
You're staring at an Xbox Series S that won't boot. Or maybe you just want to wipe it clean before selling it. Either way, knowing how to factory reset Xbox Series S is the fix you need.
But only if you pick the right method for your situation.
As of 2026, Microsoft's official support documentation outlines two distinct reset paths. Which one you use depends entirely on whether the console powers on normally or stays stuck on a black or green screen. One wrong choice could cost you your game saves.
So let's figure out which branch you're on.
Quick Answer
To factory reset an Xbox Series S, open Settings. Go to System, then Console Info, then Reset Console. Choose "Reset and remove everything" for a full wipe.
If the console is frozen, use a USB drive with the Offline System Update file. Boot into the troubleshooting menu by holding Pair, Eject, and Power.
The Two Paths: Are You Stuck or Just Wiping?
Image source: Wikimedia Commons / AsmodeanUnderscore (CC BY-SA)
A factory reset sounds like one uniform process. But on the Xbox Series S, there are two completely different workflows. The one you need depends on one simple question: can you get into the dashboard or not?
Path A, The console boots normally. You can see the home screen. You can open Settings. The reset lives inside the system menu.
It takes about five minutes. You get two choices about what to keep or delete.
Path B, The console is frozen. It is stuck on a logo or showing an error code. You cannot get into Settings at all. This path requires a USB flash drive and a file from Microsoft's support site.
Most people assume Path B is harder. It is not. It just needs a few extra tools and patience.
But picking the wrong path for your situation is where people get into trouble.
If your console boots fine, never jump straight to the USB method. You will wipe the entire system when you could have kept your games. And if your console is truly frozen, the in-menu reset simply is not an option.
You have to use the offline method.
Here is the key insight. The factory reset command does not touch your Microsoft account or your digital game licenses. Those live in the cloud.
Your saved games, captures, and settings live on the console's internal SSD. That is what you are erasing or keeping depending on the option you choose.
Quick Decision Guide: Which Reset Method Do You Need?
This decision tree covers every scenario. Read the condition in the left column. Follow the arrow to your recommended action.
| Your Situation | Reset Method | Why This One |
|---|---|---|
| Console boots to dashboard normally. You want a clean slate. | Settings > System > Console Info > Reset Console (Remove Everything) | Fastest option. Preserves system software files. |
| Console boots to dashboard. You want to keep your installed games. | Settings > System > Console Info > Reset Console (Keep My Games) | Only clears settings and accounts. Leaves game files intact. |
| Console boots but runs slowly, glitches, or crashes in games. | Settings > System > Console Info > Reset Console (Keep My Games) then troubleshoot | The reset clears corrupted profile data without forcing a full reinstall. |
| Console stuck on green Xbox logo, black screen, or error E101/E102/E200. | Offline USB reset with OSU1 file | In-menu reset is unreachable. USB method reinstalls system software from scratch. |
| Console boots but you are selling or giving it away. | Settings > System > Console Info > Reset Console (Remove Everything) | Full wipe ensures no personal data remains. Your account stays active on Microsoft's servers. |
| Console boots but you cannot remember your account password. | Offline USB reset with OSU1 file | The in-menu reset still requires you to sign in afterward. USB reset lets you start over without the old account locked to the console. |
If you are still unsure, go with this rule of thumb. If you can see the Xbox home screen, use the Settings method. If you cannot, go offline.
There is no third path.
One note about the "Keep My Games" option. This resets your system settings and removes all accounts. It leaves the actual game files on the SSD.
The games will still need to re-sync licenses when you sign back in. That takes time but avoids re-downloading 50 to 200 GB of game data.
Before You Do Anything: Protect Your Saves and Licenses
A factory reset is permanent. Once you confirm the action, the console erases the data within seconds. There is no undo button.
So before you tap that reset prompt, do these three things.
Check That Cloud Sync Is Turned On
Your Xbox Series S automatically syncs saved games to the cloud when it is connected to Xbox Live. But automatic does not mean instant. If your console has been offline for a while, your latest save might only exist locally.
Open Settings. Go to Account, then Privacy and online safety, then Xbox privacy, then View details and customize, then Game content. Look for "Save game data in the cloud." Make sure it says On.
Then force a sync by starting any game, letting it connect, and closing it again. The console uploads saves during the idle period after a game closes.
Our research shows that most lost saves happen because people skipped this step. They assumed the cloud had the latest data. It did not.
The few seconds it takes to verify the sync is worth it.
Unlink Your Microsoft Account (If Selling)
If you plan to sell the console, the factory reset will remove your account from the device. But there is an extra step Microsoft does not make obvious. You should also remove the console from your Microsoft account's device list.
Go to account.microsoft.com/devices on a phone or computer. Sign in. Find your Xbox Series S and click Remove.
This ensures the new owner cannot trigger any account-related prompts during setup. It also frees up the console limit on your account.
Back Up Captures and Clips
Your screenshots and video clips live on the internal SSD. The factory reset deletes them permanently. There is no cloud backup for captures by default.
Plug in a USB drive formatted as NTFS. Open the Captures app. Select "Manage captures." Choose "Copy all to external storage." The process takes a few minutes but saves your best gaming moments.
We also recommend checking our privacy policy if you have concerns about what data the reset does and does not erase. Protecting your personal information matters, especially when handing the console to someone else.
Understand What the Reset Does Not Touch
The factory reset only affects the console's internal storage. It does not affect:
- Your Microsoft account. That stays active. You can sign into any Xbox anywhere.
- Your digital game licenses. Microsoft's servers remember what you own. You just need to re-download the games.
- Your Xbox Game Pass or Xbox Live Gold subscription. Those are account-level services.
- Data on external USB drives. Game files stored on an external hard drive remain untouched. Just plug the drive into your new console or a reinstalled one.
This last point surprises a lot of people. If you have a 4 TB external drive full of games, the reset leaves it completely alone. You only lose what is on the internal SSD.
Method 1: Reset from Settings (Console Working)

Image source: Bing (Web (fair-use with source credit))
This is the simplest path. You need about five minutes and a controller that syncs. The entire process happens on screen with clear prompts at every step.
How to Get There
Press the Xbox button on your controller to open the guide. Scroll to Profile and System. Select Settings.
From there, go to System, then Console Info. At the bottom of that screen you will see "Reset Console."
Microsoft places this option at the very end of the menu tree intentionally. It is hard to stumble into by accident. You have to deliberately navigate there.
Option A – Reset and Keep My Games and Apps
Selecting this option does exactly what the name says. It keeps your installed games and apps on the SSD. It removes everything else.
What gets erased:
- All user accounts and profiles
- System settings, network config, display preferences
- Parental controls and family settings
- Home console assignment
- Saved passwords and payment info
What stays:
- Installed game files
- Installed apps (Discord, Netflix, etc.)
- Captures and screenshots (yes, these stay with this option)
This is the best choice if you are troubleshooting performance issues. Game corruption is rare. More often, the problem is a bad system setting or a corrupted profile.
This reset gives you a fresh system without forcing you to re-download Call of Duty, which is over 200 GB at this point.
The process takes about 30 seconds to initiate. The console restarts automatically. You will see a setup screen asking for language, region, and network.
Sign in with your Microsoft account. Then wait for the console to re-sync your licenses. That sync can take another two to five minutes depending on how many games you own.
Option B – Reset and Remove Everything
This is the full nuclear option. The console deletes every file on the internal SSD and reinstalls the system software.
What gets erased:
- All user accounts and profiles
- All system settings
- All installed games and apps
- All captures and screenshots
- All locally saved game data
- Home console assignment
What stays:
- Your Microsoft account (on Microsoft's servers)
- Your digital game licenses
- Your subscriptions
This option takes slightly longer. The console needs to reformat the SSD partition and run a fresh system install. Expect about three to five minutes before the initial setup screen appears.
After the restart, the console behaves exactly like a brand new unit straight out of the box. You need to go through the full first-time setup. Connect to Wi-Fi.
Sign in. Set region and language. Re-download your games.
If you are selling the console, this is the only option that fully protects your privacy. The "Keep My Games" option leaves residual account data on the drive. Forensic tools could potentially recover fragments.
The "Remove Everything" option performs a secure erase.
Which One Should You Choose?
Here is the simplest rule. If you plan to keep the console, use "Keep My Games." If you plan to sell, give away, or return the console, use "Remove Everything."
There is one exception. If the console has serious system-level corruption and you have already tried "Keep My Games" without success, go straight to "Remove Everything." The lighter reset only clears settings. It does not replace system files.
Corruption in the operating system itself requires a full reinstall.
If you run into trouble during the reset process, feel free to reach out through our contact page. We keep a running list of edge cases and solutions.
Method 2: Offline USB Reset (Console Frozen or Won't Boot)
When your Xbox Series S will not boot to the dashboard, the in-menu reset is impossible. You cannot navigate what you cannot see. This is where the offline USB method comes in.
The official name for this process is the Offline System Update. It is sometimes listed as OSU1. It is a recovery file that reinstalls the entire operating system from a USB flash drive.
Think of it as the Windows repair disc for your Xbox.
Image source: Wikimedia Commons / Deni Williams from São Paulo, Brasil / Brazil (CC BY)
Step 1 – Prepare the USB Drive
Not every USB drive works. Microsoft requires specific formatting and folder structure. If you get this wrong, the console will not detect the update file.
Drive requirements:
- Minimum 4 GB capacity (16 GB recommended for safety)
- Must be formatted as NTFS (not FAT32 or exFAT)
- USB 3.0 or faster (USB 2.0 works but is very slow)
- No other files on the drive (empty drive only)
How to format the drive:
- Plug the drive into a Windows computer or Mac.
- Open File Explorer (Windows) or Disk Utility (Mac).
- Right-click the drive. Select Format.
- Choose NTFS as the file system.
- Set Allocation unit size to Default.
- Uncheck Quick Format (do a full format for reliability).
- Click Start.
On a Mac, the process is more involved. MacOS does not format NTFS natively. You can use a tool like Paragon NTFS or borrow a Windows machine.
A cleaner option is to use a friend's PC or a public library computer. Getting the format wrong is the single most common reason this method fails.
Step 2 – Download the Offline System Update File
Microsoft hosts a single OSU1 file on its official Xbox Support site. As of 2026, the file is roughly 5 to 7 GB depending on the current system version.
Go to the official Xbox Support page. Search for "Offline System Update" or navigate to the System Update section. Look for the OSU1 download link.
It will be a single .zip file.
Important: Download the OSU1 file. Not the OSU2 or OSU3 files. Those are for older Xbox One consoles.
The Xbox Series S and Series X use OSU1 only.
Once the download finishes, do not unzip the file. You need to place the entire .zip file into a specific folder on the USB drive.
Folder structure:
- Root of the USB drive:
$SystemUpdate - Inside that folder: OSU1.zip (place the file directly inside, do not extract)
The folder name must be exactly $SystemUpdate. Case matters. No spaces.
A dollar sign at the start. If you name it incorrectly, the console will not see it.
Step 3 – Boot into the Troubleshoot Menu
This is the part that trips people up. It uses button combinations on the console itself, not the controller.
The button sequence:
- Unplug the power cable from the back of the console.
- Wait 30 seconds (this drains any residual charge in the PSU).
- Plug the power cable back in.
- Locate the Pair button (small circular button on the front, left side).
- Locate the Eject button (small recessed button on the front, right side).
- Press and hold both the Pair button and the Eject button.
- Keep holding them. Then press the Xbox button on the front of the console (the main power button).
- Continue holding Pair and Eject for about 10 to 15 seconds.
You will hear the startup chime. Keep holding. Then you will hear a second chime.
That second chime means you have successfully entered the troubleshooting menu. Release the buttons.
The screen will show a gray menu with a few options. You will see "Reset this Xbox" and "Offline System Update." Use the D-pad on your controller to navigate.
If the second chime does not come, you held the buttons too early or released too early. Try again. The timing is precise.
Some people find it easier to have a second person help. One person holds the two small buttons, the other presses the power button.
Step 4 – Run the Reset from USB
Plug the USB drive into one of the rear ports on the console. The front port also works but the rear ports are more stable during the recovery process.
On the troubleshooting menu, select "Offline System Update." The console will scan the USB drive for the $SystemUpdate folder and the OSU1.zip file inside. If it finds the file, it will begin the installation automatically.
What happens during the process:
- The screen goes dark for a moment.
- A progress bar appears showing the update status.
- The console may restart once or twice.
- Total time: 10 to 20 minutes depending on USB speed and drive performance.
- When finished, the console boots to the initial setup screen.
Common Mistakes That Wreck the Offline Reset
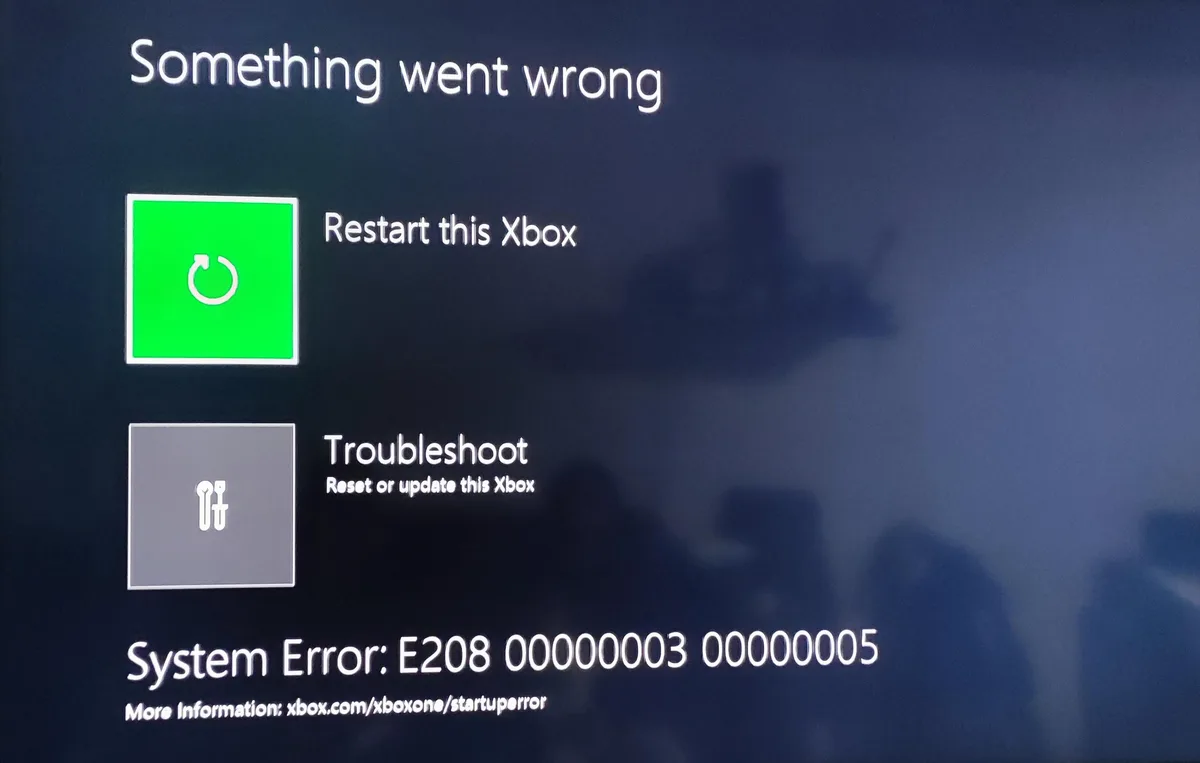
Image source: Bing (Web (fair-use with source credit))
The offline USB reset works nearly every time when done correctly. But certain mistakes cause it to fail. Here are the most common ones and how to avoid each.
Using FAT32 Instead of NTFS
This is mistake number one by a wide margin. Most USB drives ship formatted as FAT32. That works fine for storing documents or photos.
But the Xbox Series S requires NTFS for the OSU1 file.
The fix is simple. Reformat the drive to NTFS before copying the file. Do not rely on the drive being "new" or "empty." Check the format in your computer's file properties.
Wrong Folder Name
The folder must be named $SystemUpdate. Not systemupdate. Not SystemUpdate.
Not $System_Update. The dollar sign at the start is critical. The console looks for that exact string.
Double-check the spelling before you eject the USB drive. A single character error makes the file invisible to the console.
Using the Wrong OSU File
Microsoft hosts multiple OSU files for different console generations. OSU2 and OSU3 are for Xbox One models. Only OSU1 works on Xbox Series S and Series X.
Download the file directly from the official Xbox support site. Do not use third-party mirrors or forums. The file name includes the version number.
If you see OSU2 or OSU3 in the name, delete it and download the correct one.
Not Holding Buttons Long Enough
The troubleshoot menu requires holding the Pair and Eject buttons for 10 to 15 seconds after pressing the power button. Many people release too early.
You need to hear two startup chimes. The first chime is the normal boot. The second chime confirms you entered the troubleshoot menu.
If you only hear one chime, the button combination did not register. Try again.
Using a Damaged or Slow USB Drive
USB 2.0 drives work but can take 30 minutes or more for the OSU1 installation. During that time, the console may appear frozen. Some people interrupt the process thinking it is broken.
Use a USB 3.0 or faster drive. Test it on a computer first to confirm it reads and writes without errors. A dying USB drive can corrupt the OSU1 file mid-install.
Interrupting the Installation
Once the installation starts, do not touch the console. Do not unplug the power cable. Do not remove the USB drive.
Let the process finish completely.
If the power goes out or the console gets unplugged, the system software will be partially installed. You will need to start the entire process again from Step 1.
Real-World Scenarios: Selling vs. Troubleshooting
A factory reset is not a one-size-fits-all operation. The right approach depends on why you are doing it. Here are the three most common scenarios and exactly how to handle each.
Scenario 1: You Are Selling the Console
You want every trace of your data gone. Full privacy protection is the goal.
The correct method: In-menu reset. Choose "Reset and remove everything."
Extra steps:
- First, remove the console from your Microsoft account device list at account.microsoft.com/devices.
- Back up any captures you want to keep.
- After the reset, the console will boot to the initial setup screen. The new owner will set it up as their own.
- No need to sign out or delete your profile manually. The reset handles that.
One gotcha. The console is still tied to your Microsoft account until you remove it from the device list. If you skip this step, the new owner may see a prompt to sign in as you during setup. Remove the device first.
Scenario 2: You Are Troubleshooting Performance Issues
Your console works but games crash, the UI stutters, or downloads fail. You want to fix the problem without losing everything.
The correct method: In-menu reset. Choose "Reset and keep my games and apps."
Extra steps:
- Before the reset, write down your network settings if you use a static IP or custom DNS.
- After the reset, sign in and let the console re-sync licenses. This takes 2 to 5 minutes.
- Test the console with one game before reinstalling everything else.
If the problem persists after the keep option. Move to "Reset and remove everything." Some system corruption goes deep enough that only a full reinstall fixes it.
Scenario 3: The Console Is Completely Frozen
You see the green Xbox logo for 30 minutes. Or you get error E101, E102, or E200. Or the screen stays black.
The correct method: Offline USB reset with OSU1 file.
Extra steps:
- This method erases everything on the internal SSD. All games, saves, captures, and settings are gone.
- You cannot use "Keep my games" with the offline method. The entire system software gets replaced.
- After the reset, sign in and re-download your games. Cloud saves will sync automatically if you had them enabled.
One important note. The offline USB reset reinstalls the system software but does not update it to the latest version. After the reset, connect to the internet and check for system updates in Settings. You may need to download one or two updates before you can play online.
Post-Reset Must-Dos (Even If You've Done This Before)
The reset finished. The console booted to the setup screen. Now what?
Here is the checklist to get back up and running.
Sign In and Re-Link Your Account
Enter your Microsoft account email and password. The console will authenticate with Xbox Live. This step restores your digital licenses and subscriptions.
If you have two-factor authentication enabled, have your phone ready for the verification code.
Re-Download Your Games
Open My Games and Apps. Go to Full Library, then Owned Games. You will see every title tied to your account.
Select the ones you want and start the download.
Download order tip. Start with the games you play most. Let the rest download overnight. The console supports background downloads even when the display is off.
Re-Sync Cloud Saves
Cloud saves sync automatically when you launch a game. But you can force a sync to speed things up.
Open My Games and Apps. Highlight a game. Press the Menu button on your controller.
Select Manage game and add-ons. Look for "Saved data." Choose "Sync." The console will pull the latest save from the cloud.
Do this for each game before you start playing. Playing on an old local save that did not sync yet can cause progress conflicts.
Reconfigure Settings
The factory reset returns all settings to default. You will need to set up:
- Display and audio (HDR, 4K, audio format)
- Network (Wi-Fi password, static IP if used)
- Privacy and online safety
- Parental controls (if needed for kids in the house)
- Power mode (Energy saving or Instant On)
Power mode matters. If you use Instant On, the console stays in a low-power state and can download updates overnight. Energy saving uses less electricity but takes longer to boot.
Reassign Your Home Console
Your Xbox Series S will not be set as your home console after the reset. If you share games with other people in your house, you need to reassign it.
Go to Settings. Select General, then Personalization, then My home Xbox. Choose "Make this my home Xbox." This lets anyone on the console play your games without signing in as you.
Check for System Updates
The reset reinstalls the system software version that was current when the console was manufactured. That could be months or years old.
Go to Settings. Select System, then Updates. Check for any available updates.
Download and install them before playing online. The console may need two or three cumulative updates.
Frequently Asked Questions
Will I lose my game saves if I factory reset?
Yes if you do not have cloud sync enabled. No if you do. Microsoft stores your saves in the cloud by default.
But if you played offline for a while, the latest save may only exist locally. Check that cloud sync is on before resetting.
How long does a factory reset take?
The in-menu reset takes 5 to 10 minutes total. The offline USB reset takes 15 to 30 minutes depending on your USB drive speed. The USB method includes the download time for the OSU1 file, which is 5 to 7 GB.
Will I lose my Game Pass subscription?
No. Your Xbox Game Pass subscription is tied to your Microsoft account, not to the console. After the reset, sign in and your subscription is active.
You just need to re-download the games.
What if the reset fails midway?
If the in-menu reset fails, the console should still boot normally. Try again. If the offline USB reset fails, the console may be stuck in a partial install.
Unplug the power cable for 30 seconds. Try the offline reset again from Step 1. If it fails twice, the internal SSD may have a hardware fault.
Can I cancel a factory reset after starting it?
No. Once you confirm the reset, there is no pause or cancel option. The process is designed to be irreversible.
This is intentional. It prevents partial wipes that leave corrupted files behind.
Do I need the original controller to do the reset?
No. Any Xbox Wireless Controller that syncs with the console works. You can also use a USB cable to connect the controller if the wireless sync is not working.
For the offline USB reset, you need a controller to navigate the troubleshoot menu.
Final Decision Guide – Which Branch Is Yours?
Let us put it all together. Here is the final decision tree in plain language.
Start here. Can you see the Xbox home screen?
- Yes. Go to Settings, System, Console Info, Reset Console.
, Keeping the console? Choose "Keep my games and apps."
, Selling or giving away? Choose "Remove everything."
- No. The console is frozen, stuck on a logo, or showing an error.
, Use the offline USB method with OSU1.
, Prepare a USB drive formatted as NTFS.
, Create the $SystemUpdate folder.
, Download OSU1 from the official Xbox support site.
, Boot into the troubleshoot menu using Pair + Eject + Power.
, Select "Offline System Update."
, Wait 15 to 30 minutes.
Still stuck? If you have tried both methods and the console still will not work, the problem may be hardware. The internal SSD could be failing. The power supply might need replacement.
In that case, contact Microsoft Support or a local repair shop.
One final reminder. Read our terms of service for any warranty questions before opening the console. Opening the case voids the warranty on most models.
Keep that in mind before you attempt any hardware fixes.
You now have the complete picture. You know which reset method fits your situation. You know what to do before, during, and after the reset.
Pick your branch and get started.