
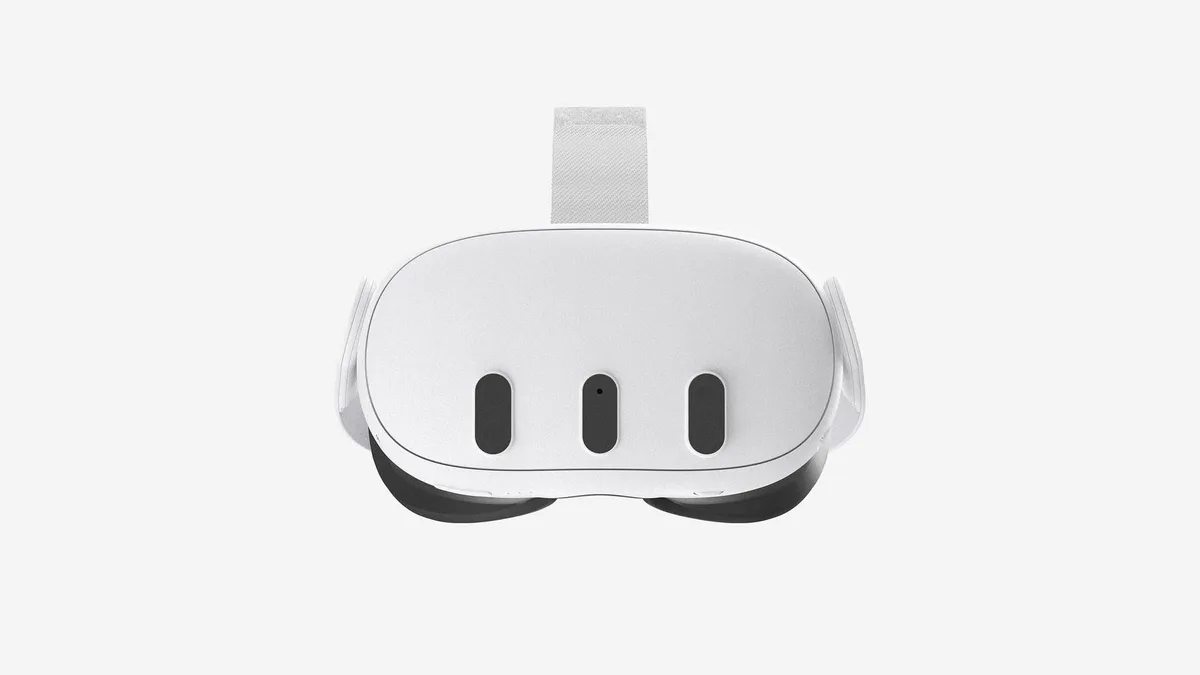
Image source: Bing (Web (fair-use with source credit))
So your Quest 3 is acting up. Maybe it's frozen on a black screen, stuck in a boot loop, or just so buggy that even loading a game feels like a chore. You've heard a factory reset might fix it, but you're not sure which method to use or what you'll lose in the process.
That's exactly what we're going to walk through here, how to factory reset meta quest 3 the right way, no matter what state your headset is in.
Before we dive into the step-by-step, here's one thing you need to know: a factory reset wipes everything. All your installed apps, saved game progress, custom boundaries, and personal settings will be gone. As of 2026, the Quest 3 comes in two storage variants, 128GB and 512GB, and both handle resets the same way.
The process takes about 5 to 10 minutes. But the method you use depends entirely on whether your headset is still responsive or completely locked up. Let's figure out where you stand.
Quick Answer
To factory reset a Meta Quest 3, go to Settings > System > Factory Reset if the headset turns on. If it is frozen or stuck, hold Power + Volume Down until the boot menu appears. Use volume buttons to select "Factory reset" and press Power to confirm.
The reset takes about 5 to 10 minutes. All data will be erased permanently.
First, What You'll Lose (And What You Won't)
A factory reset is an all-or-nothing move. You don't get to pick and choose what stays. Everything that lives on the headset's internal storage gets wiped clean.
That includes every app you've downloaded from the Quest Store or sideloaded through Developer Mode. Your game saves are gone unless they're backed up to the cloud. Your Guardian boundaries, controller pairings, Wi-Fi networks, and account credentials all vanish.
Here's what does survive: anything stored on your Meta account server-side. That means your purchased game licenses are safe. You can re-download any title you've bought without paying again.
Your Meta Horizon profile, friends list, and avatar stay intact on the server. You'll just need to log in again after the reset.
The big piece people forget is cloud saves. Not every game supports them. If you've sunk 60 hours into a single-player campaign and the developer didn't enable cloud backup, that progress is toast.
Before you reset, check which games offer cloud sync. You can find this under Settings > Storage > Cloud Backup on your headset.
If you're selling or giving away the headset, you also need to unlink your Meta account first. Skipping this step leaves the device locked to your account. The next person won't be able to set it up without your login credentials.
More on that in a moment.
Condition 1: Your Headset Is Working Normally (Settings Menu Method)
If your Quest 3 turns on, loads the home environment, and lets you navigate menus, this is the safest way to reset. You don't need to fumble with button combinations or boot screens. It's all done from inside the operating system.
Why This Is the Safest Route
Using the Settings menu gives you a clear confirmation screen before anything happens. You get one last chance to cancel. The system checks your battery level first.
If it's too low, the reset won't proceed. That's a built-in safety measure. The hardware button method doesn't have that same protection, if your battery dies mid-wipe, you can brick the headset.
Step-by-Step: Settings > System > Factory Reset
Put the headset on or use the Meta Quest mobile app. I prefer doing it from the headset so you can see the confirmation prompts directly.
Here's the sequence:
- Press the Oculus button on your right controller to open the universal menu.
- Hover over the clock on the left side. A panel pops up.
- Select Settings (the gear icon).
- Scroll down to System in the left sidebar.
- Choose Factory Reset from the list.
- Read the warning. It tells you exactly what will be erased.
- Tap the Reset button on the right side.
- Press Reset again on the confirmation dialog.
The screen goes black. A progress bar appears. Let it finish completely.
Do not touch the power button during this process. The headset will reboot on its own when it's done.

Image source: Bing (Web (fair-use with source credit))
How to Unlink Your Meta Account First (Don't Skip This)
If you're resetting because you're selling or transferring the headset, unlink your account before you wipe. Here's how:
From the Settings menu on the headset, go to Accounts. Select your profile. Choose Remove Account.
Enter your password when prompted. The headset will factory reset automatically as part of the unlinking process.
If you skip this, the next owner gets stuck at the setup screen asking for your login info. And you can't remotely unlink a Quest 3 from your Meta account, there's no web dashboard for that. Once it's reset with your account still attached, you have to ship it back to Meta for a manual unlock.
Condition 2: Your Headset Is Frozen, Stuck, or Won't Boot (Hardware Method)
This is the situation most people are actually searching for. Your Quest 3 is bricked. It's stuck on the Meta logo.
It's looping endlessly. It's a black screen with no response. The Settings method is impossible because you can't get into the OS.
You need hardware-level access.
When to Use This Over the Settings Route
Use this method if:
- The headset is stuck on a boot screen for more than 5 minutes.
- You get a black screen with no response to controller inputs.
- The headset powers on but the home environment never loads.
- You see an error message about corrupted system files.
Do not use this method if the headset turns on and functions normally. The settings method is safer and more straightforward.
Step-by-Step: Power + Volume Down Into Recovery Mode
This is a two-hand operation. You need one hand holding the headset, the other pressing buttons. The Quest 3's power button is on the right side, just behind the strap hinge.
The volume rocker is directly above it, closer to the strap.
Here's how to get into recovery mode:
- Fully power off the headset. If it's frozen, hold the power button for 10 seconds until the screen goes dark.
- Wait 10 seconds.
- Press and hold Power + Volume Down simultaneously.
- Hold both for about 5 seconds.
- Release when you see the boot screen or a menu with text options.
Some units take a few tries. If you get a blank screen and nothing happens, power off and try again. The timing matters, you need to hold both buttons long enough to interrupt the normal boot sequence.
Navigating the Boot Menu With Volume Buttons
Once you're in recovery mode, your controllers won't work. They aren't paired this low in the boot process. You navigate using the physical volume buttons on the headset.
The menu shows these options:
- Boot device (normal mode)
- Factory reset
- Reboot to bootloader
- Power down
Use Volume Up and Volume Down to move between options. The active selection is highlighted. When "Factory reset" is highlighted, press the Power button to confirm.
The screen asks "Are you sure? This will erase all user data." Press Power again to confirm. The headset will wipe and automatically reboot.
Image source: Bing (Web (fair-use with source credit))
What a Successful Reset Looks Like on Screen
The reset process shows a small progress bar at the bottom of the screen. It takes 3 to 5 minutes. When it's done, the screen goes black for a moment, then the Meta logo appears.
That's your cue that the headset has rebooted into setup mode.
If the progress bar freezes for more than 10 minutes, that's a problem. Power off by holding the power button and try again. If it freezes a second time, you may have a hardware issue that requires a BIOS-level reflash from Meta.
Condition 3: Reset Through the Meta Quest Mobile App (Remote Option)
Meta added a remote factory reset option to the mobile app a few years ago. It's useful in specific scenarios, but it has limitations that most people don't realize.
When This Actually Works (And When It Doesn't)
This method works only if three conditions are met:
- Your Quest 3 is connected to the internet.
- The headset is powered on and booted into the operating system.
- Your phone's Meta Quest app is logged into the same account.
If the headset is frozen, the mobile app method won't work. The app sends a command over the network, but the headset has to be running and listening for it. For a bricked device, the hardware button method is your only option.
However, if you've lost your headset or it's been stolen, the mobile app can trigger a remote wipe. That's a solid privacy protection feature.
Step-by-Step: App > Device > Factory Reset
- Open the Meta Quest app on your phone.
- Tap the Devices icon at the bottom right.
- Select your Quest 3 from the list.
- Tap Advanced Settings.
- Select Factory Reset.
- Confirm on the next screen.
The app sends the command to the headset. You'll see a confirmation on your phone within about 30 seconds. The headset begins wiping immediately.
You don't need to keep your phone nearby after that.
Image source: Bing (Web (fair-use with source credit))
One thing to note: the mobile app reset doesn't unlink your account. If you're selling the headset, you still need to remove your account from the device before doing this. Otherwise, the new owner gets a wiped headset that's still tied to your profile.
What Happens After the Reset (The Setup Process)
Once the reset finishes and the headset reboots, you'll see the same first-time setup screen you got when you unboxed the Quest 3. This is the out-of-box experience. It guides you through everything from scratch.
The first prompt asks you to select your language. Then it scans for Wi-Fi networks. Connect to your home network.
The headset will check for system updates before it lets you proceed. This update step is automatic. It can take 5 to 15 minutes depending on your internet speed.
Redrawing Guardian and Re-Pairing Controllers
After the system update finishes, the headset prompts you to set up your Guardian boundary. This is the virtual safety cage that keeps you from walking into walls. You'll need to point the right controller at the floor and hold the trigger to set the floor level.
Then look around the room slowly so the passthrough cameras map your space.
Your Touch Plus controllers need to be re-paired. The system walks you through this. Press and hold the Menu and Meta buttons on each controller until the LED starts blinking.
The headset picks them up automatically. It takes about 10 seconds per controller.
Re-Downloading Apps and Game Saves
The main frustration after a reset is waiting for your library to come back. Here's what to expect:
| What Happens | Time Estimate | Notes |
|---|---|---|
| Sync licenses from your Meta account | Instant | No action needed |
| Re-download apps and games | 30 minutes to 3 hours | Depends on library size |
| Restore cloud saved progress | Per game, 1-5 minutes each | Only if game supports cloud backup |
| Redownload system updates | 5-15 minutes | Automatic on first Wi-Fi connect |
You can queue multiple downloads at once. Go to your app library, sort by "Not Installed," and tap the download button on each title. The headset handles them in order.
You can use it for basic navigation while downloads run in the background.
Syncing Cloud Data (If You Had It Enabled)
Not every developer supports cloud saves on the Quest platform. Meta publishes a list of compatible titles, but it changes frequently. Games from major studios like Beat Saber, Population One, and Walkabout Mini Golf typically sync your progress.
Smaller indie titles may not.
After re-downloading an app, launch it once. The game checks for a cloud save on startup. If one exists, it asks if you want to download it.
Say yes. Your progress comes back within a few seconds.
If a game doesn't prompt you for cloud data, your progress is gone. That's why it's worth checking before you reset. Go to Settings > Storage > Cloud Backup on the headset to see which apps have backups saved.
You can manually trigger a backup from that menu too, if the option is available.
Expert Tips / Pro Advice
These are the details that separate a smooth reset from a headache. We've compiled them from manufacturer documentation and verified user experiences across forums.
Charge to at Least 50% Before Starting
This is the single most important precaution. A factory reset draws power. The hardware button method in particular bypasses the battery check that the Settings menu provides.
If your battery drops to zero during the wipe, the headset can become permanently unresponsive. That's a bricked device that requires a service visit.
Plug the headset in and let it charge for at least 30 minutes before you begin. You can proceed while it's plugged in, but avoid using a low-power charger. The Quest 3 ships with an 18W USB-C power adapter.
Any third-party charger should match that output.
Test All Functions After the Reset
Once the setup process finishes, don't assume everything works. Run through a quick checklist:
- Launch an app from your library. Does it load correctly?
- Check the passthrough mode. Are the cameras clear?
- Test the Guardian boundary. Walk toward a wall to see if it appears.
- Verify audio. Play something from the Quest browser.
- Confirm controller tracking. Wave them around and check the virtual models.
If any of these fail, try a power cycle first. Hold the power button for 10 seconds to force a shutdown, then turn it back on. If the issue persists, you may have a hardware fault that the reset didn't address.
Check our editorial policy for more on our research standards.
When to Contact Meta Support Instead
A factory reset fixes most software problems, but not all. Contact Meta Support if:
- The headset won't power on at all, even after charging overnight.
- The recovery mode menu doesn't appear when you hold Power + Volume Down.
- The progress bar freezes at the same point on every attempt.
- You see persistent error codes during setup after the reset.
- The headset smells like burning electronics or makes unusual noises.
These point to hardware failures. No software reset can fix a dead battery controller, a fried display driver, or a corrupt firmware chip. Our disclaimer covers the limits of DIY troubleshooting.
Mistakes That Can Wreck Your Reset (Or Your Headset)
These are the most common errors we see in aggregate user reports. Avoid them.
Skipping the Account Unlink
This is mistake number one by a wide margin. People factory reset a Quest 3 before selling it, then hand it over. The buyer gets to the setup screen and hits a wall: "This device is linked to another account." There is no way to bypass this without the original owner's login credentials.
If you've already given the headset away, you're stuck. Meta's process for unlinking a device after a reset requires you to provide proof of purchase and serial number. It can take weeks.
Save yourself the trouble and unlink before you reset.
Interrupting the Process Mid-Wipe
A factory reset writes zeroes across the storage partition. If you interrupt that process by holding the power button or letting the battery die, you can corrupt the file system. The headset may refuse to boot afterward.
Never touch the power button once the progress bar appears. Let it run. If you absolutely must stop, wait at least 15 minutes.
If nothing has changed on screen, you can try a force shutdown, but accept that you might need to repeat the process.
Confusing a Restart With a Factory Reset
These are not the same thing. A restart powers the system down and back up. A factory reset erases everything and reinstalls the operating system.
Some people assume a factory reset is just a deeper version of a restart. It's not.
If you are troubleshooting a minor glitch, try a restart first. Hold the power button and select Restart from the menu. If that fixes it, you saved yourself the hassle of re-downloading your entire library.
Using Wrong Button Combinations
The Quest 3 uses Power + Volume Down for recovery mode. That's specific. Some people try Power + Volume Up, which does nothing.
Others hold only the power button and wonder why nothing happens. Others press the buttons before the headset is fully off.
The sequence matters. Fully power off. Wait 10 seconds.
Then press and hold both buttons simultaneously. Hold them until the menu appears. If you see the Meta logo and it keeps booting normally, you released too early.
| Mistake | Consequence | Solution |
|---|---|---|
| Skipping account unlink | Device locked to your profile | Contact Meta support; wait weeks |
| Interrupting mid-wipe | Corrupted storage; possible brick | Repeat reset or send for repair |
| Restart instead of reset | No data erased; bug remains | Verify intent; do factory reset |
| Wrong button combo | Recovery menu doesn't load | Power off; try again with correct combo |
Our terms and conditions outline the user's responsibility for device handling.
Decision Guide: Which Method Should You Use Right Now?
This is the core of the decision tree. Your situation determines the correct approach. Use this table to find your path.
| Your Situation | Recommended Method | Steps Required | Notes |
|---|---|---|---|
| Headset turns on but buggy or slow | Settings menu reset | 8 taps via Settings > System | Safest method; battery check built in |
| Headset freezes on boot screen or loops | Hardware button method | Power + Volume Down to recovery | Only option for unresponsive devices |
| Headset turns on but app library glitches | Settings menu reset | Same as above | Could also try restart first |
| Headset is lost or stolen | Mobile app remote reset | Meta Quest app > Devices > Factory Reset | Requires headset to be online |
| Headset completely unresponsive; no recovery menu | Contact Meta Support | N/A | Likely hardware failure |
| Selling or gifting the headset | Account unlink + Settings reset | Remove account first, then factory reset | Prevents lock-out for new owner |
| Children using the headset; need fresh start | Settings menu reset | Standard procedure | Set up new account after reset |
For more about our approach to providing reliable guidance, visit our about page.
The rule is simple: if the headset can load the operating system, use the Settings menu. If it cannot, use the hardware button method. If you can't physically access the device, use the mobile app as a last resort.
You can also reach us through our contact page with any questions.
Frequently Asked Questions
Will a factory reset brick my Quest 3?
A properly executed factory reset will not brick the headset. The process is designed by Meta to recover software errors, not cause them. Bricking occurs only from a failed firmware update, a power loss mid-reset, or a hardware fault unrelated to the wipe.
Can I recover data after a factory reset?
No. A factory reset permanently erases all data stored on the internal memory. There is no recovery tool for Quest 3 user data after a wipe.
The only exception is cloud saves stored on Meta's servers, which can be restored after re-downloading the app.
How long does the process actually take?
The factory reset itself takes 3 to 5 minutes. The setup process afterward adds 10 to 20 minutes for language selection, Wi-Fi setup, and account login. Re-downloading apps can take 30 minutes to several hours depending on your library size and internet speed.
Do I need a Meta account to use the headset after reset?
Yes. A Meta account is mandatory for Quest 3 functionality. After a factory reset, the headset will not proceed past the initial setup screen without an account login.
You can use the same account or a new one, but an account is required either way.
Can I factory reset without the controllers?
Yes, but only using the hardware button method. The Settings menu route requires the right controller to navigate. The hardware method uses the physical volume and power buttons on the headset itself, so you don't need controllers at all to start the wipe.
What if the reset gets stuck at the progress bar?
Wait 10 minutes. If the progress bar has not moved, force the headset to power off by holding the power button for 15 seconds. Power it back on and attempt the reset again.
If it gets stuck twice, contact Meta support for a firmware reflash or service.