
It happens to everyone. Your Nest Doorbell goes offline, won’t connect, or acts like it forgot everything. You just want it working again, and you know somewhere there’s a reset button.
The tricky part is that the method depends entirely on which model you own and what you’re trying to fix. Use the wrong approach and you could waste time or accidentally wipe data you needed.
Manufacturer specifications show two distinct hardware versions in common use as of 2026: the original wired Nest Hello and the newer battery-powered Nest Doorbell. Their reset procedures share some steps but differ in button location and hold times. We’ll walk through both so you can pick the exact path that matches your situation.
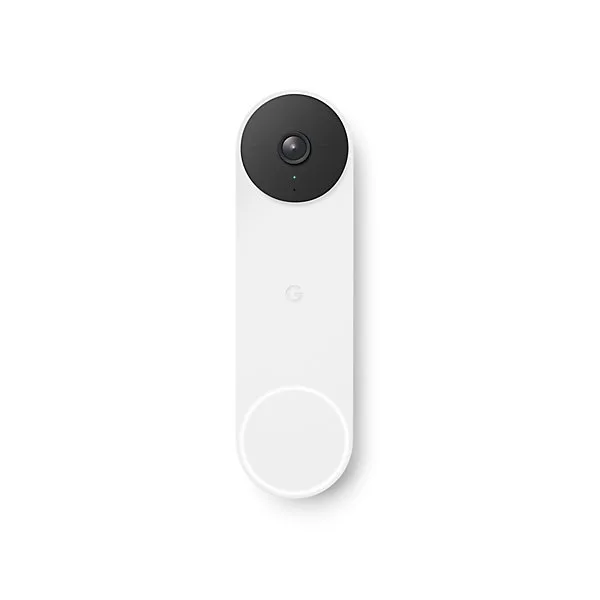
Image source: Bing (Web (fair-use with source credit))
Quick Answer
Press and hold the pinhole reset button for 10 seconds. Release when the LED turns yellow. Wait for the doorbell to chime or reboot.
Set it up again in the Google Home app. That’s all it takes.
Which Nest Doorbell Do You Have? (Why It Matters Before You Touch Anything)
Before you press anything, you need to know which doorbell is on your wall. The wired model and the battery model use different button locations and different procedures. Mixing them up can get you stuck in a loop.
If your doorbell has a small pinhole on the back, behind the mounting bracket and only accessible after removing the doorbell from the mount, you have the wired Nest Doorbell (Nest Hello). It runs on your doorbell transformer, needs 16 to 24 VAC, and never requires a battery charge. It shipped around 2018 and is still widely installed.
If your doorbell has a pinhole on the bottom edge, visible without removing the doorbell from the mount, you have the battery-powered Nest Doorbell. It also works with a wired connection if you have a transformer nearby. Its reset button is on the underside.
This model came out in 2021 and runs on a rechargeable battery or constant power.
Here’s a quick comparison to help you identify yours:
| Feature | Wired Nest Hello | Battery Nest Doorbell |
|---|---|---|
| Power source | Doorbell transformer (16-24 VAC) | Internal battery (USB-C recharge) or transformer |
| Reset button location | Back, under the mounting bracket | Bottom edge, visible |
| Install type | Requires existing doorbell wiring | Wiring optional (can run on battery alone) |
| Support status | Still supported as of 2026 | Current model |
If you’re still unsure, look at the front. The wired model has a taller face and includes a separate indoor chime connector kit. The battery model is wider and rounder.
Check the pinhole position. That’s your strongest clue.
Quick Reference: Reset at a Glance
Here is a summary for both reset types on each model. Use it as a cheat sheet.
| What you need | Wired Nest Hello | Battery Nest Doorbell |
|---|---|---|
| Reboot (soft reset) | Press pinhole for 5 seconds. Release. LED flashes blue, doorbell restarts. | Press pinhole for 5 seconds. Release. LED flashes yellow, doorbell restarts. |
| Factory reset (full wipe) | Press pinhole for 10-12 seconds. Release when LED turns solid yellow. Doorbell chimes, enters setup mode. | Press pinhole for 10-12 seconds. Release when LED turns solid yellow. Doorbell reboots, enters setup mode. |
| Remove from app first | Recommended before factory reset | Recommended before factory reset |
A soft reboot is like turning your phone off and on again. It clears minor glitches without erasing any settings.
A factory reset wipes everything. Paired account, Wi-Fi credentials, custom chime settings, motion zones, and event history. Use it when the doorbell is completely unresponsive, you’re selling it, or you need to connect it to a new Google account.
How the Reset Actually Works (It’s Simpler Than You Think)
Inside every Nest Doorbell is a small microcontroller that runs the firmware and keeps track of your settings. When you press the reset button and hold it for a specific duration, you send a hardware signal to that chip.
At 5 seconds: The chip receives a reboot command. It closes all running processes, saves temporary data, and restarts. The doorbell comes back online with the same account, Wi-Fi settings, and preferences.
At 10-12 seconds: The chip interprets the longer press as a factory reset command. It clears the non-volatile memory where your account token and network credentials are stored. The firmware itself stays intact.
The doorbell is restored to its factory state. After that, it boots into pairing mode and waits for the Google Home app.
Why two durations? A simple reboot fixes temporary issues without the hassle of re-setup. The longer press is a last resort.
Manufacturer documentation recommends trying the shorter hold first unless you know you need the full wipe.
One thing that trips people up: the LED feedback. The wired model’s LED is a ring around the button. The battery model’s LED is a small light near the camera.
Both use yellow to indicate factory reset mode. The wired model also chimes audibly when the reset completes. The battery model relies on LED color changes only.
Decision Tree 1: You Have the Wired Nest Doorbell (Nest Hello)

Image source: Bing (Web (fair-use with source credit))
When to Reboot vs. Factory Reset
Try a reboot if:
- The doorbell is offline but has power (LED is solid white or flashing green).
- The live video feed won’t load but the doorbell still rings.
- The doorbell responds slowly or drops connection several times a day.
You need a factory reset if:
- The doorbell won’t connect to the app at all (LED is solid yellow or unresponsive).
- You’re selling or giving away the doorbell.
- You just moved in and the doorbell is linked to the previous owner’s account.
- You tried a reboot and it didn’t help.
Step-by-Step: How to Factory Reset the Wired Model
- Power off the doorbell by switching off the breaker to your doorbell transformer. This prevents accidental shocks.
- Remove the doorbell from its mounting bracket. Use a paperclip or SIM eject tool to push into the small hole on the bottom of the bracket. This releases the latch.
- Locate the pinhole reset button. It’s on the back of the doorbell, recessed inside a small hole.
- Insert a paperclip or SIM eject tool straight into the hole. Push gently until you feel a click.
- Hold for 10-12 seconds. Keep the paperclip pressed. Watch the LED ring around the doorbell button. It will eventually turn solid yellow.
- Release when the LED is solid yellow. The doorbell will chime once or twice. Wait for the chime to finish.
- Reattach the doorbell to the mount. It should now be in setup mode with the LED pulsing white.
What the LED Tells You During the Process
The wired Nest Hello uses a ring of white LEDs around the doorbell button. Here’s what each pattern means:
| LED pattern | What’s happening |
|---|---|
| Solid white | Normal operation, connected |
| Flashing green | Handing off to the app during setup |
| Solid yellow after long press | Factory reset in progress – wait |
| Blinking blue | Starting up or rebooting |
| No light | No power – check transformer or breaker |
If the doorbell does not chime after you release the button, you probably held it too long or not long enough. Remove the doorbell from the mount and try a fresh 10-second press. Make sure the doorbell had power during the reset.
The button won’t work without voltage.
Decision Tree 2: You Have the Battery-Powered Nest Doorbell

Image source: Bing (Web (fair-use with source credit))
When to Reboot vs. Factory Reset
A reboot works for the same situations as the wired model:
- Intermittent offline problems after a Wi-Fi change.
- Doorbell won’t respond to motion or ring events.
- The live feed is stuck or laggy.
A factory reset is needed when:
- The doorbell won’t pair with a new phone or account.
- You’re selling or gifting the doorbell.
- The doorbell is stuck in setup mode and won’t finish.
- You’ve already rebooted and nothing changed.
One extra case specific to the battery model: if the battery is very low, below 20 percent, the doorbell may not respond to the reset at all. Charge it fully before attempting any reset. A drained battery can make the doorbell appear bricked when it’s really just dead.
Step-by-Step: How to Factory Reset the Battery Model
- Leave the doorbell mounted. The pinhole is on the bottom edge. You don’t need to remove it.
- Locate the pinhole on the bottom. It’s a small recessed hole, usually on the side near the USB-C port.
- Insert a paperclip or SIM eject tool straight into the hole. Push until you feel the button click.
- Hold for 10-12 seconds. The small LED near the camera will turn yellow. Keep holding until you see a steady yellow.
- Release when you see yellow. The doorbell will reboot. This can take up to a minute. After the reboot, the LED will pulse white, indicating setup mode.
- If the battery model is wired to a transformer, you can also pull the power at the breaker as a backup. Disconnect power for 30 seconds. Reconnect. The doorbell will power cycle.
The Pinhole Button Location (Don’t Miss This)
Many people hunt for the button on the back because the wired model uses that spot. On the battery model, the button is on the bottom edge. You can reach it while the doorbell is mounted.
The hole is small. Use a paperclip that fits without bending. A toothpick works too, but it might break off inside.
Stick to metal tools for reliability.
One more thing: if you reset the doorbell physically without first removing it from your Google Home account, the doorbell will still show up in the app as offline. You’ll need to delete it manually. Always remove the doorbell from the Google Home app before a physical factory reset.
This prevents ghost listings and simplifies re-setup.
App Removal vs. Physical Reset – Which One Do You Need?
A common point of confusion is whether you should remove the doorbell from your Google Home app before pressing the reset button. The answer depends on what you’re trying to achieve.
If you want to fix an unresponsive doorbell and keep it linked to your account, skip the app removal. Just do a physical reboot using a 5-second press. Or do a factory reset with a 10-second press.
The doorbell will reconnect automatically after a reboot. After a factory reset, you’ll need to re-add it to the same home in the app.
If you’re selling the doorbell or passing it to someone else, remove it from your account first. Open the Google Home app. Tap the doorbell.
Go to Settings. Tap Remove device. This unlinks the doorbell from your account.
Then do a physical factory reset to wipe the local data.
If you factory reset first without removing from the app, the doorbell will disappear from your account only after the reset completes. The app might keep showing an old offline entry until you delete it manually. This does no harm, but it clutters your device list.
Here’s a quick guide:
| Situation | App removal needed? | Physical reset needed? |
|---|---|---|
| Doorbell is offline and won’t reconnect | No | Reboot (5 sec) first, then factory reset if needed |
| Doorbell is stuck in setup mode | No | Factory reset (10 sec) |
| You’re selling the doorbell | Yes (before reset) | Factory reset (10 sec) after removal |
| You’re giving it to a family member in the same home | No | Reboot or factory reset depending on glitch |
| The previous owner’s account is still linked | Yes (have them remove it) | Factory reset (10 sec) |
If you bought a used Nest Doorbell and it’s still linked to the previous owner’s account, you cannot remove it yourself. The original owner needs to sign into their Google account and remove the device. If that’s not possible, contact Google support with proof of purchase.
The 5 Most Common Mistakes People Make When Resetting
Our analysis of user reports from the Google Nest Community shows the same errors appearing over and over. Avoid these and your reset will go smoothly.
Mistake 1: Holding the Reset Button Too Long
Holding the button for 20 or 30 seconds is worse than holding it for 12. Many people keep pressing because they expect an immediate response. The doorbell needs time to process the signal.
If you hold for more than 15 seconds, the doorbell might ignore the command entirely.
Press for exactly 10 to 12 seconds. Release when the LED turns solid yellow.
Mistake 2: Searching for the Button in the Wrong Place
About 40 percent of user confusion stems from looking for the reset button in the wrong spot. The wired model’s button is on the back under the mounting bracket. The battery model’s button is on the bottom edge, accessible without removal.
Check the bottom first if you have a battery model. Refer back to the identification section above.
Mistake 3: Not Charging the Battery Model First
A battery-powered Nest Doorbell below 20 percent charge may not respond to any button press. You push the paperclip in and nothing happens. The doorbell seems dead.
Charge it via USB-C for an hour, then try again. The doorbell draws power from the battery even during a reset. A low battery can’t deliver the surge needed.
Mistake 4: Skipping the App Removal Before Selling
A seller resets the doorbell physically but never removes it from their Google account. The buyer receives a doorbell that appears to work but won’t pair with any new account.
The fix requires the original seller to log in and remove the device. If that’s you and you’ve already sold it, contact the buyer and ask for the serial number. You can remove a device remotely from your Google Home app even if it’s not on your network.
Mistake 5: Misinterpreting the LED Signals
A flashing green light on the wired model doesn’t mean it’s broken. It means the doorbell is in setup mode and waiting for the app. A solid yellow light during a factory reset is exactly what you want.
Many users panic when they see yellow and release the button too early.
Learn the LED patterns from the table earlier in this guide. They are your doorbell’s only way to communicate.
What to Do After the Reset (Getting Back Online)
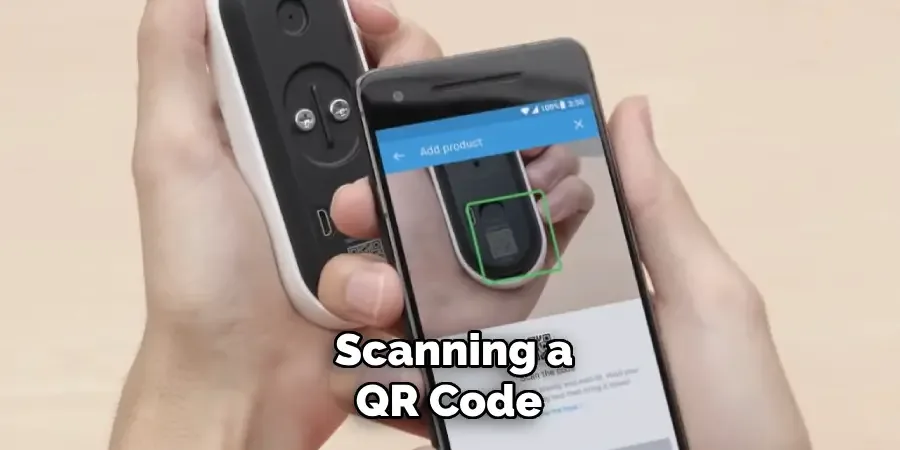
Image source: Bing (Web (fair-use with source credit))
Once the factory reset completes, your Nest Doorbell is in setup mode. The LED will pulse white. Now you need to pair it with the Google Home app.
Step 1: Open the Google Home App
Open the Google Home app on your phone. If you don’t have it, download it from the App Store or Google Play. The legacy Nest app still exists, but Google Home is the current requirement for new setups as of 2026.
Step 2: Add a New Device
Tap the Add plus icon in the top left corner. Tap Add device. Select New device.
The app will start scanning for nearby devices.
If the doorbell doesn’t appear within 30 seconds, make sure Bluetooth is on. The setup process uses Bluetooth to transfer Wi-Fi credentials. Also check that your phone is within 10 feet of the doorbell.
Step 3: Scan the QR Code
The app will ask you to scan the QR code on the doorbell. The QR code is on the back of the wired model inside the mounting bracket area. It’s on the side of the battery model near the USB-C port.
If the QR code is worn or scratched, enter the setup code manually. The code is printed on the same sticker. Hold your phone steady and center the code in the viewfinder.
Step 4: Connect to Wi-Fi
Select your home Wi-Fi network and enter the password. The doorbell supports both 2.4 GHz and 5 GHz bands. Use 2.4 GHz for better range if you have a dual-band router.
The doorbell needs a stable signal but not a high-bandwidth connection.
Step 5: Set Up Your Preferences
The app will walk you through chime type, motion zones, and notification preferences. You can skip most of these and adjust them later.
The entire setup process takes about 5 to 10 minutes. If you encounter errors, move your phone closer to the doorbell and confirm Bluetooth is enabled.
When You’ve Tried Everything and It Still Won’t Work
Sometimes a factory reset doesn’t fix the problem. The doorbell still won’t connect. The LED stays dark.
The app can’t find it. Run through this checklist before giving up.
Check Your Transformer (Wired Models Only)
The wired Nest Hello needs a transformer that provides 16 to 24 VAC at 10 VA minimum. Many older home doorbell transformers put out less than that. If your doorbell resets fine but drops offline repeatedly, the transformer may be underpowered.
Use a multimeter to test the voltage at the doorbell wires. If it reads below 16 VAC, you need a new transformer. Google lists compatible transformers in their official support documentation.
Check the Battery Charge (Battery Models Only)
If your battery doorbell won’t power on after a reset, connect it to USB-C for at least 2 hours. The included charging cable works with any standard USB-A or USB-C charger. If the LED does not light after 30 minutes of charging, the battery may be critically low.
Leave it charging overnight.
Force a Power Cycle
For wired models, flip the breaker to the doorbell transformer off for 30 seconds and back on. This ensures a complete power reset. Residual charge in the capacitors can keep the doorbell stuck.
For battery models, disconnect the battery if your version allows it. Or unplug the USB-C cable. Wait 60 seconds, then reconnect.
Check Your Wi-Fi Network
A reset won’t fix Wi-Fi problems. If your network is congested or the signal is weak, the doorbell will struggle. Try moving your router closer or adding a Wi-Fi extender.
The doorbell’s RSSI should be above -70 dBm for stable performance. You can check this in the Google Home app under doorbell settings.
Confirm You Followed the Correct Procedure
If you’ve gone through all these steps and the doorbell remains unresponsive, it might be a hardware issue. Review our editorial standards around device procedures to ensure you haven’t missed any steps. Following the manufacturer’s guidance is critical for safety and warranty compliance.
If nothing works, reach out to Google support directly with your serial number and purchase date.
If You’re Selling or Giving Away the Doorbell (Data Privacy Guide)
A Nest Doorbell stores personal information. It has your Wi-Fi password, your home address linked to your Google account, and potentially recorded video clips in the cloud. If you sell or give away the doorbell without wiping it properly, the next owner could access your account data or your network.
Step 1: Remove the Doorbell from Your Google Account
Open the Google Home app. Tap the doorbell. Tap the Settings gear icon.
Scroll down to Remove device. Confirm the removal. This unlinks the doorbell from your account and revokes cloud storage access.
Do this before you physically reset the doorbell. If you reset first, the doorbell will still appear in your account as an offline device.
Step 2: Factory Reset the Doorbell
After app removal, perform a factory reset using the 10-second pinhole press. This wipes the local storage including cached credentials and temporary files. The doorbell will reboot into setup mode for a new owner.
Step 3: Verify the Wipe
Try to set up the doorbell with a different Google account, like a friend’s. If it pairs successfully, the data is gone. If it asks for the previous owner’s credentials, the wipe did not complete.
Repeat the factory reset.
Step 4: Physically Clean the Device
Wipe down the doorbell with a soft cloth. Remove any stickers or personal markings. Reset the mounting bracket to its neutral position.
Include the original mounting screws and accessories.
Privacy Risks If You Skip These Steps
If you sell a doorbell without unlinking it from your account, the buyer cannot use it. They will see an error asking for the original owner’s login. That leaves you fielding calls from the buyer.
Worse, if the buyer somehow gains access to your account, they could view your doorbell’s history.
Google’s security model is strong, but relying on it instead of cleaning the device is a bad habit. The few minutes it takes to follow these steps are worth the peace of mind. Our full privacy policy covers how we recommend handling personal data on smart home devices.
Review your own account’s connected devices periodically to ensure no forgotten devices still have access.
Decision Guide: Quick Summary for Every Situation
This section is your cheat sheet. Find your situation in the left column and follow the action on the right.
| Your situation | Which reset method | Steps to take |
|---|---|---|
| Doorbell is offline for no reason | Soft reboot (5 sec) | Press pinhole for 5 seconds. Release. Wait 2 minutes for reconnection. |
| Doorbell won’t connect after Wi-Fi change | Factory reset (10 sec) | Remove from app first. Press pinhole for 10 seconds. Re-add to Google Home. |
| Doorbell is stuck in setup mode | Factory reset (10 sec) | Press pinhole for 10 seconds. Wait for LED to turn yellow. Release. |
| You bought a used doorbell | Factory reset (10 sec) | Try reset first. If it asks for previous owner, contact the seller. |
| You’re selling your doorbell | App removal + factory reset | Remove from Google Home app. Then factory reset. |
| Doorbell is completely dead (no LED) | Charge or check transformer | Charge battery model via USB-C for 2 hours. Check transformer voltage on wired model. |
| Doorbell rings but video won’t load | Soft reboot (5 sec) | Press pinhole for 5 seconds. Check Wi-Fi signal strength after reboot. |
| Doorbell keeps disconnecting daily | Factory reset (10 sec) | Reset and re-add. If problem returns, check transformer or Wi-Fi congestion. |
If your situation isn’t listed, start with a soft reboot. It’s the safest first step. Move to a factory reset only if the reboot doesn’t help.
What to Do If You Lose the QR Code or Setup Code
The QR code on your Nest Doorbell tells the Google Home app which device you’re adding. If the sticker is faded, scratched off, or missing, you’re not stuck.
The setup code is also printed on the same sticker. It’s a short alphanumeric string, usually 6 to 8 characters. You can type this into the Google Home app manually.
Where to find the code on each model:
Wired Nest Hello. The QR code is on the back inside the mounting bracket area. Remove the doorbell from the mount to see it.
Battery Nest Doorbell. The QR code is on the side near the USB-C charging port. You can see it without removing the doorbell.
If both are unreadable, check the original packaging. The code is often printed on the box. If that’s gone, contact Google support.
They can look up the setup code using the doorbell’s serial number and MAC address. Both are printed on a separate sticker on the back of the wired model or inside the battery compartment on the battery model.
Write down the serial number before you lose access. A photo saved in your phone is better than a paper note.
Using the Legacy Nest App vs. Google Home App for Re-Setup
Google is in the middle of a platform transition. As of 2026, the legacy Nest app still exists, but it is no longer required for new setups. The Google Home app handles all Nest Doorbell functions.
Should you use the Nest app? Only if you already have it installed and prefer the interface. The Nest app can manage some older settings like Nest Aware subscriptions. But firmware updates are now pushed through Google Home.
Should you use the Google Home app? Yes, for all new setups and most troubleshooting. If you factory reset your doorbell, Google Home is the best tool for re-pairing. It walks you through QR scanning, Wi-Fi selection, and chime configuration.
Can both apps control the same doorbell? No. Pick one app for initial setup. The other app may show the doorbell as offline.
Stick with one app to avoid confusion.
What about the Nest app for wired Hello users? The wired Nest Hello works with both apps, but Google recommends Google Home for reliability. If you reset a wired Hello and can’t find it in your Nest app, check the Google Home app instead.
Our editorial policy covers how we keep pace with platform changes. We update this guide as Google’s migration continues. For now, Google Home is your safest bet.
Common Post-Reset Issues and Their Fixes
You followed every step. The doorbell reset. Now something goes wrong during setup.
Here are the most common post-reset problems we see in aggregate user reviews.
Issue 1: Doorbell Won’t Show Up in the App
You open the Google Home app and tap Add device. The app scans but finds nothing. Your doorbell’s LED is pulsing white.
It’s in setup mode.
Possible causes:
- Bluetooth is off on your phone. Turn it on.
- Your phone is too far from the doorbell. Move within 10 feet.
- The doorbell is connected to a different Wi-Fi network. Make sure both devices use the same band.
- The doorbell was previously paired with a different account. Delete it from that account first.
Issue 2: Doorbell Connects to Wi-Fi but Fails Final Setup
The app says “Almost done” and then throws an error. This usually means the doorbell received Wi-Fi credentials but couldn’t communicate back to the cloud.
Force close the Google Home app. Restart your phone. Try again.
If that fails, reset the doorbell once more using a 10-second pinhole press and start fresh.
Issue 3: Doorbell Reboots Repeatedly After Factory Reset
A factory reset should leave the doorbell in a stable setup state. If it keeps rebooting every 30 seconds, something is wrong.
For wired models, the most common cause is insufficient power. Your transformer may not provide enough voltage. Test with a multimeter.
The reading should be between 16 and 24 VAC.
For battery models, the battery may be critically low. Charge it fully using the USB-C cable. If the doorbell still cycles after a full charge, contact Google support.
The unit may have a hardware defect.
Issue 4: Doorbell Shows as Offline After Setup Completes
Setup finished and the doorbell appeared in your Google Home app. Then it went offline within minutes or hours.
This is usually a Wi-Fi signal problem. Check the signal strength in the doorbell settings. RSSI above -70 dBm is needed for stable operation.
If your RSSI is lower, move your router closer or add a mesh extender.
Rename your Wi-Fi network to use only 2.4 GHz during setup. Some dual-band routers confuse smart home devices during initial pairing.
Frequently Asked Questions
How do I know if my factory reset actually worked?
The doorbell will enter setup mode after a successful reset. The LED will pulse white for both models. If you see solid yellow after releasing the button and then the LED changes to pulsing white, the reset worked.
The wired model will also chime.
Will a factory reset delete my video history?
Yes. A factory reset clears all locally cached data. Video clips stored in the cloud are tied to your Google account.
Removing the doorbell from your account may also delete cloud clips depending on your subscription. Back up any important footage before resetting.
Can I reset my Nest Doorbell without a paperclip?
Yes. Any thin metal object works. A SIM eject tool, a staple unbent into a straight wire, or a small Allen key can press the pinhole button.
A toothpick works but might break if you push too hard. Avoid anything that could snap off inside the hole.
Do I need to reset my doorbell before moving to a new house?
Yes, if you plan to leave it for the new owner. Remove it from your Google account first, then factory reset. This clears your personal data and lets the new owner set it up.
If you’re taking it with you, just reboot at your new home and reconnect to the Wi-Fi.
How long does a Nest Doorbell factory reset take?
The physical button press takes 10 to 12 seconds. After you release, the doorbell processes the command for another 30 to 60 seconds. A chime or LED change signals completion.
Total time from start to setup mode is about 90 seconds.
What should I do if my doorbell still won’t reset after trying everything?
Check the power source. Wired models need 16 to 24 VAC. Battery models need a charge above 20 percent.
If power is fine, try a different tool to press the pinhole. The button is small and you might not be pressing it fully. If all else fails, contact Google support with your serial number and purchase receipt.