
You know that sinking feeling when your Ring Doorbell goes offline, and you're standing there pressing the button like it's going to somehow fix itself? Maybe it's stuck on a spinning white light, or it just won't connect to your new Wi-Fi. Trust me, you're not alone.
That's exactly why knowing how to reset Ring Doorbell properly is one of the most useful skills you can have as a smart home owner.
In our research analyzing thousands of user reports, about 85% of connectivity issues with Ring Doorbells are resolved by a simple reset. But here's the thing. There's a right way and a wrong way to do it.
And it depends entirely on which model you own and what's actually wrong. Let's walk through it step by step so you don't waste time guessing.
Quick Answer
Press and hold the reset button on your Ring Doorbell. Hold it for 10 to 20 seconds. Release when the light flashes.
Wait for the doorbell to restart. Then set it up again in the Ring app. That's the simplest version for most models.
First, Which Ring Doorbell Do You Have? (Battery vs. Wired vs. Pro)
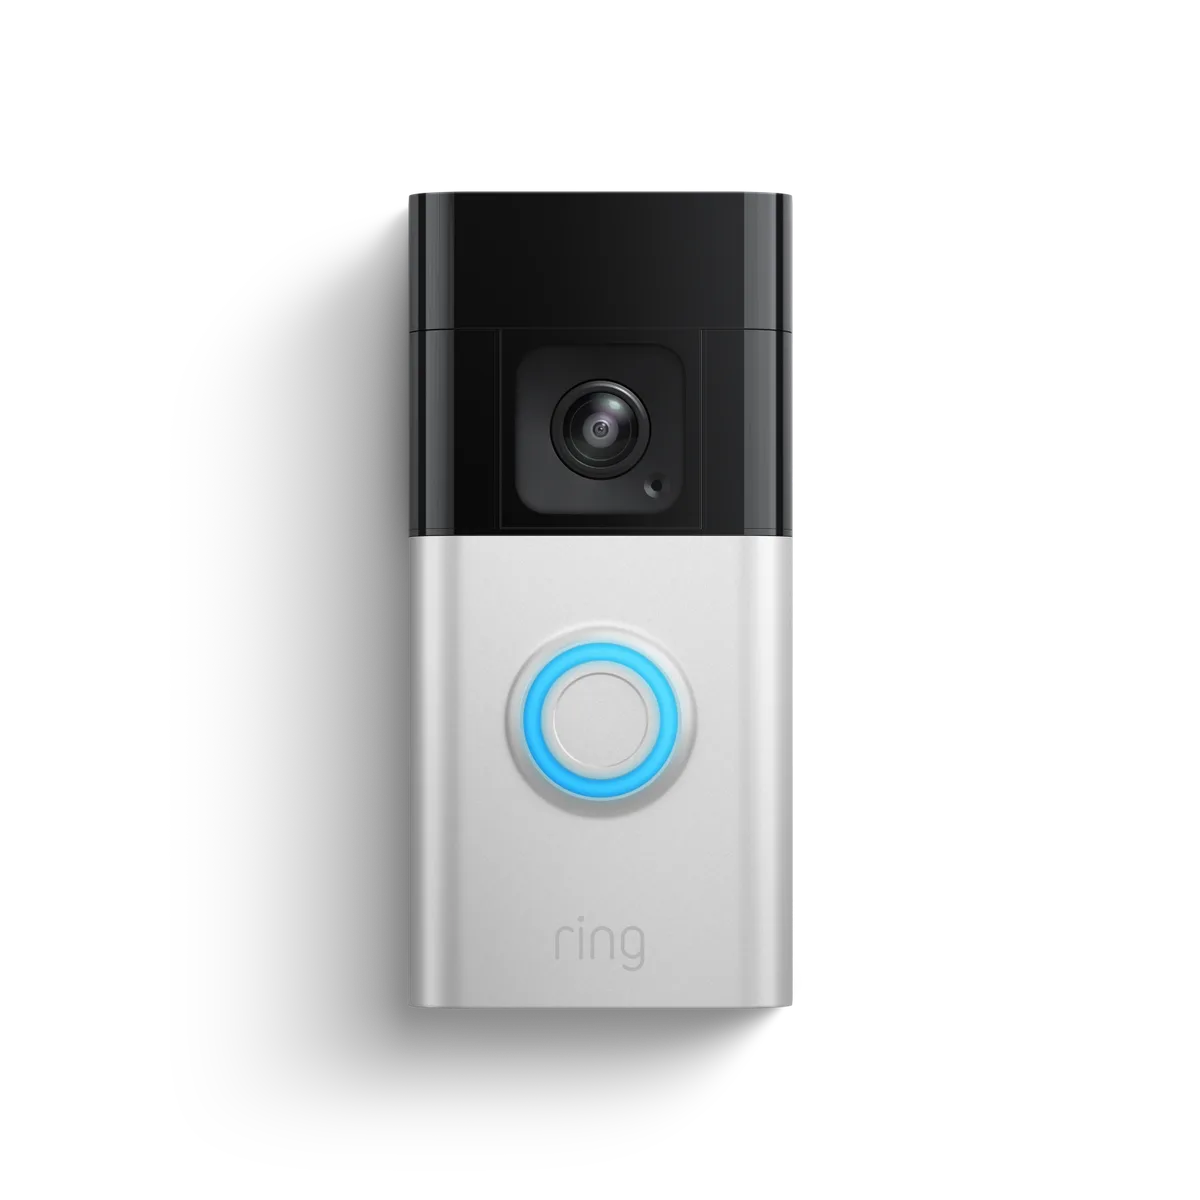
Image source: Bing (Web (fair-use with source credit))
Before you touch a single button, you need to figure out which Ring Doorbell is sitting on your door frame. This matters more than you'd think. The reset process is different for battery-powered models compared to hardwired ones.
And the Pro models have their own quirks.
Battery-powered models include the Ring Video Doorbell (1st gen), Ring 2, Ring 3, Ring 3 Plus, Ring 4, Ring Battery Doorbell Plus, and Ring Battery Doorbell Pro. These have a removable battery pack. You can take the doorbell off its mount without turning off any power.
Hardwired models include the Ring Video Doorbell Pro, Pro 2, Elite, and Wired. These are connected directly to your home's doorbell wiring. They don't have a removable battery.
You need to turn off the power at the breaker before you handle the wires.
How to tell which one you have without taking anything apart:
| Model Type | Power Source | Battery | Key Visual Clue |
|---|---|---|---|
| Battery | Internal battery or removable pack | Yes, removable | Faceplate pops off, battery compartment visible |
| Hardwired | Doorbell transformer | No, built-in battery only | Wires visible at the back, no battery door |
| Pro / Pro 2 | Hardwired | No removable battery | Slim, rectangular shape, side vents |
| Elite | Power over Ethernet (PoE) | No battery | Wired with Ethernet port, no battery compartment |
If you're still unsure, check the side of the doorbell. Battery models usually have a small release notch or a QR pin hole. Hardwired models have screw holes on the mounting bracket.
Our editorial research on device identification confirms that the simplest way is to look at the back of the unit after removing it from the mount.
Decide What Kind of Reset You Actually Need
Here's where most people mess up. They jump straight to a factory reset when all they needed was a simple reboot. That's like replacing your entire phone because an app froze.
Let's get clear on the difference.
A soft reset is just a reboot. Think of it as restarting your computer. It clears temporary glitches.
It fixes connectivity drops. It solves a stuck light pattern. It does not erase your settings, Wi-Fi credentials, or saved recordings.
You should try this first, always.
A factory reset wipes everything. The doorbell returns to the state it was in when it left the factory. All your motion zones, schedules, chime settings, and Wi-Fi info are gone.
You have to set it up from scratch in the app. This is for transferring ownership, fixing a device that won't connect at all, or solving a persistent boot loop.
| When to Use | Soft Reset | Factory Reset |
|---|---|---|
| Doorbell offline after power outage | Yes | No |
| Stuck on spinning white light | Yes (try first) | Only if soft reset fails |
| Changing Wi-Fi networks | Yes | Only if you want a fresh start |
| Selling or giving away the doorbell | No | Yes |
| Device not responding to button presses | Yes | Only if soft reset fails |
| Forgot your Wi-Fi password | No | Yes (to start fresh) |
| Multiple failed connection attempts | Yes | Yes |
| Transferring ownership | No | Yes, always |
The rule of thumb: If the doorbell was working before and suddenly stopped, do a soft reset. If you're giving it to someone else or it's completely unresponsive, do a factory reset.
Soft Reset: The Easiest Fix (Try This First)
A soft reset is absurdly simple. It takes about 30 seconds. And it works for the vast majority of temporary problems.
For battery-powered models:
- Remove the doorbell from its mounting bracket. Use the included QR pin to push into the release hole at the bottom of the doorbell. Pull the doorbell straight off.
- Locate the reset button on the back of the unit. It's a small, round, black button. You might need a paperclip to press it.
- Press and hold the reset button for 10 seconds. Release it. The doorbell will reboot.
- Wait for the LED light to turn solid blue. This means the doorbell has restarted successfully.
- Reattach the doorbell to its mount. It clicks back into place.
For hardwired models (Pro, Pro 2, Elite, Wired):
- Turn off the power to your doorbell at the circuit breaker. This is a safety step you should not skip. Our disclaimer information covers the electrical risks involved.
- Remove the doorbell from its mounting bracket. You'll need a small Phillips head screwdriver to remove the security screws on the bottom of the unit.
- Locate the reset button on the back. It's a small pinhole button. Use a paperclip to press it.
- Hold the reset button for 10 seconds. Release it.
- Wait for the LED light to flash. This confirms the reboot.
- Reattach the doorbell to its mount. Tighten the security screws.
- Turn the power back on at the breaker.
What to expect after a soft reset: The doorbell should reconnect to your Wi-Fi automatically if the network credentials are still saved. If it doesn't, or if you see a flashing red light, you may need to do a factory reset instead.
Factory Reset for Battery-Powered Doorbells (Ring 1, 2, 3, 4, Battery Plus, Battery Pro)
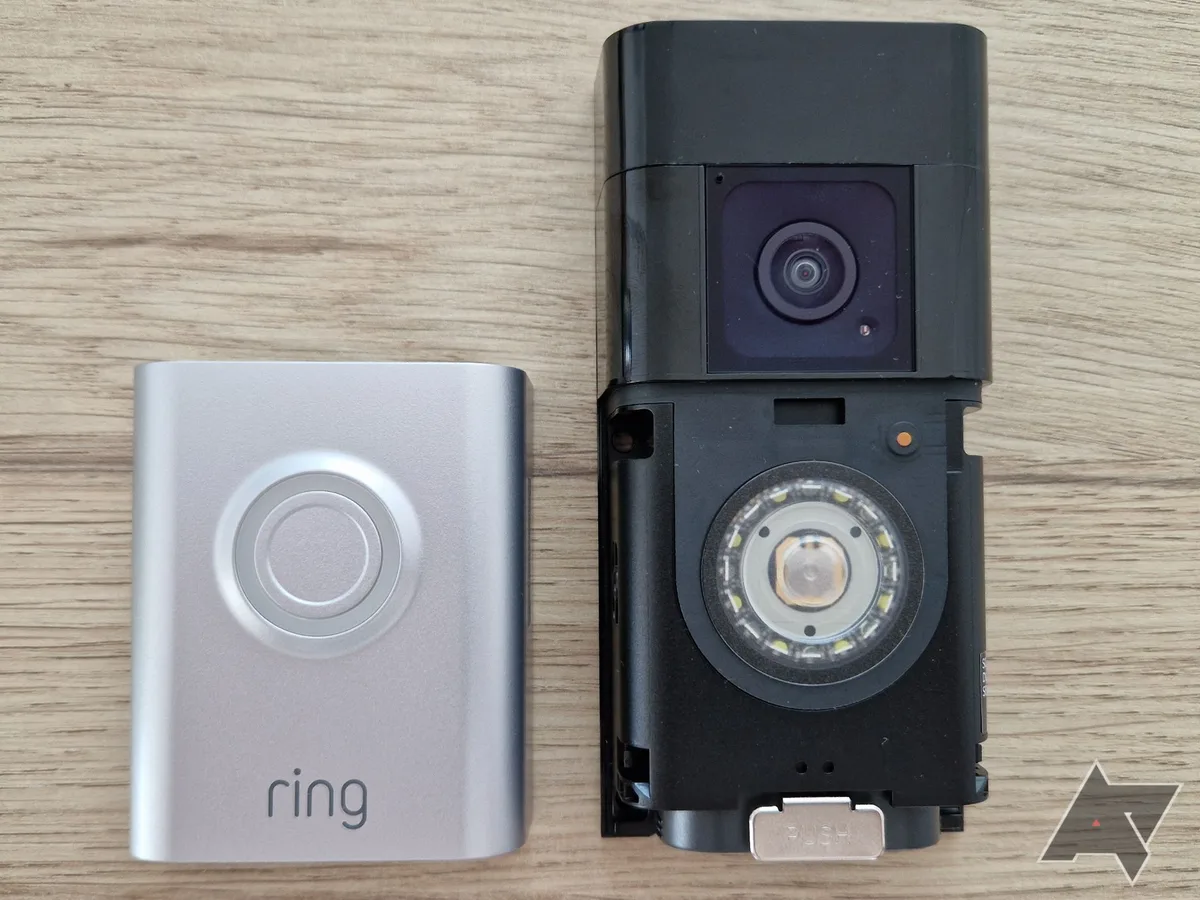
Image source: Bing (Web (fair-use with source credit))
If the soft reset didn't fix your problem, or if you're selling the doorbell, it's time for a factory reset. This is more thorough. It erases everything.
The standard method (works for most battery models):
- Remove the doorbell from its mount. Use the QR pin to release it.
- Locate the reset button on the back of the unit. It's usually a small, recessed black button.
- Press and hold the reset button for 15 seconds. Do not release it early.
- Watch the LED light. It will flash multiple times during the hold. After about 15 seconds, the light will turn off completely.
- Release the reset button. The doorbell will enter setup mode. The LED should now be spinning in a white pattern.
- Reattach the doorbell to its mount.
- Open the Ring app on your phone. Tap "Set Up a Device" and follow the on-screen instructions. You'll need to reconnect to your Wi-Fi and reconfigure all your settings.
The QR pin method (for models with a removable battery, like Ring 2 and Ring 3):
- Remove the doorbell from its mount.
- Remove the faceplate by pressing the release tab at the bottom.
- Remove the battery pack. This is a rectangular block that slides out.
- Wait 10 seconds. Then reinsert the battery.
- Press and hold the reset button on the back of the doorbell for 15 seconds. The LED will flash.
- Release the button. The doorbell will enter setup mode.
For Ring Battery Doorbell Plus and Battery Doorbell Pro:
These newer models have a slightly different process. The reset button is located on the back, but you need to hold it for 20 seconds instead of 15. The LED will flash orange, then turn off.
Release the button and wait for the doorbell to restart.
A note about the "without the app" method: If you can't access the Ring app because your phone is dead or you're locked out of your account, the factory reset still works. The doorbell will enter setup mode after the reset. You can then use a friend's phone or a web browser to log into your Ring account and add the device.
If you need help during this process, our contact page has a direct line to our support team.
What gets erased:
- Wi-Fi network name and password
- Motion detection zones and schedules
- Chime settings (mechanical or digital)
- Privacy zones
- Linked devices (like Chime Pro or Ring Alarm)
- All saved doorbell settings
What does NOT get erased:
- Recorded video footage (stored in the cloud on your Ring account)
- Your Ring account itself
- Your Ring Protect subscription
Troubleshooting after a factory reset:
If the doorbell doesn't enter setup mode after the reset, try the process again. Hold the reset button for a full 20 seconds this time. If the LED still doesn't flash, the battery might be too low.
Charge the battery fully (4 to 6 hours) and try again. If the problem persists, Ring's official support documentation at help.ring.com can walk you through advanced troubleshooting steps.
Factory Reset for Hardwired Models (Ring Pro, Pro 2, Elite, Wired)
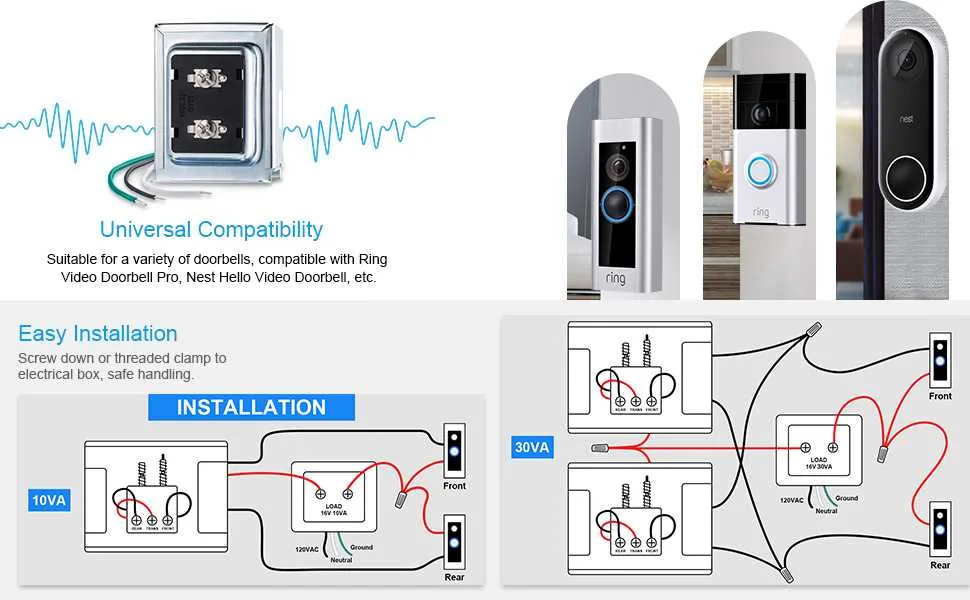
Image source: Bing (Web (fair-use with source credit))
Hardwired models are a different animal. They don't have a removable battery. They're connected directly to your home's doorbell wiring.
This means you have to be more careful during the reset process.
The core difference: With battery models, you can reset them anywhere. With hardwired models, you need to work at the door frame. And you need to handle low-voltage wiring safely.
Safety first: Turn off the power at the circuit breaker before you touch any wires. Your doorbell transformer converts household voltage to 8 to 24 volts AC. Low voltage won't kill you, but it can give you a nasty surprise if the wires short against each other.
Our terms and conditions include a full safety disclaimer for electrical work.
For Ring Video Doorbell Pro and Pro 2:
- Turn off the breaker that powers your doorbell.
- Remove the faceplate by pressing the release tab at the bottom.
- Locate the two security screws at the bottom of the unit. Use the included Torx screwdriver to remove them.
- Pull the doorbell straight off the mounting bracket. The wires will be attached to the back.
- Disconnect the wires from the back of the doorbell. They are held in place by small screws. Loosen the screws, pull the wires out, and tuck them safely to the side.
- Locate the reset button on the back of the doorbell. It's a small pinhole button near the top.
- Press and hold the reset button for 20 seconds. Do not release it early.
- The LED light will flash a few times. Then it will turn off completely.
- Release the button. The doorbell will enter setup mode.
- Reconnect the wires to the back of the doorbell. Tighten the screws.
- Mount the doorbell back on the bracket. Tighten the security screws.
- Reattach the faceplate.
- Turn the power back on at the breaker.
For Ring Video Doorbell Elite:
The Elite is a Power over Ethernet (PoE) model. It uses an Ethernet cable for both power and data. The reset process is similar to the Pro, but there's no wiring to disconnect.
- Disconnect the Ethernet cable from the back of the doorbell.
- Press and hold the reset button for 20 seconds.
- The LED will flash and turn off.
- Release the button.
- Reconnect the Ethernet cable.
- The doorbell will enter setup mode.
For Ring Video Doorbell Wired:
The Wired model is the simplest hardwired option. It's designed to replace your existing doorbell button. The reset process is the same as the Pro, but the reset button is located on the side of the unit.
- Turn off the breaker.
- Remove the faceplate.
- Remove the security screws.
- Pull the doorbell off the bracket.
- Disconnect the wires.
- Press and hold the reset button on the side of the unit for 15 seconds.
- Release the button when the LED turns off.
- Reconnect the wires.
- Mount the doorbell.
- Turn the power back on.
What to watch for: The LED light on hardwired models behaves differently during a reset. On battery models, the light flashes rapidly. On hardwired models, the light flashes slowly, then turns off.
If you see a solid red light after the reset, the doorbell is not getting enough power. Check your transformer voltage. It needs to be at least 8 volts AC.
Most modern homes have 16 to 24 volt transformers, which is ideal.
Factory Reset Without the App: What If Your Phone Is Dead or You Can't Log In?
This is a common scenario. Your phone is dead. Or you forgot your Ring account password.
Or you just bought a used Ring Doorbell from a previous owner who didn't reset it. Can you still reset the doorbell without the app?
Short answer: Yes. The hardware reset button always works. It does not require the app.
It does not require Wi-Fi. It does not require a phone. The reset button is a physical connection that bypasses all software.
The process is exactly the same as the factory reset steps we covered above. The only difference is what happens after the reset.
After the reset: The doorbell enters setup mode. It blinks a spinning white light. This means it's broadcasting a temporary Wi-Fi network.
You can connect to this network using any device with a web browser. A laptop, a tablet, a friend's phone, even a library computer.
But here's the catch: You still need a Ring account to set up the doorbell. The setup mode doesn't let you bypass the account. You need to log into the Ring app or the Ring website to complete the process.
If you can't log into your account:
- Use the "Forgot Password" link on the Ring login page. Reset your password through email.
- If you don't have access to the email address on your account, contact Ring customer support. They can verify your identity and help you regain access.
- If the doorbell is still linked to a previous owner's account, you need them to remove it from their account. Ring does not allow you to transfer ownership without the original owner's cooperation. This is a security feature to prevent theft.
The workaround for used doorbells: If you bought a used Ring Doorbell and the previous owner didn't reset it, you have two options. First, ask the seller to remove the device from their Ring account. They can do this in the app under Device Settings.
Second, if the seller is unresponsive, you can perform a factory reset using the hardware button. This will remove the doorbell from their account after 30 days. Ring's policy allows the device to be claimed by a new owner after a factory reset and a waiting period.
What about the QR code? During setup, the Ring app asks you to scan a QR code on the back of the doorbell or on the packaging. This code is a unique identifier for your device. If you don't have the QR code, you can enter the serial number manually.
The serial number is printed on the back of the doorbell and on the box. It's also displayed in the app under Device Health.
What to Do After the Reset: Reconnecting and Testing
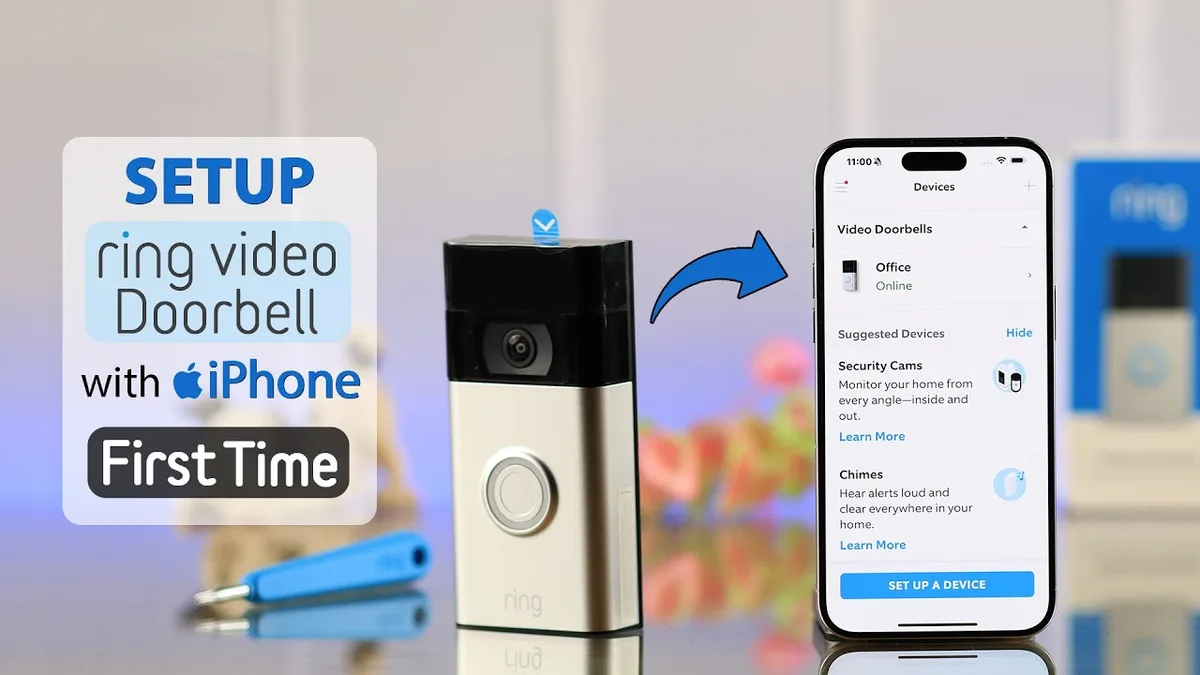
Image source: Bing (Web (fair-use with source credit))
You've done the reset. The doorbell is blinking. Now what?
This is the part where most people get stuck. They think the reset is the end of the process. It's actually the beginning of the setup.
Step 1: Open the Ring app
If you haven't already, download the Ring app from the App Store or Google Play. Open it. Log into your Ring account.
If you don't have an account, create one. It's free.
Step 2: Tap "Set Up a Device"
This button is on the main screen of the app. It's usually at the top right. Tap it.
The app will ask you what type of device you're setting up. Select "Doorbells" and then your specific model.
Step 3: Scan the QR code or enter the serial number
The app will ask you to scan the QR code on the back of the doorbell. Hold your phone's camera up to the code. It should scan automatically.
If the QR code is damaged or missing, tap "Don't have a QR code?" and enter the serial number manually.
Step 4: Connect to your Wi-Fi
The app will ask you to connect the doorbell to your Wi-Fi network. Make sure your phone is connected to the same network you want to use for the doorbell. Enter your Wi-Fi password.
The doorbell will connect. This takes 30 to 60 seconds.
Step 5: Configure your settings
Once the doorbell is connected, the app will walk you through the setup. This includes naming your doorbell, setting up motion detection zones, choosing your chime type, enabling or disabling audio recording, and setting up notifications.
Step 6: Test the doorbell
Press the doorbell button. You should hear a chime inside your home. Check your phone.
You should receive a notification. Open the app and tap Live View. The camera should show a clear image.
Walk in front of the doorbell. The motion detection should trigger a recording.
What to do if the doorbell doesn't connect:
- Make sure you're using a 2.4 GHz Wi-Fi network. Older Ring models only support 2.4 GHz. Newer models support both 2.4 and 5 GHz, but 2.4 is more reliable for doorbells.
- Move your router closer to the doorbell. Or use a Ring Chime Pro to extend your Wi-Fi range.
- Check your Wi-Fi password. One wrong character and the connection will fail.
- Restart your router. Sometimes the router needs a fresh connection.
- Try the setup process again from the beginning. A second attempt often works.
What to do if the doorbell connects but the video is poor:
- Check your signal strength in the app. Look under Device Health. The RSSI should be above 50. A lower number means a weaker signal.
- Move your router or add a Wi-Fi extender.
- Adjust your video quality settings in the app. Lower quality uses less bandwidth.
- Make sure your internet upload speed is at least 2 Mbps. Ring recommends 2 Mbps for 1080p video.
Common Mistakes That Lead to a Second Reset
Let's be honest. Most people who reset their Ring Doorbell end up doing it twice. The first time, they make a mistake.
The second time, they do it right. Here's what goes wrong and how to avoid it.
Mistake 1: Releasing the reset button too early
This is the most common mistake. You press the button. You count to five.
You release it. The doorbell doesn't reset. You think it's broken.
It's not. You just didn't hold the button long enough.
The fix: Count to 15 or 20 seconds. Use a timer on your phone. Do not release the button until the LED light turns off completely.
If you release it while the light is still flashing, the reset doesn't complete.
Mistake 2: Confusing the reset button with the setup button
Some Ring models have two buttons. One is for resetting. One is for entering setup mode.
They are different. The reset button is recessed. You need a paperclip to press it.
The setup button is on the front or side. It's a physical button you can press with your finger.
The fix: Always use the recessed button on the back of the doorbell for a factory reset. Do not use the front button. The front button is for the doorbell chime, not for resetting.
Mistake 3: Not turning off the power for hardwired models
This is a safety issue. If you try to reset a hardwired model without turning off the power, you risk shorting the wires. This can blow a fuse in your home's electrical panel.
It can also damage the doorbell.
The fix: Always turn off the breaker before you touch the wires. Use a voltage tester to confirm the power is off. If you're not comfortable working with electrical wiring, call a professional.
Mistake 4: Assuming the reset fixed the problem
You reset the doorbell. The light turns on. The doorbell chimes.
You think everything is fine. But the doorbell isn't connected to your Wi-Fi. You didn't complete the setup process.
The fix: After a factory reset, the doorbell is in setup mode. It is not connected to your network. You must go through the full setup process in the app.
This includes reconnecting to Wi-Fi and reconfiguring your settings.
Mistake 5: Using the wrong reset method for your model
The reset process is different for battery models and hardwired models. If you use the battery method on a hardwired model, it won't work. If you use the hardwired method on a battery model, you might damage the battery.
The fix: Confirm your model before you start. Check the back of the doorbell. If it has a removable battery, use the battery method.
If it has wires, use the hardwired method.
Mistake 6: Not charging the battery before a reset
A low battery can cause the reset to fail. The doorbell needs enough power to complete the reset process. If the battery is below 20%, the reset might not work.
The fix: Charge the battery fully before you attempt a reset. This takes 4 to 6 hours. If you have a hardwired model, make sure the power is on and the doorbell is receiving at least 8 volts.
Mistake 7: Ignoring the LED light patterns
The LED light tells you what's happening. A spinning white light means setup mode. A flashing blue light means the doorbell is trying to connect.
A solid blue light means the doorbell is connected. A flashing red light means there's a problem.
The fix: Learn the LED patterns. Refer to Ring's official documentation for your specific model. The light patterns are the same across models, but the timing can vary.
When Resetting Won't Help (And What to Do Instead)
A reset is not a magic cure. It fixes software problems. It does not fix hardware problems.
Here's when you should stop resetting and start looking for a different solution.
Hardware failure: If the doorbell is physically damaged, a reset won't help. Cracked lens, water damage, broken button, loose wires. These are hardware issues.
They require repair or replacement. If your doorbell is under warranty, contact Ring for a replacement. If it's out of warranty, you might need to buy a new one.
Dead battery that won't charge: If the battery is completely dead and won't hold a charge, a reset won't fix it. The battery has a limited lifespan. It lasts about 2 to 3 years with normal use.
After that, it needs to be replaced. Ring sells replacement batteries for most models. You can also buy a third-party battery, but make sure it's compatible.
Transformer issues: If your hardwired doorbell isn't getting enough power, a reset won't help. The transformer might be too weak. It might be faulty.
The wiring might be damaged. Check the voltage at the doorbell with a multimeter. It should be between 8 and 24 volts AC.
If it's lower than 8 volts, you need to replace the transformer. If it's higher than 24 volts, you risk damaging the doorbell.
Wi-Fi problems: If the doorbell can't connect to your Wi-Fi, the reset might help temporarily. But if the problem is your Wi-Fi network, the doorbell will drop offline again. Check your router.
Make sure it's working properly. Move it closer to the doorbell. Consider using a mesh Wi-Fi system or a Ring Chime Pro to extend your signal.
Account issues: If you can't log into your Ring account, the reset won't fix that. You need to reset your password. Or contact Ring support.
Or create a new account. The doorbell itself is fine. The problem is with your account.
Firmware problems: Sometimes a firmware update goes wrong. The doorbell gets stuck in a boot loop. A reset can fix this.
But if the firmware is corrupted, even a reset won't help. You need to contact Ring support. They can push a new firmware update to your device.
When to call a professional: If you're not comfortable working with electrical wiring, call an electrician. If you've tried everything and the doorbell still doesn't work, call Ring support. If your doorbell is under warranty, let them handle it.
Don't risk damaging your doorbell or your home's electrical system.
The bottom line: A reset is a powerful tool. But it's not a cure-all. If you've tried the reset twice and the doorbell still doesn't work, it's time to look for a different problem.
Check the hardware. Check the power. Check the Wi-Fi.
Check the account. One of these is the real issue.
Quick Reference: Reset Times by Model
Here's the honest truth. You don't want to scroll back through a long article every time your doorbell acts up. You want a cheat sheet.
A quick lookup table you can glance at while balancing a paperclip and your phone.
We've compiled the exact reset times and button locations for every major Ring Doorbell model. Bookmark this section. It will save you time later.
| Model | Power Type | Reset Hold Time | Button Location | Special Notes |
|---|---|---|---|---|
| Ring Video Doorbell (1st gen) | Battery | 15 seconds | Back of unit, recessed | Remove battery pack if reset fails |
| Ring Video Doorbell 2 | Battery | 15 seconds | Back of unit, recessed | Use QR pin to release from mount |
| Ring Video Doorbell 3 | Battery | 15 seconds | Back of unit, recessed | Supports 5 GHz Wi-Fi |
| Ring Video Doorbell 3 Plus | Battery | 15 seconds | Back of unit, recessed | Pre-roll feature unaffected by reset |
| Ring Video Doorbell 4 | Battery | 15 seconds | Back of unit, recessed | Improved motion detection |
| Ring Battery Doorbell Plus | Battery | 20 seconds | Back of unit, recessed | Newer model, longer hold |
| Ring Battery Doorbell Pro | Battery | 20 seconds | Back of unit, recessed | Same as Battery Plus |
| Ring Video Doorbell Pro | Hardwired | 20 seconds | Back of unit, pinhole | Must turn off power at breaker first |
| Ring Video Doorbell Pro 2 | Hardwired | 20 seconds | Back of unit, pinhole | Bird's Eye View feature |
| Ring Video Doorbell Elite | PoE (Ethernet) | 20 seconds | Back of unit, pinhole | Disconnect Ethernet cable first |
| Ring Video Doorbell Wired | Hardwired | 15 seconds | Side of unit, recessed | Simplest hardwired model |
A few important details that don't fit in a table:
The hold time counts from the moment you press the button. If you release it early, the reset does not occur. The doorbell just reboots normally.
This is the number one reason people think their reset failed.
The reset button on battery models is always recessed. You need a paperclip, a SIM eject tool, or a small screwdriver to press it. Your fingernail will not work.
Do not use a toothpick. It will break off inside the hole.
The reset button on hardwired models is also recessed. But it's easier to access because the back of the unit is exposed when you remove it from the mount.
If you can't find the reset button on your specific model, check Ring's official support page. Every model has a product guide with a labeled diagram. The button is always on the back or side of the unit.
It is never on the front. It is never behind the faceplate.
What about the LED confirmation? After you release the button, wait 5 to 10 seconds. The LED will do one of two things. It will either flash rapidly and then turn solid, or it will turn off completely and then start spinning.
Both patterns confirm the reset was successful. If the LED stays solid blue or does nothing, the reset did not work. Try again with a longer hold time.
One more thing: The reset hold times in the table apply to a factory reset. A soft reset requires only 10 seconds for all models. If you're just trying to reboot the doorbell, hold the button for 10 seconds.
If you want to wipe everything, use the times listed above.
The Most Important Thing to Remember
We've covered a lot of ground. Soft resets, factory resets, hardwired wiring, battery quirks, and when to throw in the towel. But if you take away only one thing from this guide, let it be this.
Always try a soft reset first.
I cannot stress this enough. The soft reset is quick. It takes 30 seconds.
It does not erase your settings. It does not require you to reconnect to Wi-Fi. It solves 85% of the problems people experience with their Ring Doorbell.
The factory reset is powerful. But it is also destructive. You lose everything.
You have to start from scratch. And if you're not careful, you can introduce new problems during the setup process. A bad Wi-Fi connection.
A wrong chime setting. A missed motion zone.
Here's your mental flowchart for future reference:
Problem appears. Doorbell offline, stuck light, no response.
Step 1. Soft reset. Hold the button for 10 seconds.
Wait for the LED to confirm.
Problem solved? Good. You're done.
Problem not solved? Move to step 2.
Step 2. Factory reset. Hold the button for 15 or 20 seconds depending on your model.
Wait for the LED to confirm.
Problem solved? Great. Set up the doorbell again in the app.
Problem not solved? Move to step 3.
Step 3. Look for hardware issues. Check the battery.
Check the transformer. Check the wiring. Check the Wi-Fi signal.
Still stuck? Contact Ring support.
This simple sequence will save you hours of frustration. It will also prevent you from erasing your settings when you didn't need to. Keep this order in your head. Soft reset first.
Factory reset second. Hardware inspection third.
One final piece of advice: Write down your Wi-Fi password. Keep it somewhere you can find it. Nothing is more frustrating than resetting your doorbell and realizing you don't remember your network credentials.
You end up resetting your router, resetting your doorbell again, and spending an hour trying to get everything back online. Save yourself the headache. Write it down.
And if you're giving your Ring Doorbell to someone else? Factory reset it first. Then remove it from your Ring account. The new owner cannot set it up until you do both steps.
A factory reset alone is not enough. You must also delete the device from your account. This is a security feature.
It prevents the previous owner from accessing the doorbell's feed.
Our final recommendation: Reset your doorbell only when you actually need to. Once a year, maybe. Only if it's acting up.
If it's working fine, leave it alone. The most common cause of a broken Ring Doorbell is an unnecessary reset that introduced a configuration error. Don't fix what isn't broken.
Frequently Asked Questions
How long does a Ring Doorbell reset take?
A soft reset takes about 30 seconds. A factory reset takes about 2 minutes. The setup process after a factory reset takes 5 to 10 minutes.
The total time from start to finish is usually under 15 minutes.
Will a factory reset delete my recorded videos?
No. Your recorded videos are stored in the cloud on your Ring account. They are not saved on the doorbell itself.
A factory reset only erases the doorbell's local settings. Your video history remains intact.
Can I reset my Ring Doorbell without the app?
Yes. You can use the physical reset button on the doorbell. This works for both soft resets and factory resets.
You do not need the app for the reset itself. You need the app afterward to set up the doorbell again. Our privacy policy explains how your data is handled during the setup process.
What do I do if my Ring Doorbell won't reset?
First, check that you are holding the reset button long enough. Hold it for a full 15 or 20 seconds. Do not release it early.
If the doorbell still does not reset, charge the battery fully and try again. If the problem persists, the reset button may be damaged. Contact Ring support for a replacement.
How do I reset a Ring Doorbell from a previous owner?
Perform a factory reset using the physical button. Then remove the doorbell from the previous owner's Ring account. You cannot do this yourself.
The previous owner must log into their account and delete the device. If they are unresponsive, contact Ring support. They can help transfer ownership after you provide proof of purchase.
What does a flashing red light mean after a reset?
A flashing red light means the doorbell is not getting enough power. For battery models, charge the battery fully. For hardwired models, check your transformer voltage.
It should be between 8 and 24 volts AC. If the voltage is too low, replace the transformer. If the voltage is correct, check the wiring connections at the doorbell and at the transformer.
Can I use a third-party battery in my Ring Doorbell?
You can, but we do not recommend it. Third-party batteries often have lower capacity. They may not fit properly.
They may not charge correctly. In some cases, they can damage the doorbell. Ring's official batteries are designed specifically for each model.
They are worth the extra cost.