
If you've ever searched for how to reset ring camera, you probably have a camera that is frozen, offline, or behaving strangely. The most common fix for a stubborn Ring device is a factory reset, but doing it wrong can lock you out of your own equipment. There is a reliable way through it, and it starts with knowing which exact model you own.
Our research shows the physical part of a factory reset takes between 10 and 20 seconds on most models. Get the model right and you will be back online in under five minutes. Get it wrong and you will waste an hour pressing the wrong button.
As of 2026, Ring ships over a dozen distinct camera models, each with a different reset button location and hold time. That is why this guide exists.
Quick Answer
You reset a Ring camera by pressing a physical button on the device. The button location and hold time depend on your specific model. Most models require holding the button for 10 to 20 seconds.
A flashing blue or white light confirms the reset worked. Then you re-add the camera to the Ring app as if it were new.
When You Actually Need to Reset Your Ring Camera – And When You Don't
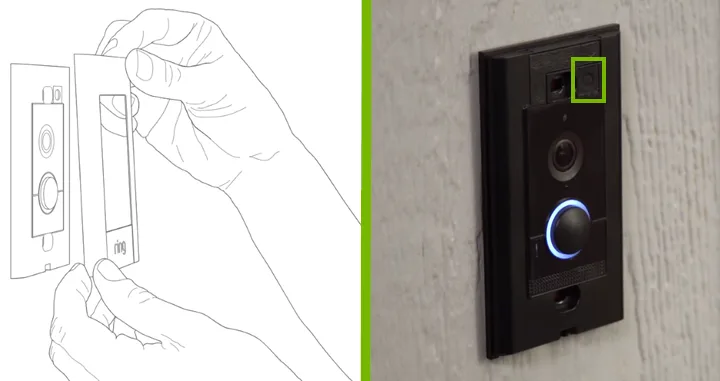
Image source: Bing (Web (fair-use with source credit))
Let us start with the honest truth. A factory reset should not be your first troubleshooting step. Many Ring issues are connection problems, not device problems.
A reset wipes everything. It clears your Wi-Fi credentials. It removes the camera from your account.
It forces you to set it up from scratch. That is fine when it is needed, but unnecessary if a simpler fix exists.
When a factory reset is the right move:
| Scenario | Why a reset helps |
|---|---|
| You are switching to a new Wi-Fi network | The camera stores only one Wi-Fi password. A reset clears the old one. |
| You are moving the camera to a different home | The previous owner's account needs to be fully removed. |
| The camera is completely unresponsive | Freeze-ups that do not fix with a power cycle often need full reset. |
| The app says "Device Offline" for days | Software corruption can block reconnection without a clean slate. |
| You are selling or giving the camera away | Protect your privacy by wiping all personal data. |
When you should try something else first:
- The camera is offline but the lights are still on -> try a soft reset (reboot) through the app first.
- The battery is dead or low -> charge it fully before attempting any reset.
- The camera works but will not stream -> check your Wi-Fi signal strength in the app's Device Health section.
- You just changed your router -> a soft reset often fixes this without wiping settings.
The rule of thumb: if the camera responds at all (lights flash, it chirps, the app sees it), skip the factory reset and try a soft reset first. Only pull the nuclear option when the camera is truly unresponsive or you are handing it to someone else.
Finding Your Model First: Why Guessing the Reset Button Location Wastes Your Time
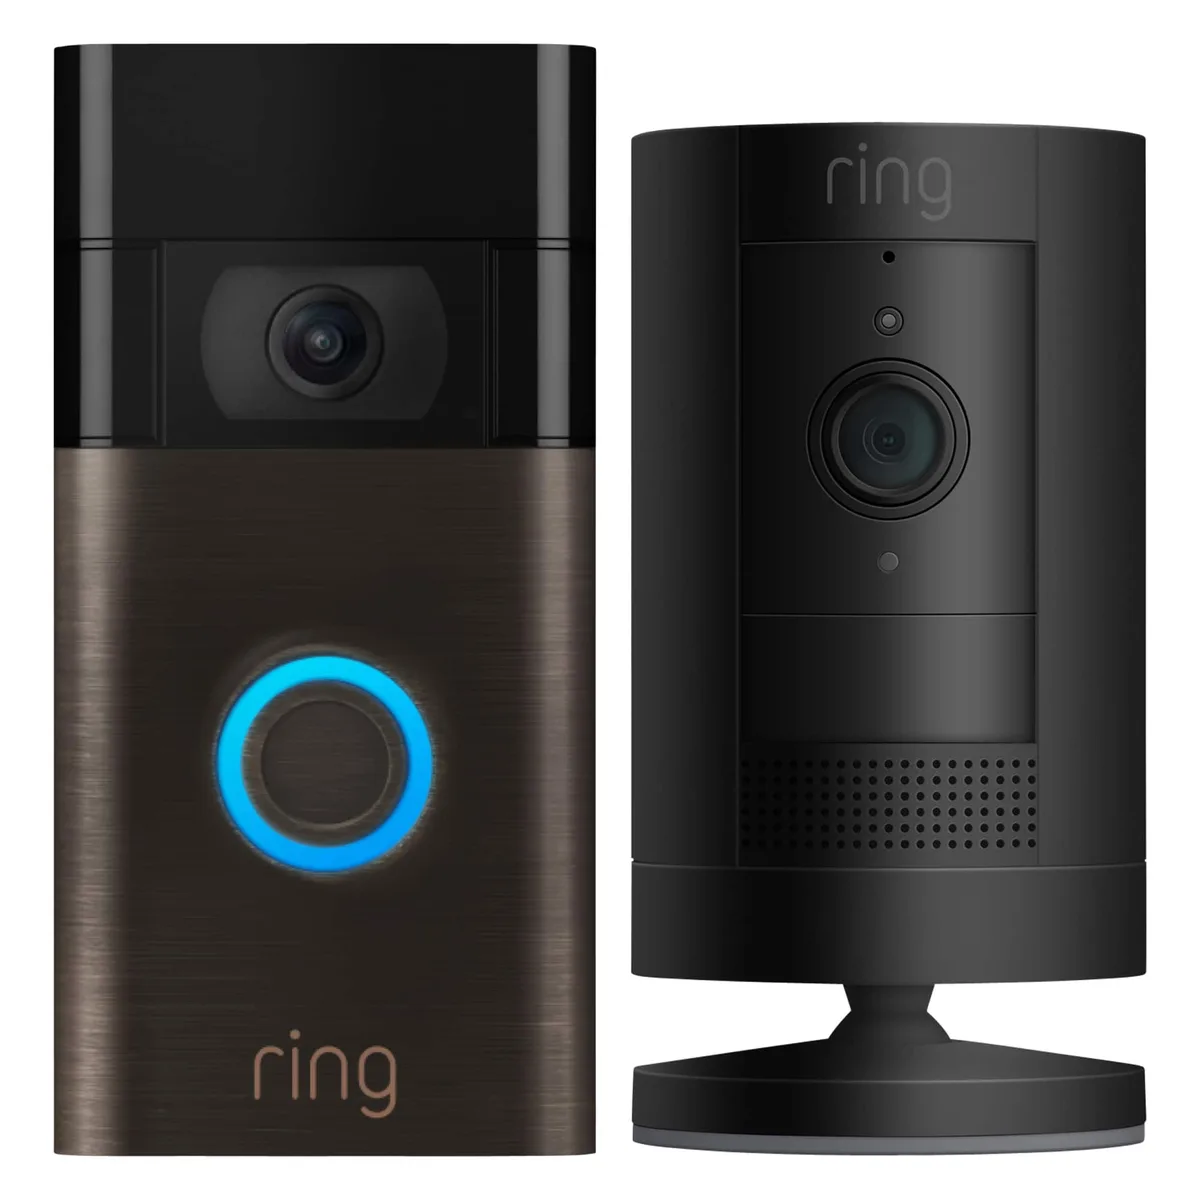
Image source: Bing (Web (fair-use with source credit))
Here is a mistake we see constantly. Someone searches "how to reset ring camera," finds a general tutorial, and presses a button on the back of their device for 10 seconds. Nothing happens.
They try again for 20 seconds. Still nothing. They get frustrated and discover they own a Stick Up Cam, not a Video Doorbell.
The reset button was on the top, not the back.
Ring's camera lineup includes at least eight distinct product families as of 2026. Each family has its own reset button location and required hold time. Without identifying your model, you are guessing.
And guessing wastes time.
How to identify your model in 30 seconds:
- Check the physical device. Look for a model number printed on the back, bottom, or inside the battery compartment. Common model numbers start with "1B", "2B", "3B", or "4B" for doorbells, and "5S" or "6S" for stick-up cams.
- Open the Ring app. Go to menu -> Devices -> select your camera -> tap Device Health. The model name appears at the top.
- Compare visual features. Does it have a removable battery? A solar panel connection? A wired power cable? A peephole mount? Each tells you which family it belongs to.
Once you know the model, the reset process becomes dead simple. The table below shows the most common families and where to find their reset buttons.
| Product family | Reset button location | Typical hold time |
|---|---|---|
| Video Doorbell (2nd Gen, 3, 3 Plus, 4) | Right side panel or back | 10 seconds |
| Video Doorbell Pro / Elite / Wired | Back of device | 15 to 20 seconds |
| Stick Up Cam (Battery / Plug-In / Solar) | Top of camera | 15 seconds |
| Spotlight Cam (Battery / Wired / Solar) | Back or bottom panel | 15 seconds |
| Floodlight Cam (Wired / Pro / Plus) | Top or side under light housing | 15 to 20 seconds |
| Indoor Cam (1st Gen / 2nd Gen / Pro) | Back near base | 10 seconds |
| Peephole Cam | Inside battery compartment | 10 seconds |
Key takeaway: do not guess. Find your model number. It is printed right on the device or visible in the app.
That single identification step saves five minutes of frustration.
Hard Reset vs. Soft Reset – Two Very Different Things
People often use "reset" to mean two different things. Mixing them up can be costly. Let us untangle them.
Soft reset (also called a reboot or power cycle). This is like restarting your phone. The camera powers down and boots back up. Your settings, Wi-Fi connection, and account data all stay intact.
A soft reset fixes temporary glitches and minor freezes.
Hard reset (also called factory reset or full reset). This wipes the camera's memory completely. It removes your Wi-Fi credentials. It unlinks it from your Ring account.
It restores the factory default settings. After a hard reset, the camera behaves like it just came out of the box.
How to perform a soft reset for each model type:
| Model type | Soft reset method |
|---|---|
| Battery-powered (Doorbell, Stick Up, Spotlight, Indoor Cam Battery) | Remove the battery, wait 10 seconds, reinsert it. |
| Wired models (Doorbell Wired, Floodlight Wired, Spotlight Wired) | Flip the breaker or unplug the transformer for 10 seconds, then restore power. |
| Plug-in models (Indoor Cam Plug-In, Stick Up Plug-In) | Unplug the power cable from the camera, wait 10 seconds, plug it back in. |
| Any model | In the Ring app, tap the device -> Device Health -> Reboot This Device. |
When to choose each option:
- Choose a soft reset when the camera is offline but you can still see it in the app, or when it is acting sluggish but still boots up.
- Choose a hard reset when the camera is completely unresponsive, when you cannot connect to it in the app, or when you are transferring ownership.
The most common mistake: users try a soft reset by pressing the factory reset button. That is a hard reset. It wipes everything unnecessarily.
Conversely, some users try a hard reset by pulling the battery and expect it to fix a deeper software issue. That is a soft reset. It will not wipe the corrupted settings.
Our advice: if your camera is just acting up, try the soft reset first. It takes 10 seconds and does not require re-setup. Only move to the hard reset if the soft reset fails.
Only do it if you need to fully clear the device.
The Factory Reset Decision Tree: Pick Your Model, Follow the Button Press
This section is where you will get your answer. We are going model by model. Find yours.
Follow the exact steps. You will be done in under a minute.
Ring Video Doorbells (2nd Gen, 3, 3 Plus, 4, Pro, Elite, Wired)
Identifying features: These are rectangular doorbell cameras, typically mounted on a doorframe or wall. Most are wireless with a removable battery pack. The Pro and Elite are hardwired and thinner.
Reset button location:
| Model | Reset button location | Hold time |
|---|---|---|
| Video Doorbell 2nd Gen | Right side panel (under the faceplate) | 10 seconds |
| Video Doorbell 3 / 3 Plus | Right side panel (under the faceplate) | 10 seconds |
| Video Doorbell 4 | Right side panel (under the faceplate) | 10 seconds |
| Video Doorbell Pro | Back of device (near bottom) | 15 seconds |
| Video Doorbell Elite | Back of device (near bottom) | 15 seconds |
| Video Doorbell Wired | Back of device (near bottom) | 15 seconds |
Steps for battery-powered Video Doorbells (2nd Gen, 3, 3 Plus, 4):
- Remove the faceplate by pushing the release tab at the bottom.
- Locate the small reset button on the right side panel. It is recessed, so you will need a paperclip or SIM eject tool.
- Press and hold the button for exactly 10 seconds. The light will start spinning blue. Keep holding until the light flashes blue, then release.
- The camera will reboot and enter setup mode. You will hear a chime after about 10 seconds.
Steps for wired Video Doorbells (Pro, Elite, Wired):
- Remove the faceplate by pushing the release tab.
- Locate the reset button on the back of the device, near the bottom. It is a small pinhole.
- Use a paperclip to press and hold the button for 15 seconds. The light will pulse blue then flash white.
- Release when you see the white flash. The camera will reboot into setup mode.
What to watch for: If the light does not change within 20 seconds, release the button, wait 10 seconds, and try again. Some units require a firm press. If you still get no response, the camera may need charging first.
For battery models, charge the battery to at least 20 percent before retrying.
Ring Stick Up Cam (Battery, Plug-In, Solar)
Identifying features: A cylindrical or oval camera on a ball joint. Often mounted on a wall or placed on a shelf. The battery model has a removable battery pack on the back.
The plug-in model has a fixed power cord.
Reset button location: The button is on the top of the camera, near the mounting bracket. It is a small recessed button. For battery models, remove the battery first to access it more easily.
Hold time: 15 seconds.
Steps:
- If you have a battery model, remove the battery pack by pressing the release button on the back. Set the battery aside.
- Locate the reset button on the top of the camera. Use a paperclip to press it.
- Press and hold for 15 seconds. The light will flash blue, then go solid blue, then flash white.
- Release when you see the white flash. The camera will reboot and enter setup mode.
- If you removed the battery, reinsert it after the light shows white.
What to watch for: This model is sometimes confused with the Spotlight Cam. The Spotlight Cam has a built-in light ring around the camera lens. The Stick Up Cam does not.
If your camera has that light ring, skip this section and go to the Spotlight Cam instructions below.
Ring Spotlight Cam (Battery, Wired, Solar)
Identifying features: This camera looks similar to the Stick Up Cam but has a ring of LED lights around the camera lens. The lights activate when motion is detected. The battery model has a removable battery pack on the back.
The wired and solar models have a fixed power cable.
Reset button location: The button is on the back or bottom of the camera, near the power connection. For battery models, it is inside the battery compartment.
Hold time: 15 seconds.
Steps:
- If you have a battery model, remove the battery pack by pressing the release button. Set it aside.
- Locate the reset button. On battery models, it is inside the battery compartment on the back wall. On wired and solar models, it is on the bottom near the power port.
- Use a paperclip to press and hold the button for 15 seconds. The light will flash blue, then go solid blue, then flash white.
- Release when you see the white flash. The camera will reboot and enter setup mode.
- Reinsert the battery (if applicable) after the light shows white.
What to watch for: The reset button is easy to miss on battery models because it is recessed inside the compartment. Use a bright light to see it clearly. If you press for 15 seconds and the light does not change, you may need to charge the battery fully first.
Ring Floodlight Cam (Wired, Pro, Plus)
Identifying features: A large camera with two bright floodlight panels on either side. These are hardwired and permanently mounted. There is no battery.
Reset button location: The button is on the top of the camera, near the mounting bracket, under a rubber cover. On the Pro and Plus models, it is on the side of the camera near the light panels.
Hold time: 15 to 20 seconds.
Steps:
- Locate the rubber cover on top of the camera. Gently peel it back to expose the reset button.
- Use a paperclip to press and hold the button for 15 seconds. If the light does not change after 15 seconds, continue holding for up to 20 seconds.
- The lights will flash blue, then go solid blue, then flash white. Release when you see the white flash.
- The camera will reboot and enter setup mode.
What to watch for: Floodlight Cams are wired directly into your home's electrical system. If the reset does not work, you may need to flip the breaker for 10 seconds to fully power-cycle the camera before retrying the factory reset. This model also requires a longer hold time; 20 seconds is sometimes needed.
Ring Indoor Cam (1st Gen, 2nd Gen, Pro)
Identifying features: A small, desktop-style camera with a rounded shape. The 1st Gen has a fixed stand. The 2nd Gen and Pro have a built-in privacy cover that slides over the lens.
Reset button location: The button is on the back of the camera, near the base. On the 1st Gen, it is a pinhole. On the 2nd Gen and Pro, it is a small button.
Hold time: 10 seconds.
Steps:
- Locate the reset button on the back of the camera.
- Use a paperclip (1st Gen) or your finger (2nd Gen/Pro) to press and hold the button for 10 seconds.
- The light will flash blue, then go solid blue, then flash white. Release when you see the white flash.
- The camera will reboot and enter setup mode.
What to watch for: This is one of the simpler models to reset. The 10-second hold time is short, so do not over-hold. If you hold too long (over 15 seconds), it may cycle through a second reset.
Just release at the first white flash.
Ring Peephole Cam
Identifying features: A compact camera that replaces your existing door peephole. It has a doorbell button on the front and a camera lens. The battery compartment is accessed by removing the interior mounting plate.
Reset button location: Inside the battery compartment, next to the battery pack.
Hold time: 10 seconds.
Steps:
- Remove the interior mounting plate using the included screwdriver.
- Locate the battery pack and remove it.
- Inside the compartment, find the small reset button. It is a pinhole.
- Use a paperclip to press and hold the button for 10 seconds.
- The light will flash blue, then go solid blue, then flash white. Release when you see the white flash.
- Reinsert the battery and reattach the mounting plate.
What to watch for: This is the trickiest model to reset because you have to remove the entire mounting plate. Make sure you have the correct screwdriver (usually a Torx T6). If you lose the screwdriver, a small flathead works in a pinch.
After the Reset: What You'll See (And What It Means)

Image source: Bing (Web (fair-use with source credit))
A successful factory reset gives you clear visual feedback. The camera's LED light follows a specific sequence. Once you know what to look for, you will know immediately whether the reset worked.
The standard light sequence during a hard reset:
| Stage | Light behavior | What it means |
|---|---|---|
| While holding the button | Spinning blue light rotating slowly | The camera received the command and is processing |
| After 10 to 15 seconds | Blue light flashes rapidly | The reset has been accepted |
| After releasing | Blue light pulses for a few seconds | The camera is wiping its memory |
| After 10 to 20 seconds | White or blue light flashes intermittently | The camera has entered setup mode |
What a failed reset looks like:
- The light stays solid without spinning or flashing. That usually means you did not press the button firmly enough or hold it long enough.
- The light turns red briefly then goes off. That can mean the battery is too low to complete the reset cycle.
- No light at all. The device may not be receiving power. Check the battery charge or the wiring connection.
What comes next after a successful reset:
The camera will beep or chirp once the reset completes. Then it enters what Ring calls setup mode. In this mode, the camera broadcasts its own temporary Wi-Fi network.
You connect to that network through the Ring app to pair the device to your home Wi-Fi.
One important detail: if you see the light pulse blue for longer than 60 seconds, the camera may be stuck in a boot loop. In that case, perform a second reset. Remove the battery first, wait 30 seconds, then try the hard reset again.
This clears any residual software hang-ups.
What about audio cues? Most Ring cameras play a chime after a successful reset. The chime is a two-tone ascending note. If you hear a descending tone instead, that indicates an error.
The error usually means the reset did not take or the battery voltage dropped during the process.
Re-Adding the Camera to the Ring App – The Setup After the Reset

Image source: Bing (Web (fair-use with source credit)
Once the factory reset is complete, your camera is blank. It has no Wi-Fi credentials. It has no account linkage.
It needs to be set up from scratch, just like the day you unboxed it.
The step-by-step re-add process:
- Open the Ring app on your phone. Make sure Bluetooth and location services are enabled. The app uses both to discover nearby devices.
- Tap "Set Up a Device" at the top of the Devices screen. If you do not see this option, tap the plus icon in the upper right corner.
- Select your camera type from the list. The app asks you to choose the product family. Pick the one that matches your physical device.
- Scan the QR code or enter the device ID manually. The QR code is printed on the camera body. For doorbells, it is under the faceplate. For other models, it is on the back or bottom. If the QR code is scratched or missing, the app lets you type the 8-character serial number instead.
- Connect to the camera's temporary network. The app prompts you to join a Wi-Fi network called "Ring-XXXX" or similar. Go to your phone's Wi-Fi settings, select that network, then return to the Ring app.
- Enter your home Wi-Fi credentials. The app asks for your 2.4GHz Wi-Fi network name and password. Note: Ring cameras do not support 5GHz networks. If your router uses the same name for both bands, the camera may have trouble connecting. Check your router settings to confirm you are on the 2.4GHz band.
- Wait for the connection confirmation. The camera will chime once the connection succeeds. The light turns solid blue for a few seconds, then switches to a blinking blue or white light during normal operation.
- Name your camera. The app asks you to give the device a name. Choose something descriptive like "Front Door" or "Back Yard." This name appears in your device list and notifications.
- Complete the setup walkthrough. The app guides you through a few screens about motion zones, notification preferences, and video recording settings. You can adjust these now or skip them and change them later.
What if the camera doesn't show up in the app?
This is a common frustration. If the camera is in setup mode (flashing white or blue light) but the app cannot find it, try these fixes in order:
- Close the Ring app completely. Reopen it and try again.
- Turn your phone's Bluetooth off and back on.
- Manually connect to the camera's Wi-Fi network in your phone settings before returning to the app.
- Move closer to the camera. The temporary network signal is weak. Stand within 3 feet of the device.
What if the QR code is damaged or unreadable?
Every Ring camera has a serial number printed next to the QR code. Look for an 8-character alphanumeric code. Tap "Enter Device ID Manually" in the app and type that code.
The serial number is also visible in the device's original packaging and on the Quick Start guide.
How long does the re-setup take?
In our research, the entire re-setup process takes 3 to 5 minutes for most users. The longest step is connecting to the camera's temporary Wi-Fi network. That step sometimes fails on the first try.
If it does, just repeat it.
One critical note: after resetting and re-adding a camera, all your previous motion zones and notification settings are gone. You will need to reconfigure them. Take five minutes to review the setup screens carefully.
Missing a motion zone adjustment can lead to false alerts or missed events.
First Gen vs. Newer Models – What Changes
Ring has updated its hardware lineup several times since the first generation launched in 2013. The older models behave differently during a factory reset. If you own a first-generation device, the process is not the same as what we have described above.
First-generation Video Doorbell (2013 to 2015):
The original Ring doorbell had a different reset mechanism. There was no recessed button. Instead, the reset was performed by holding a small button on the back of the device near the charging port.
The hold time was longer. Our research indicates 20 seconds was the standard.
The light sequence also differed. The first-gen model showed a spinning blue light for up to 10 seconds after releasing the button. If the light turned red, the reset had failed.
You had to charge the battery fully and try again.
How to identify a first-generation model:
- It is thicker than newer doorbells. About 1.5 inches deep.
- The faceplate is not removable. It is permanently attached.
- The charging port is on the back. It uses a micro-USB cable, not the newer pogo-pin charger.
- The model number starts with "1B".
Ring Stick Up Cam first generation (2016 to 2018):
The original Stick Up Cam had two reset methods. The physical button on the top was the same as current models, but the hold time was 20 seconds instead of 15. There was also a software reset option in the app that is no longer available on newer firmware.
What changed with the second generation and later:
| Generation | Hold time change | Light sequence change | Other differences |
|---|---|---|---|
| First gen (2013-2015) | 20 seconds | Blue spin, then red on failure | micro-USB charging, no removable faceplate |
| Second gen (2016-2018) | 15 seconds | Blue spin, white flash on success | Removable faceplate, pogo-pin charger |
| Third gen (2019-2021) | 10 to 15 seconds | Faster LED response | Improved battery, better Wi-Fi radio |
| Fourth gen (2022-present) | 10 seconds | Instant LED feedback | Enhanced night vision, updated processor |
Why generation matters for your reset:
The older the model, the longer the hold time needed. If you have a first-gen device and you hold the button for only 10 seconds, nothing will happen. You will assume the reset failed and waste time troubleshooting a device that simply needed a longer press.
How to check your generation without disassembling:
Open the Ring app. Tap the device. Go to Device Health.
Look for the "Firmware" or "Hardware" line. The hardware version often includes a number that maps to the generation. For example, "1B" is first generation.
"2B" is second generation. "3B" is third generation.
One more difference on first-gen models: after a factory reset, first-generation devices sometimes fail to enter setup mode immediately. They may cycle through a reboot two or three times before the LED starts flashing. This is normal.
Wait up to two minutes after the reset before assuming it did not work.
Common Mistakes That Keep Your Reset From Working
We have seen the same errors repeated in feedback forums and support threads. Knowing them in advance saves you a lot of time. Here are the most common reset mistakes and how to avoid each one.
Mistake 1: Not holding the button long enough.
This is the number one cause of failed resets. Users press the button for 3 to 5 seconds and expect the light to change. On most Ring cameras, the minimum hold time is 10 seconds.
On some models it is 15 or 20 seconds. The camera needs that full duration to confirm the command.
Our advice: use a timer. Set your phone's stopwatch for the required seconds. Press the button and watch the timer.
Do not release until the timer hits the target.
Mistake 2: Using the wrong button.
Some Ring cameras have more than one button. The Video Doorbell Pro, for example, has a small button on the back for reset and a larger button on the front for the doorbell ring. Pressing the front button does nothing for a reset.
It just rings the chime. Always confirm you have located the correct recessed reset button.
Mistake 3: Forgetting to remove the camera from your Ring account first.
If you are resetting the camera because you want to give it away or sell it, you must remove it from your account before or immediately after the factory reset. If you skip this step, the new owner will see a "Device Already Linked" error when they try to set it up. They cannot complete the setup.
To remove a device from your account: open the Ring app. Select the device. Tap Device Settings.
Scroll to General Settings. Tap Remove This Device. Confirm the removal.
Mistake 4: Trying to reset with a low battery.
A factory reset consumes power. If your battery is below 10 percent, the reset may start but fail partway through. The camera may become unresponsive.
You then have a device that is stuck between states.
Charge the battery to at least 20 percent before attempting a hard reset. For wired models, confirm that the power supply is active. Check the breaker or transformer.
Mistake 5: Not waiting for the light sequence to complete.
After you release the reset button, the camera needs time to process. The light may spin for up to 30 seconds. Some users assume the reset failed during this window and press the button again.
That interrupts the process.
Let the camera finish its cycle. Wait for the light to change to its final state before touching the button again. This patience alone prevents many repeat attempts.
Mistake 6: Confusing setup mode with normal operation.
After a successful reset, the camera enters setup mode. In this mode, the light flashes white or blue. That is correct.
Some users see the flashing light and think the camera is working normally. They close the app. They miss the setup steps.
If you just performed a factory reset and see a flashing light, do not walk away. Open the app immediately and start the setup process. The camera stays in setup mode for about 15 minutes.
After that, it times out and goes dormant.
Mistake 7: Using the wrong Wi-Fi band.
Ring cameras only work on 2.4GHz networks. If your router broadcasts both 2.4GHz and 5GHz under one network name (band steering), the camera may connect to the wrong band. It will show as offline in the app.
To fix this, temporarily disable the 5GHz band on your router during setup. Or create a separate 2.4GHz-only network for your smart home devices. After the camera connects successfully, you can re-enable the 5GHz band.
Mistake 8: Not resetting after a firmware update failure.
If a firmware update interrupted partway through, the camera may act normally but never complete the update. The next time you try to use it, it freezes or disconnects. A soft reset will not fix this.
You need a factory reset to clear the corrupted firmware files.
Signs of a failed firmware update: the camera works for a few minutes then goes offline. The light behaves erratically. The app shows a "Updating Firmware" message that never completes.
When Resetting Doesn't Fix It – Try This Before Calling Support
Sometimes a factory reset is not enough. The camera may still refuse to connect, stay offline, or behave erratically. Before you call Ring support or request a replacement, try these deeper troubleshooting steps.
Step 1: Power cycle the camera twice.
Power cycling (soft reset) after a hard reset sometimes clears residual issues. Here is the specific sequence for battery models: remove the battery. Wait 30 seconds.
Reinsert it. Let the camera boot up. Wait for the light to show its status.
Then remove the battery again. Wait another 30 seconds. Reinsert it.
This double power cycle clears charge left in the camera's capacitors.
For wired models: flip the breaker off. Wait one minute. Flip it on.
Wait for the camera to boot. Then flip the breaker off again. Wait one minute.
Flip it back on.
Step 2: Check the power supply with a multimeter.
If the camera shows no lights at all after a reset, it may not be receiving power. This is common with wired devices. Use a multimeter to check the voltage at the wiring terminals.
Ring doorbells require 8 to 24 volts AC. Floodlight Cams require 110 to 240 volts AC.
If the voltage is below the minimum, your transformer may need upgrading. Ring's official specifications call for a 16-volt 20-amp transformer for most wired doorbells.
Step 3: Try a different phone or tablet.
The Ring app may have a conflict on your primary device. If you have an iPad, an old phone, or a family member's phone, install the Ring app on that device. Try the setup process from there.
This eliminates your phone's Bluetooth or Wi-Fi stack as the problem.
Step 4: Check for interference from other smart home devices.
Some smart home hubs, mesh network nodes, and Bluetooth devices can interfere with the Ring's temporary setup network. Temporarily turn off other smart home hubs (Alexa, Google Home, SmartThings) and any Bluetooth speakers or headphones near the camera. Then try the setup again.
Step 5: Update the Ring app.
An outdated app can cause setup failures. Go to your phone's app store. Check for Ring app updates.
Install any pending updates. Then retry the setup. Aggregate user feedback indicates that app version 5.60 or later resolves many setup bugs.
Step 6: Factory reset a second time using an alternative method.
Some Ring cameras have a second factory reset method that works when the physical button fails. For battery-powered models, you can remove the battery and hold the setup button while reinserting the battery. This forces a more aggressive reset.
The alternative method: remove the battery. Press and hold the reset button. While holding the button, reinsert the battery.
Continue holding the button for 15 seconds. Release. The camera should enter setup mode immediately.
Step 7: Check the physical reset button for damage.
The reset button is a small mechanical switch inside a recessed hole. If you have used a paperclip many times, you may have pushed the switch too far or damaged it. Inspect the button with a bright light.
If it looks recessed deeper than usual or feels mushy when pressed, the switch may be broken.
In that case, the alternative reset method (step 6 above) is your best option. If that also fails, the camera likely needs a hardware repair or replacement.
When to contact Ring support:
Our research suggests you should contact Ring support only after you have tried all the steps above. Support can run a diagnostic on your camera's serial number. They can check if the device is still under warranty.
They can also issue a replacement if the hardware is faulty.
Before you reach out, have this information ready:
- Your camera's model number and serial number.
- A description of what happens when you attempt the reset.
- The light sequence you see (or do not see).
- Your phone type and Ring app version.
- Whether you have tried the alternative reset method.
One last thing: aggregate user feedback indicates Ring's support team is generally helpful but slow. Response times average 24 to 48 hours. If your camera is critical for security, consider buying a replacement from a local retailer while you wait for a warranty resolution.
Frequently Asked Questions
How do I know which Ring camera model I own?
Open the Ring app. Tap Devices and select your camera. Go to Device Health.
The model name appears at the top of that screen. You can also find the model number printed on the back or bottom of the physical device.
How long do I hold the reset button on a Ring Doorbell?
Hold it for 10 seconds on battery-powered models (2nd Gen, 3, 3 Plus, 4). Hold it for 15 to 20 seconds on wired models (Pro, Elite, Wired). The light will change from spinning blue to flashing white when the reset is accepted.
What does a flashing blue light mean after a reset?
A flashing blue light after a reset means the camera has entered setup mode. It is waiting for you to connect through the Ring app. Open the app and follow the prompts to re-add the device to your account.
Can I reset a Ring camera without the app?
You cannot complete the re-setup without the app. The physical reset process does not require the app. But to connect the camera to your Wi-Fi and link it to your account, you must use the Ring app on a smartphone or tablet.
What happens if I reset my Ring camera and it still doesn't work?
Try the double power cycle method first. Then check the power supply with a multimeter. If the camera still shows no signs of life, the hardware may be faulty.
Contact Ring support with your model number and serial number.
Will a factory reset delete my saved videos?
A factory reset clears recordings stored locally on the device. It does not delete videos saved to your Ring account in the cloud. Those cloud recordings remain until you manually delete them or your subscription expires.