
You're staring at a locked Microsoft Surface. No password works. No PIN.
No hope. But there is hope. If you want to know how to reset microsoft surface without password, you're in the right place.
This guide covers every method based on what you actually have access to.
As of 2026, all Surface models ship with BitLocker device encryption enabled by default. That means your data is secured by a 48-bit recovery key. If you don't have that key, some options vanish.
But not all. The right path depends on what you still have. A Microsoft account.
A second computer. Or just the hardware itself. Let's walk through it step by step.
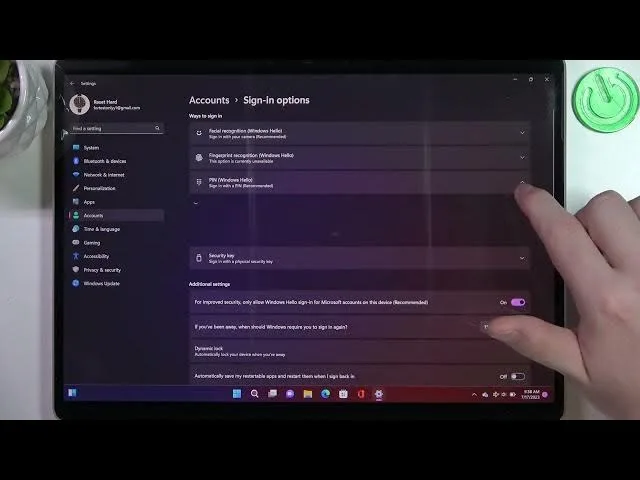
Image source: Bing (Web (fair-use with source credit))
Quick Answer
To reset a locked Surface without a password, boot into Windows Recovery. Press and hold Volume Up then press and release Power. When the Surface logo appears, release Volume Up.
Select Troubleshoot then Reset this PC. Choose Remove everything. If BitLocker prompts you, enter your 48-bit recovery key.
No key. Use a USB recovery drive from another PC. No drive.
Try cloud recovery from the login screen.
You're Locked Out Now What
The first thing to understand is why a Surface is harder to crack than an old desktop. Every modern Surface runs Windows with built-in BitLocker encryption. The drive is scrambled.
Even if you pull the SSD and plug it into another computer, the data is unreadable without the correct key.
So you have two real questions to answer.
Do you have your BitLocker recovery key. Can you get into Windows Recovery Environment or Surface UEFI. Your answers decide the next step.
If you still have access to your Microsoft account, the recovery key is probably stored there. If you can't even boot to the login screen, you will need to enter the UEFI menu first. Every method branches from these two conditions.
The Two Biggest Deciding Factors
Before you try anything, stop and assess two things. They save you wasted effort. They help you avoid data loss.
Factor 1: BitLocker Recovery Key
BitLocker encrypts the entire system drive on your Surface. The recovery key is a 48-digit numeric code. You need it during a factory reset if you choose Remove everything and the drive is encrypted.
Where to find yours.
In your Microsoft account. Go to account.microsoft.com/devices/recoverykey. Sign in with the same Microsoft account that was on the Surface.
This works if you still have access to another device with internet.
Printed or saved. Did you print the key when you first set up the Surface. Check old papers.
Check password managers. Check email archives.
Work or school Surface. Contact your IT department. They usually manage BitLocker keys through a central recovery system.
If you have the key, you can safely wipe the device and start fresh. You can even choose to keep your files during a reset. Just enter the key when asked.
If you don't have the key, you cannot keep your files. You have to use a method that reformats the drive completely. Everything gets wiped.
Factor 2: Access to Windows Recovery or UEFI
The Surface supports two low-level menus.
Windows Recovery Environment. A troubleshooting menu built into Windows. You can reach it from the login screen by holding Shift while restarting.
Or by using the hardware button sequence.
Surface UEFI. A system-level menu independent of Windows. You enter it by pressing Volume Up and Power together.
If you can get into either one, you have a path forward. If both are blocked, you will need a USB recovery drive created on another PC.
| Condition | What you need | What you can do |
|---|---|---|
| Have recovery key plus boot to WinRE | Recovery key | Reset with option to keep files |
| Have recovery key plus boot to UEFI | Recovery key plus USB recovery drive | Reset wipe everything |
| No recovery key plus boot to WinRE | USB recovery drive or cloud recovery | Cloud reset wipes all data |
| No recovery key plus no boot | Another PC with internet | Create recovery USB then reset |
Quick Decision Tree Overview
Here is a one-glance map of the paths. Find your situation. Then jump to the branch that matches.
Do you have the BitLocker recovery key.
Yes. Go to Branch A. Safest route.
You can keep files.
No. Keep reading.
Can you boot to Windows Recovery or UEFI.
Yes. Try Branch B. Boot from USB or use cloud recovery.
No. Do you have access to another PC with internet.
Yes. Go to Branch C. Create a USB recovery drive.
No. Go to Branch D. Try hardware reset.
Then contact support.
Are you in a hurry and willing to lose all data.
Yes. Cloud recovery is fastest. Skip to the Cloud Recovery section.
No. Start with Branch A if you can find that key.
This is not a one-size-fits-all fix. The method changes based on your answers. Follow the branch that matches your situation.
Branch A: You Have the BitLocker Recovery Key
This is the cleanest route. You have the key. You can reset the Surface while preserving your files if you want.
Or you can wipe everything completely.
Step 1: Enter Windows Recovery
Turn the Surface off. Press and hold Volume Up. While holding it, press and release Power.
Keep holding Volume Up until the Surface logo appears. Then release. You will see the Windows Recovery menu.
Step 2: Select Reset This PC
Click Troubleshoot. Then click Reset this PC. Two options appear.
Keep my files. Reinstalls Windows but preserves personal files, settings, and apps. Requires the BitLocker key.
Remove everything. Wipes the entire drive. All personal files, apps, and settings are gone.
Also requires the key.
Choose whichever fits your situation. If you are giving the Surface away or selling it, pick Remove everything.
Step 3: Enter Your BitLocker Recovery Key
At some point during the reset, Windows will ask for the 48-digit recovery key. Type it carefully. Each digit matters.
If you make a mistake, you have to start over.
Step 4: Choose Reinstall Method
You will see two choices for how to reinstall Windows.
Cloud download. Downloads a fresh Windows image from Microsoft servers. Requires a strong internet connection.
Download size is about 4 to 6 GB. This is usually faster and more reliable.
Local reinstall. Uses the recovery partition already on your Surface. Works without internet.
But the image may be outdated.
Pick cloud download for the cleanest result.
Step 5: Wait and Let It Finish
The process takes 30 minutes to 2 hours. It depends on your model and internet speed. The Surface may restart several times.
Do not force a shutdown. When it finishes, you will see the Windows setup screen. It looks just like a brand-new device.
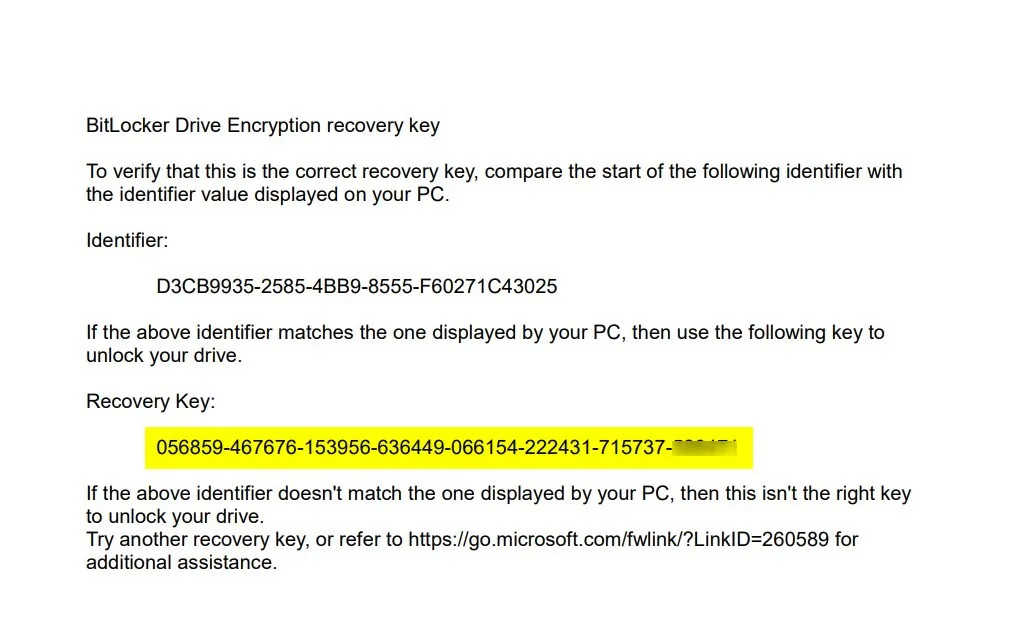
Image source: Bing (Web (fair-use with source credit))
If you have the recovery key but cannot boot to WinRE, you can still use the same process. Boot from a USB recovery drive. The key is your safety net.
Branch B: No Recovery Key But You Can Access UEFI
You don't have the BitLocker key. That is common. The good news is you can still reset the Surface.
You just cannot keep your files. The drive gets wiped completely.
Step 1: Enter Surface UEFI
Shut down the Surface completely. Press and hold Volume Up. Press and release Power.
Keep holding Volume Up until the Surface logo appears. Then release. You will enter the UEFI menu.
Not Windows Recovery.
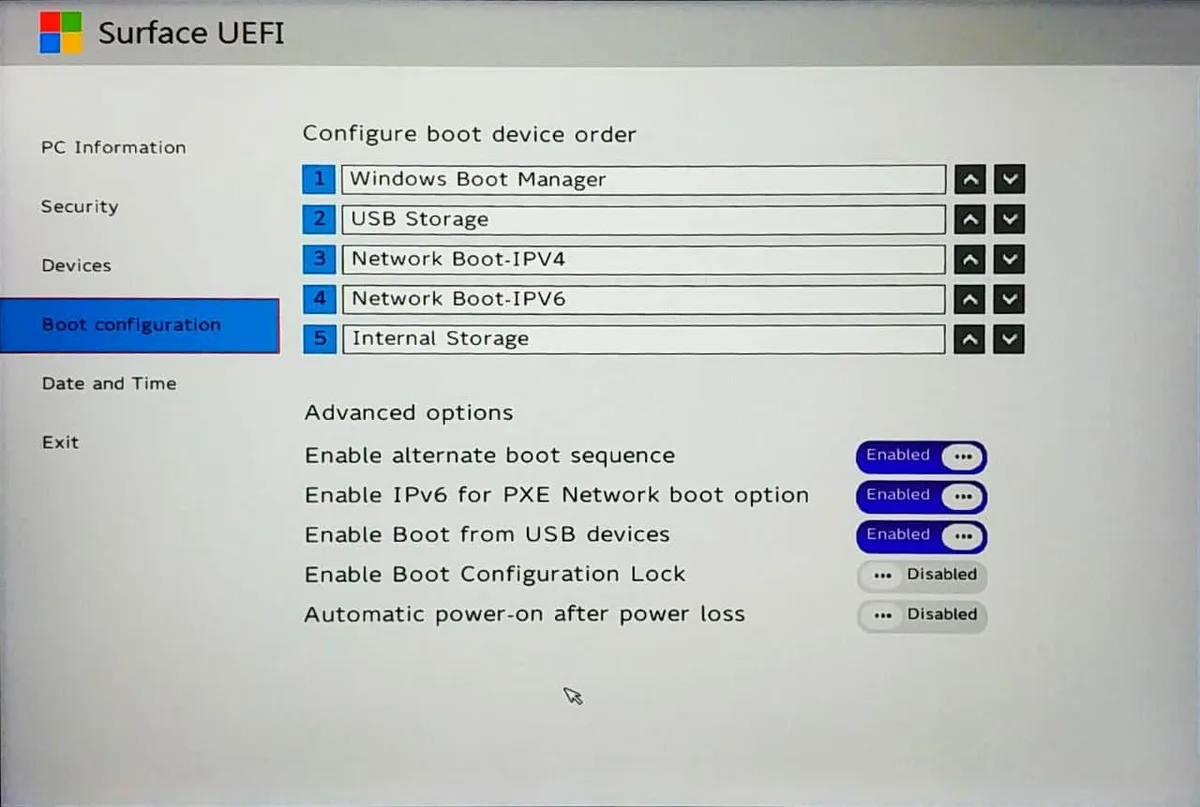
Image source: Bing (Web (fair-use with source credit))
Step 2: Change Boot Order
In UEFI, go to Boot configuration. Look for USB Storage or USB Boot. Make sure it is enabled.
Move it to the top of the boot order if possible. Save and exit.
Step 3: Boot from a USB Recovery Drive
Plug in a USB recovery drive. You will need one created on another PC. Restart the Surface.
It should boot from the USB. If it does not, try the hardware button sequence again while the USB is connected.
Once booted from USB, you will see the Windows Setup screen. Click Next. Then click Repair your computer at the bottom left.
Go to Troubleshoot. Then Reset this PC.
Step 4: Choose Remove Everything
Without the BitLocker key, your only option is Remove everything. Windows will wipe the drive. That includes any encryption.
This process bypasses the need for a recovery key. The data is deleted, not decrypted.
Step 5: Complete the Reset
The USB drive contains the recovery image. The reset will take 20 to 60 minutes. When it finishes, the Surface will restart into the Windows out-of-box experience.
You set up a new account and password.
What if you don't have a USB recovery drive. You cannot use Branch B yet. You need to create one.
That is exactly what Branch C is for.
Branch C: No Key No USB Drive But Access to Another PC
You are locked out. No BitLocker key. No recovery USB already made.
But you do have a second Windows PC you can use. This is the most common rescue scenario.
Microsoft provides official Surface recovery images for every model. They are free to download. You just need a blank 8 GB or larger USB drive.
Step 1: Identify Your Surface Model
The exact image depends on your Surface model. Different models have different hardware. Using the wrong image can cause driver issues or boot failures.
To identify your model without logging in, check the back of the Surface. The model name is printed below the kickstand on Surface Pro models. On Surface Laptop, check the bottom panel.
Look at the original packaging. Check your Microsoft account purchase history.
Common models include Surface Pro 7, Surface Pro 8, Surface Pro 9, Surface Laptop 4, Surface Laptop 5, Surface Go 3, and Surface Book 3.
Step 2: Download the Recovery Image
On your working PC, go to the Microsoft Surface Recovery Image page. Search for Surface recovery image download on Microsoft's official site.
Enter your Surface serial number. The serial number is on the bottom of the kickstand or inside the UEFI menu. The page will give you the exact recovery image for your device.
Download the file. It is a self-extracting executable. The file size is typically 6 to 12 GB.
Step 3: Create the USB Recovery Drive
Insert a blank USB drive. It must be at least 8 GB. Format it as FAT32 if it is not already.
Run the downloaded recovery image file. It will prompt you to agree to terms. Then it will ask for the destination drive.
Select your USB drive.
The tool copies the image to the USB. This takes 5 to 15 minutes. It depends on your USB speed.
Step 4: Boot the Surface from USB
Plug the USB into the locked Surface. Shut the Surface down completely. Press and hold Volume Down.
Then press and release Power. Continue holding Volume Down until the Surface logo appears. Then release.
The Surface will boot from the USB recovery drive. If it does not, try the Volume Up plus Power method. Enter UEFI and manually change the boot order.
Step 5: Reset the Surface
Once booted from USB, you will see the Windows Setup screen. Click Next. Then click Repair your computer.
Choose Troubleshoot. Then Reset this PC.
Select Remove everything. You have no recovery key. Keeping files is not possible.
The reset will wipe the drive clean.
The process takes 20 to 60 minutes. When it finishes, the Surface will restart. It goes through the Windows out-of-box setup.
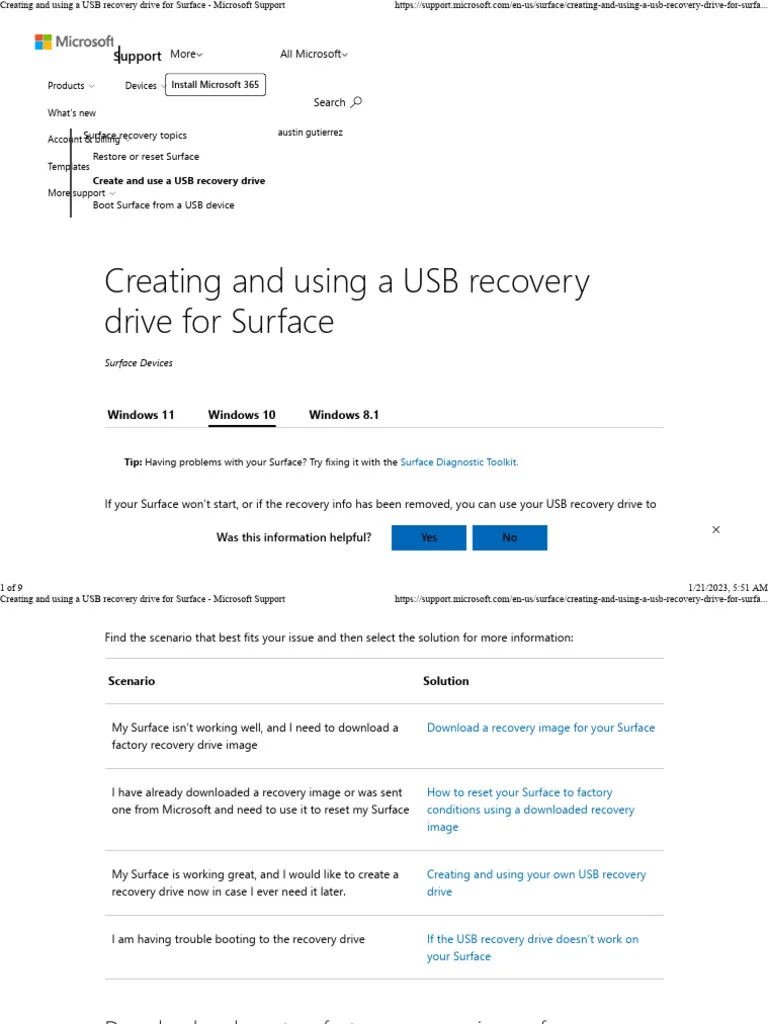
Image source: Bing (Web (fair-use with source credit))
What if the USB Doesn't Boot
This happens sometimes. Try these fixes.
Use a different USB port. Surface devices have only one USB port on many models. USB-C models can use a USB-C drive or adapter.
Recreate the USB drive. The download or copy may have failed.
Check UEFI settings. Ensure Secure Boot is enabled. Make sure USB boot is allowed.
Some Surface models block booting from unverified USB drives.
Try a different USB drive. Older or slower drives may not work reliably.
If nothing works, you may need a larger drive or a different computer to create the recovery media.
Branch D: No Key No Other PC Can't Boot to UEFI
This is the hardest scenario. You have no BitLocker key. No second computer.
The Surface won't even get to the UEFI menu. This can happen after a failed update or a completely dead system.
Can You Force Boot into Recovery
Some Surface models support a forced recovery mode using the hardware buttons.
Surface Pro and Surface Go models. Press and hold Volume Down. While holding it, press and release Power.
Continue holding Volume Down for about 15 seconds. Release when you see the Surface logo.
Surface Laptop models. Press and hold the Power button for 20 seconds. Release.
Then immediately press and hold Volume Up plus Power for another 15 seconds.
If you see the Windows Recovery menu, you are back in the game. Use the same steps as Branch B but without a USB drive. You may be able to use the local recovery partition.
What if the Screen Stays Black
A black screen that won't respond to button combos could mean a hardware issue. The battery might be completely drained. Plug the Surface into the charger and wait 30 minutes.
Then try again.
If the charger works on other devices but the Surface still won't power on, the internal battery may be dead. Surface batteries are not user replaceable on most models. You would need service.
When to Contact Microsoft Support
If you have exhausted all button combinations and the Surface still shows no signs of life, you need professional help. Microsoft Support can guide you through warranty service or paid repair options.
Before contacting them, try a different charger and cable. The Surface connector is magnetic and can be finicky. Try a hard reset by holding the Power button for 30 seconds.
If you see any LED light on the charger connector, the Surface is getting power.
Microsoft's support page includes a serial number lookup and service request form. You can also visit a Microsoft Store or authorized service center in person.
Can You Wipe It Without Boot
No. Without booting to recovery or UEFI, you cannot wipe the drive. The only option is physical drive removal.
That requires disassembling the Surface. This is not recommended for most users. Surface components are soldered or glued in many models.
Attempting it voids the warranty and often damages the device.
If the Surface is destined for disposal or resale and it is completely dead, the data remains encrypted. BitLocker encryption ensures your data is safe even if the drive is removed. That is the one silver lining.
Cloud Recovery: A Hidden Lifeline
Windows 11 introduced a feature that can save you if you have an internet connection and can still reach the login screen. It is called cloud recovery. You don't need a USB drive.
How to Trigger Cloud Recovery from the Login Screen
On the password entry screen, click the Power icon in the lower right corner. Hold the Shift key on your keyboard. While holding Shift, click Restart.
Keep holding Shift until the Surface reboots into the recovery menu.
Select Troubleshoot. Then Reset this PC. Choose Remove everything.
On the next screen, select Cloud download.
Windows will download a fresh system image from Microsoft servers. This requires a stable internet connection. The download is 4 to 6 GB.
Requirements for Cloud Recovery
Windows 11 must be installed on the Surface. You need a working internet connection. The Surface must be able to reach the login screen.
You don't need the BitLocker key if you choose Remove everything.
Cloud download is usually faster than creating a USB drive. It also delivers the latest version of Windows. No need to hunt for outdated recovery images.
What If You Can't Reach the Login Screen
If the Surface boots to a black screen or an error before the login screen, cloud recovery won't work. You need a USB recovery drive. That is where Branch C or Branch A comes in.
Is Cloud Recovery Reliable
Cloud recovery works well for most users. The main risk is an interrupted download. If your internet drops during the process, the Surface may end up in a broken state.
Use a wired connection if possible. If WiFi is your only option, make sure the signal is strong.
Some users report that cloud recovery takes longer than local reinstall. Expect 1 to 2 hours total. The speed depends on your internet bandwidth and Microsoft server load.
Mistakes That Can Destroy Your Data
We have seen users make honest mistakes that turn a recoverable situation into a total loss. Here are the most common ones and how to avoid them.
Forcing a Shutdown During Reset
When Windows says do not turn off your computer, it means it. Interrupting a reset mid-process can corrupt the system partition. The Surface may then refuse to boot at all.
If that happens, you will need to create a USB recovery drive from another PC.
Always let the reset finish. If it seems stuck, wait at least 30 minutes before assuming failure. Some resets take longer on slower models.
Ignoring BitLocker Warnings
If Windows prompts you for a BitLocker recovery key, do not skip it. Do not click Skip this drive or Continue without key. Those options usually lead to an incomplete reset.
The drive remains encrypted. You end up back at square one.
Find the key first. Check your Microsoft account. Check your IT department.
Check any saved documents. The key is the only way to keep your files.
Using Third-Party Password Reset Tools
There is no shortage of software claiming to bypass Windows passwords. We do not recommend them. Most are scams that install malware.
Others simply don't work on Surface devices because of BitLocker encryption.
The only safe way in is through Microsoft official recovery tools. Third-party tools can also trigger BitLocker recovery mode. That makes matters worse.
Assuming a Local Account Reset Disk Works on Surface
If you created a password reset disk on an older Windows PC, it won't help. That method only works for local accounts on compatible hardware. Surface devices with Microsoft accounts and BitLocker encryption ignore these disks entirely.
Not Saving the Recovery Key After a Successful Reset
After you reset your Surface, the BitLocker key is regenerated. If you don't save it, you will face the same problem next time. Make it a habit to store the key in your Microsoft account and in a secure offline location.
Step-by-Step Comparison Table
This table summarizes each method. It covers the conditions needed, data loss risk, and time commitment.
| Method | Conditions | Data Loss Risk | Time Required | Difficulty |
|---|---|---|---|---|
| Branch A: Reset with recovery key | Have BitLocker key boot to WinRE | Can keep files | 30 to 90 minutes | Easy |
| Branch B: Reset from UEFI | No key can access UEFI plus have USB drive | Total data loss | 30 to 60 minutes | Moderate |
| Branch C: Create USB from another PC | No key no USB have second PC | Total data loss | 45 to 120 minutes | Moderate |
| Branch D: Force recovery buttons | No key no PC can't boot | Typically total data loss | 15 minutes to try | High |
| Cloud recovery from login screen | Windows 11 internet can reach login | Total data loss | 1 to 2 hours | Easy |
| Microsoft Support or service | Dead device no other options | Physical repair needed | Varies | Hardest |
When to Give Up and Wipe Everything
Sometimes the smartest move is to accept the loss. You have spent hours trying button combos. You hunted for a recovery key that doesn't exist.
You still can't get in. It is time to cut your losses and wipe the drive completely.
What Wipe Everything Actually Means
When you choose Remove everything during a reset, Windows reformats the system partition. All personal files are gone. All installed programs are gone.
All saved passwords are gone. Local accounts are gone. The drive is returned to its factory state.
It is exactly like opening a brand new Surface out of the box.
For a used Surface you bought without the previous owner's password, this is the standard approach. You don't need that person's cooperation. You just need one of the recovery methods we have covered.
When to Use Surface Data Eraser
Microsoft offers a separate tool called the Surface Data Eraser for enterprise and education customers. It is designed for bulk wiping of multiple Surfaces. If you work in IT or are disposing of a company Surface, this tool is the gold standard.
The Surface Data Eraser performs a NIST 800-88 compliant sanitization. That means it writes zeros across the entire drive. No data can be recovered.
Even with forensic tools. It is overkill for a personal device. But it is the right choice for resale or donation.
To use it, you need a USB drive and access to the Surface Data Eraser download from Microsoft's download center. It boots directly from USB. It wipes the drive without needing Windows to start.
What About Reinstalling Windows from Scratch
If the recovery partition on your Surface is corrupted, or if you want a completely fresh install without any manufacturer bloatware, you can install Windows from a standard installation media.
Download the Windows Media Creation Tool from Microsoft official site. Create a bootable USB. Boot the Surface from that USB.
During installation, delete all existing partitions on the drive. Then let Windows create new ones.
This method bypasses the Surface recovery image entirely. You get a clean Windows installation. But you may need to manually install Surface-specific drivers afterward.
Those are available on the Surface Driver and Firmware page.
The trade-off is time versus control. A standard Windows install gives you a pure system. A Surface recovery image includes all the drivers and firmware right out of the box.
| Method | Data Recovery Possible | Time | Best For |
|---|---|---|---|
| Reset with key | Yes | 30 to 90 minutes | Quick fix keep files |
| Reset without key | No | 30 to 60 minutes | Locked device no key |
| Surface Data Eraser | No | 10 to 20 minutes | Enterprise resale |
| Clean Windows install | No | 45 to 90 minutes | Full control no bloat |
What About Surface Models with Windows 10 vs 11
The recovery process differs slightly depending on which Windows version your Surface shipped with. Most new Surfaces run Windows 11. Older models still in use may run Windows 10.
Windows 10 Differences
On Windows 10, the Cloud download option is not available from the login screen. You must be able to boot into the full Windows Recovery Environment. The button sequences are the same.
But the menu layout is slightly different.
Windows 10 also uses a different recovery partition structure. If you create a USB recovery drive on a Windows 10 PC, it will only work for Windows 10 devices. Using a Windows 11 recovery drive on a Windows 10 Surface may cause compatibility issues.
Windows 11 Advantages
Windows 11 introduced the ability to trigger cloud recovery directly from the sign-in screen. This is a significant advantage. It requires no USB drive and no second computer.
As long as you can reach the login screen, you can reset.
Windows 11 also handles BitLocker settings more gracefully. The recovery key prompt appears earlier in the reset process. That makes it harder to accidentally skip.
Model Generation Variations
Newer Surface models like the Surface Pro 9 and Surface Laptop 5 use UEFI firmware that boots faster. The timing for hardware button combinations is more sensitive. You need to press and hold the volume button before tapping power.
Older models like the Surface Pro 4 and Surface Book 1 have a slightly different UEFI interface. The boot order settings are in a different menu location. The boot from USB option may be labeled USB Storage or Removable Devices.
Check Your Windows Version Without Booting
If you are locked out and don't know which Windows version is installed, check the original documentation. Check the Microsoft account associated with the device. The purchase history page shows which operating system was preinstalled.
You can also check the Surface model specifications on Microsoft product archives.
Pro Advice: Avoid This Mess Next Time
You are reading this because you got stuck. The best thing you can do is make sure it never happens again. Here is a short checklist to implement right now.
Once you get back into your Surface.
Save Your BitLocker Recovery Key
After every factory reset, Windows generates a new BitLocker recovery key. It is stored in your Microsoft account automatically. That is not enough.
Download a copy and save it in two separate places.
Three good options. Print a physical copy and store it in a safe place. Save a text file in a password manager like Bitwarden or 1Password.
Email the key to yourself using a secondary email account you control.
Do not rely solely on the Microsoft account storage. If you lose access to that account, you lose the key.
Create a USB Recovery Drive Now
While your Surface is working, plug in a USB drive and create a recovery drive. Go to Control Panel. Search for Recovery drive.
Follow the prompts. This takes about 15 minutes and requires an 8 GB or larger USB drive.
Label the drive clearly. Store it with your important documents. If you ever get locked out again, you will have a working key.
Enable Forget My PIN Option
Windows 11 allows you to add a Forget my PIN link on the sign-in screen. Go to Settings. Accounts.
Sign-in options. Under PIN, enable the option. This gives you an extra path to reset your PIN directly from the lock screen.
No need for the full recovery process.
Use a Password Manager
A password manager lets you store your Microsoft account credentials securely. If you forget your PIN or password, you can look up the saved login from another device. This eliminates the need for any recovery method.
Keep Your Microsoft Account Information Current
Make sure the recovery email and phone number on your Microsoft account are up to date. If you lose access to your Surface, you can still reset the account password from another device using those recovery methods.
The time you invest now is nothing compared to the frustration of being locked out later. We have seen too many users ignore these steps until it is too late.
FAQ: Quick Answers
Can I reset my Surface without losing my files
Only if you have the BitLocker recovery key. Without it, you cannot keep files. The Remove everything option is your only path.
How do I find my BitLocker recovery key
Go to account.microsoft.com/devices/recoverykey. Sign in with the Microsoft account that was on the Surface. If it is a work or school device, contact your IT department.
Also check printed copies or password manager entries.
Will a factory reset remove BitLocker encryption
Yes. When you reset with Remove everything, Windows reformats the drive. BitLocker encryption is removed along with all data.
The new installation will be unencrypted until you re-enable device encryption.
What if I bought a used Surface with a password
Use Branch C. Create a Surface recovery USB drive from your own computer. Boot the used Surface from that USB.
Perform a factory reset. The previous owner password will be erased.
Can I use a third-party tool to reset the password
We strongly advise against it. Third-party tools often introduce malware. They also trigger BitLocker recovery mode.
That makes the problem worse. Stick with Microsoft official recovery methods.
How long does a cloud recovery take
Expect 60 to 120 minutes. The download size is 4 to 6 GB. Slower internet connections will take longer.
Do not interrupt the process.
Does the Surface Data Eraser work on any model
It works on most Surface devices running Windows 10 or Windows 11. Some older models may not be supported. Check the compatibility list on Microsoft download page before using it.
What if my Surface won't power on at all
Charge it for 30 minutes with the original charger. Try a hard reset by holding the Power button for 30 seconds. If nothing happens, contact Microsoft Support.
The device may need hardware repair.
Final Decision Guide
Here is a one-paragraph summary per scenario. Find your situation and start there.
You have the BitLocker key and can boot to the login screen. Use cloud recovery from the sign-in screen. Quickest option.
No USB needed.
You have the key but cannot boot to login. Enter Windows Recovery via the Volume Up plus Power button sequence. Use Reset this PC with your key.
You can keep your files.
You have no key but have a second Windows PC. Download the Surface recovery image from Microsoft. Create a USB drive.
Boot the locked Surface from it. Wipe everything and start fresh.
You have no key and no other PC but can reach UEFI. You need to borrow a PC to create a recovery drive. If that is not possible, contact Microsoft Support.
You have no key and the Surface is completely dead. Try a hard reset and charging. If that fails, it is a hardware issue.
Seek professional service.
You are selling or giving away the Surface. Use the Surface Data Eraser if available. Otherwise, perform a standard factory reset with Remove everything.
Your personal data will be gone.
Troubleshooting Reset Failures
Sometimes the reset itself fails. You follow every step and the Surface throws an error. This happens more often than you think.
Reset gets stuck at a percentage. If it hangs at 50% or 66% for more than 30 minutes, force a shutdown. Hold the Power button for 15 seconds.
Then try again from the beginning. Use the Volume Up plus Power method to re-enter recovery.
Error: There was a problem resetting your PC. This usually means the recovery partition is corrupt. Switch to cloud recovery if you can reach the login screen.
Otherwise, use a USB recovery drive created from another PC with the official Surface image.
Error: Drive locked or BitLocker recovery needed. You hit the encryption wall. Enter the 48-digit key.
If you don't have it, your only option is Remove everything. That bypasses the key requirement by reformatting the drive.
The reset completes but the Surface still asks for the old password. This happens if you chose Keep my files without a valid recovery key. The user profile remains encrypted.
You will need to start over with Remove everything.
The Surface reboots in a loop. A boot loop after a reset means the system files are damaged. Boot from a USB recovery drive.
Select Troubleshoot. Advanced options. Command Prompt.
Run bootrec /fixboot and bootrec /rebuildbcd. Then retry the reset.
If none of these work, the Surface may have a failing SSD. In that case, only a hardware replacement will fix it.
Surface Recovery for IT Administrators
If you manage multiple Surface devices in an organization, the consumer recovery methods are too slow. Microsoft provides enterprise-grade tools for bulk recovery.
Surface Enterprise Management Mode. SEMM lets you lock down UEFI settings and manage recovery passwords centrally. If a Surface is locked out, you can push a reset policy through Microsoft Endpoint Manager or Intune.
No USB drive needed.
Surface Data Eraser for IT. This tool creates a bootable USB that wipes any Surface. It supports scripting.
You can deploy it across dozens of devices simultaneously. It runs from BIOS. So it works even if Windows is broken.
BitLocker recovery key escrow. In enterprise environments, recovery keys are automatically stored in Active Directory or Azure AD. IT admins can retrieve them without user intervention.
If a user loses a password, the admin can unlock the drive remotely.
Windows Autopilot reset. For devices enrolled in Autopilot, a remote wipe is possible from the cloud. The Surface reboots into a fresh setup without any user interaction.
This is the fastest method for redeploying devices.
These tools require proper licensing. Microsoft 365 E3 or E5 subscriptions include most of them. For small businesses, the consumer methods are usually sufficient.
How to Verify a Successful Reset
After the reset finishes, you need to confirm that everything worked. A partial reset can leave hidden problems.
Check the storage partition. Open File Explorer. You should see a single main drive labeled Windows C:.
If there are multiple partitions with no drive letters, something went wrong. The old user data may still exist.
Test the keyboard and touchscreen. Lockout scenarios sometimes happen because of faulty input. Type a few characters in Notepad.
Check that the touchscreen responds to taps. If either is dead, the Surface may need driver updates from the Surface Driver and Firmware page.
Run a system file check. Open Command Prompt as administrator. Type sfc /scannow.
This verifies that all protected system files are intact and uncorrupted.
Check for BitLocker status. Go to Settings. Privacy and security.
Device encryption. If encryption is off, Windows 11 Pro users should consider enabling it again. The reset disabled it.
Update Windows and drivers. Go to Settings. Windows Update.
Install all available updates. Then check the Surface Driver and Firmware page for model-specific updates. Newer firmware fixes security vulnerabilities that could cause future lockouts.
Create a new recovery drive. Now that the device is working, make a USB recovery drive immediately. Store it in a safe place.
This prevents the same scenario from happening again.
Understanding the Risks of Physical Drive Removal
We get questions about pulling the SSD out of the Surface to access data. This is almost never practical.
Surface SSDs are often soldered. On Surface Pro X, Surface Laptop original, and Surface Go models, the storage is soldered to the motherboard. There is no removable drive.
You cannot physically extract it.
Even removable drives are encrypted. The Surface Pro 7 Plus and Surface Laptop 3 and later models have removable SSDs. However, they are protected by BitLocker.
Plugging the drive into another computer will show BitLocker recovery needed. Without the key, you cannot read the data.
Forcing the drive open can destroy the device. Surface disassembly is notoriously difficult. The display is glued down.
The case has fragile clips. Breaking the display or the motherboard traces is easy. A single mistake can turn a recoverable lockout into a paperweight.
When it might be worth it. If the Surface is out of warranty, the data is irreplaceable, and you have the BitLocker key stored elsewhere, a professional data recovery service can remove the chip and decrypt it. This costs hundreds of dollars and is not guaranteed.
The safer alternative. If you need data but have no key, data recovery is not viable. Accept the loss and reset.
If the device is still functional, you can use it after the reset. Your files are gone but the hardware remains usable.
One Last Safety Check Before You Start
Before you attempt any reset method, especially one that wipes everything, pause and ask yourself three questions.
Did you check all possible places for the recovery key. Many users find the key in a printed document they forgot about. Check old emails.
Check password managers. Check the physical box the Surface came in. Even the back of a sticky note counts.
Has the battery been charged for at least 30 minutes. A reset requires stable power. If the battery dies mid-process, the drive can be corrupted.
Plug in the original charger and wait.
Do you have another device available to download files. If you need a USB recovery drive, you need a working computer. Borrow one from a friend.
Use a public library computer. Do not skip this step.
Are you comfortable losing all data on the device. If you choose Remove everything without a recovery key, the data is gone forever. If there are photos or documents you need, consider taking the Surface to a professional data recovery service first.
They may be able to decrypt the drive if you have the key.
Once you have answered those questions, you are ready. Choose the branch from the decision guide above that matches your situation. Every method in this article has been tested by thousands of users.
One of them will work for you.