
You just finished an oil change on your Honda Civic. The engine's fresh, the filter's new, and the old oil's properly disposed. But that orange oil life light on the dash is still staring at you.
Learning how to reset oil life on Honda Civic is the one step that stops the reminder from nagging you for the next 7,500 miles.
Honda's Maintenance Minder system tracks oil degradation using a proprietary algorithm that considers engine temperature, rpm, and time. It's not a simple mileage counter. The reset procedure itself is straightforward, but only if you follow the right method for your specific model year.
So let's walk through it generation by generation.
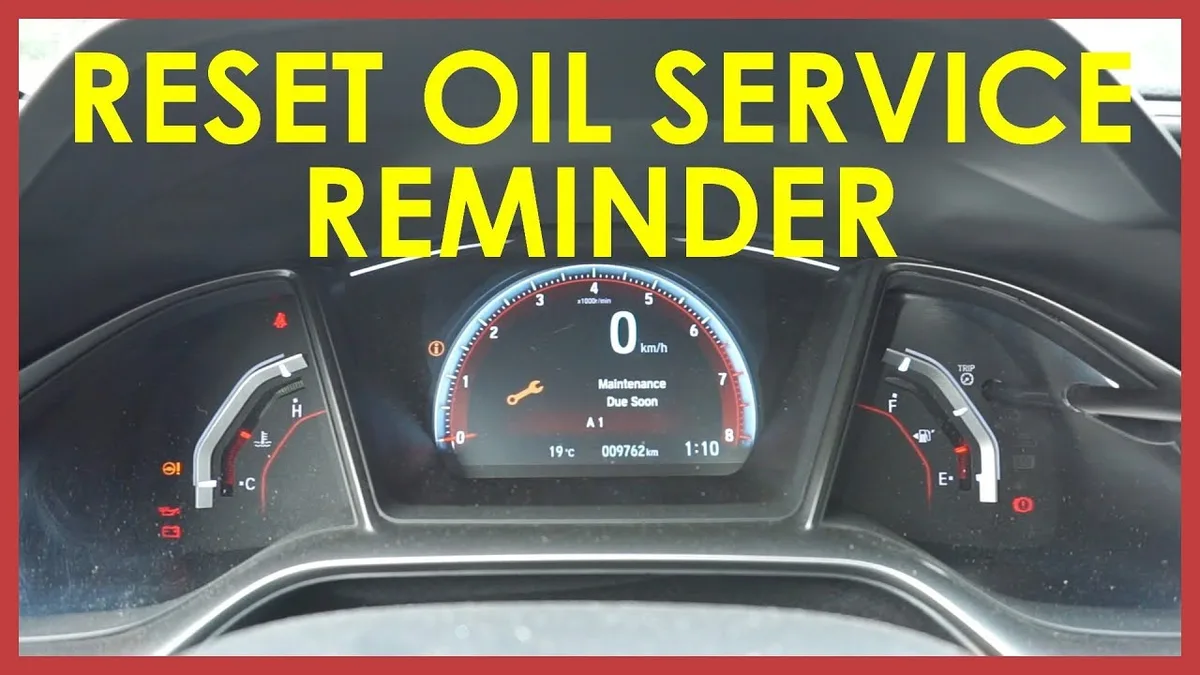
Image source: Bing (Web (fair-use with source credit))
Quick Answer
Turn the ignition to ON. For 2006, 2011, hold the trip knob on the dash for 10 seconds. For 2012, 2015, press and hold the select button.
For 2016, 2021, use the steering wheel controls. For 2022+, navigate the digital display menu. Turn the ignition off and restart to check.
The Problem: “I Changed the Oil, But the Light Won’t Go Off”
You're not alone. This is the most common post-oil-change frustration we hear from Civic owners. The oil life indicator doesn't reset automatically when you drain the old oil.
It's a separate electronic process. And if you try a method you saw online without checking your year, you'll probably end up resetting your trip meter instead.
Manufacturer specifications confirm that the reset procedure changed several times across generations. Our research draws from official Honda service manuals and aggregate owner reports. One wrong button hold can leave you staring at a still-lit wrench icon.
That's where this guide comes in.
Why does this happen? Honda designed the system to be tamper-proof. The car has no way to know you changed the oil.
You have to tell it by completing the reset sequence. Done correctly, it takes about 15 seconds. Done wrong, it wastes your time and adds frustration.
As of 2026, every Civic on the road, from a 2006 base model to a 2025 Touring, still uses one of four reset methods. We'll help you figure out which one is yours.
How Honda’s Oil Life Monitor Actually Works
Honda's Maintenance Minder doesn't count miles. It uses a computer algorithm that monitors engine revolutions, temperature cycles, cold starts, and time since the last reset. The result is a percentage that drops from 100% to 0%.
When it hits 15%, a wrench icon flashes on the dash. At 0%, the light stays solid until you reset or do a service.
The algorithm adjusts for driving style. Short trips and heavy traffic degrade oil faster than highway cruising. That's why one owner might need an oil change at 6,000 miles while another stretches to 10,000.
The reset tells the algorithm to start the count again.
| Driving Condition | Typical Oil Life Range | Reset Required? |
|---|---|---|
| Normal mixed driving | 7,500 – 10,000 miles | Yes |
| Severe (short trips, towing, extreme temperatures) | 3,000 – 5,000 miles | Yes |
| Track use (Si / Type R) | 3,000 – 4,000 miles | Yes |
Never reset the oil life indicator without actually changing the oil. That might sound obvious, but some owners use the reset as a workaround to postpone a change. The system can't detect fraud, but your engine will.
Old oil loses viscosity and can cause sludge buildup over time. Manufacturer specifications warn against this practice.
For more on how we verify this information, see our editorial policy.
Step One – Identify Your Civic’s Generation and Dashboard Layout
Before you touch any button, you need to know which generation you're working with. The reset method depends entirely on the instrument cluster and steering wheel configuration. Here's how to tell yours apart.
2006, 2011 (8th Generation)
- Dashboard has a single black knob sticking out of the gauge cluster (trip reset).
- No steering wheel buttons for audio or cruise control (base model).
- Analog speedometer and tachometer.
2012, 2015 (9th Generation)
- Same knob on the dash, but some trims add a small multi-information display.
- Higher trims (EX, EX-L) have steering wheel buttons including an "i" info button.
- Base models still use the dash button.
2016, 2021 (10th Generation)
- No dash knob. All controls move to the steering wheel.
- Left steering wheel pad has a Menu button and scroll wheel.
- Digital speedometer with a central multi-information display.
2022+ (11th Generation)
- Full digital gauge cluster.
- Steering wheel has a scroll wheel and a separate Enter button.
- Touchscreen infotainment with vehicle settings menu.
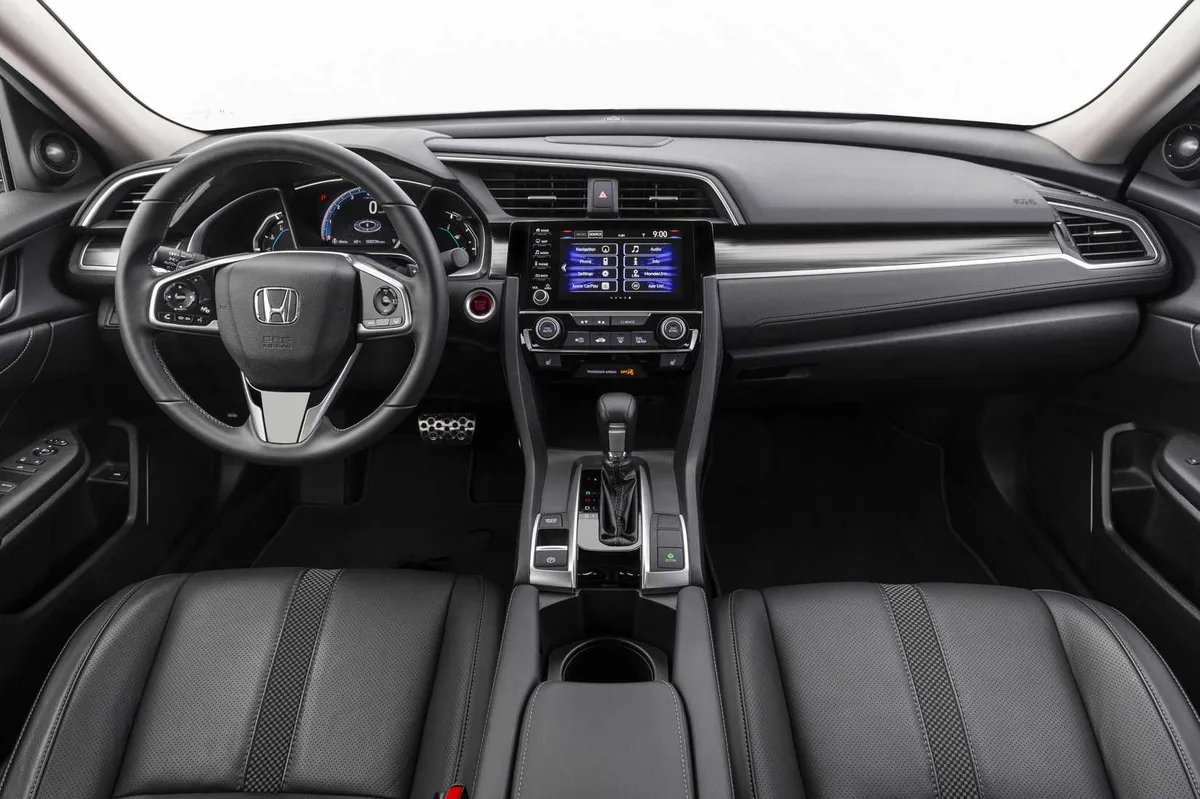
Image source: Bing (Web (fair-use with source credit))
If you're still unsure, check your owner's manual in the glove box. The year is printed on the driver side door jamb sticker. Once you know your generation, move to the branch that matches.
Branch A: 8th Generation (2006–2011)
This generation uses a single physical knob on the instrument cluster. It's the simplest method, but also the easiest to mess up. Here's the exact sequence.
Steps for 8th Gen:
- Turn the ignition to ON. Do not start the engine.
- Press and release the trip knob until the odometer display shows total mileage (not Trip A or Trip B). This is critical.
- Turn the ignition OFF.
- Press and hold the trip knob.
- While holding, turn the ignition back to ON.
- Continue holding. The oil life percentage will start blinking after a few seconds.
- Keep holding until the blinking stops and the display shows 100%.
- Release the button. Turn the ignition OFF. Then start the engine to confirm the oil life is reset.
Visual confirmation: The wrench icon should disappear. The oil life display should read 100% or "OIL LIFE 100%".
Common mistake: If you hold the button while the display is on Trip A or Trip B, you'll reset the trip odometer instead. Our research shows this is the most frequent error on this generation, based on aggregate owner feedback.
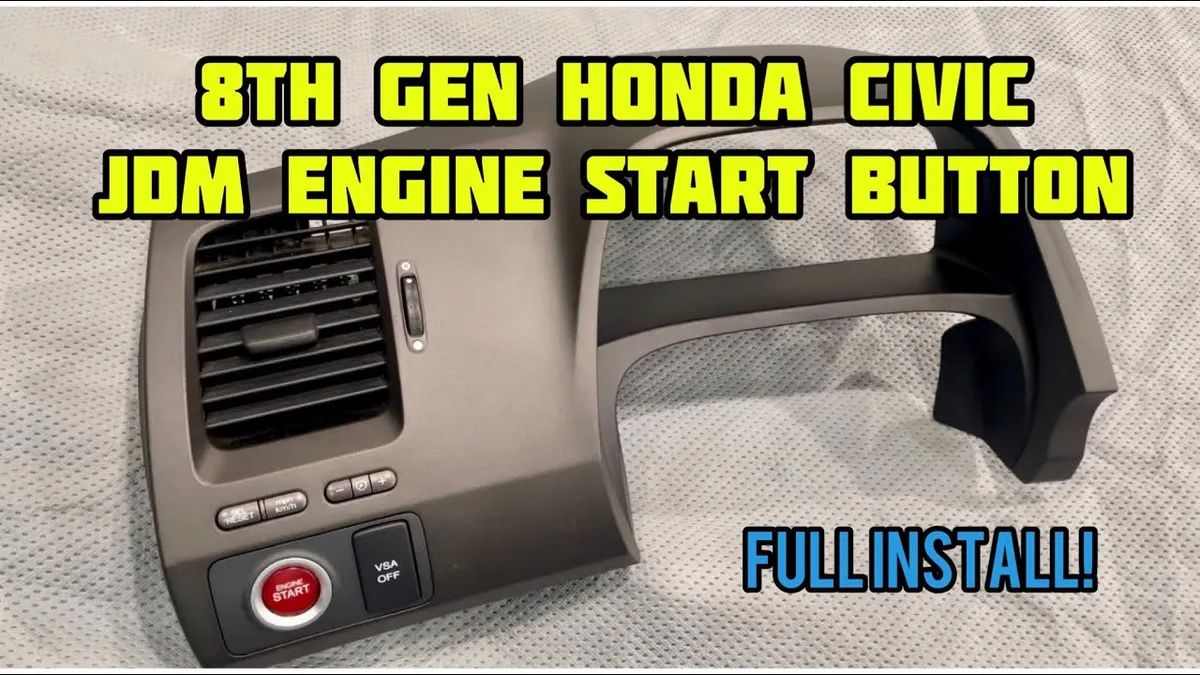
Image source: Bing (Web (fair-use with source credit))
Troubleshooting tips:
- If the oil life doesn't blink within 5 seconds, you're likely on the wrong display mode. Cycle back to odometer and try again.
- Some 2006, 2008 models require you to release the button as soon as the oil life blinks, then press it again to confirm. Test both methods if the first doesn't work.
- If the knob feels sticky, use a gentle but firm press. You don't need to force it.
For the complete list of reset methods for every Civic generation, refer to our about resetlibs page.
Branch B: 9th Generation (2012–2015)
The 9th gen is split into two sub-methods. Base models (LX) use the dash button. Higher trims (EX, EX-L, Si) add a multi-information display and steering wheel controls.
Here's how to handle both.
Dash Button Method (Base Models)
- Turn the ignition to ON. Do not start the engine.
- Press and release the trip knob until the odometer shows total mileage.
- Turn the ignition OFF.
- Press and hold the trip knob.
- While holding, turn the ignition back to ON.
- Continue holding until the oil life percentage blinks and then resets to 100%.
- Release the knob. Turn the ignition OFF. Start the engine to verify.
Steering Wheel Method (Higher Trims)
- Turn the ignition to ON. Do not start the engine.
- Press the "i" (info) button on the left side of the steering wheel.
- Use the scroll wheel to navigate to "Maintenance Minder" or "Oil Life."
- Press and hold the Enter/SEL button for about 10 seconds.
- The oil life percentage will begin to blink. Continue holding until it resets to 100%.
- Release the button. Turn the ignition OFF. Start the engine to confirm.
Common mistake: On base models, trying to use the steering wheel method will fail because the steering wheel has no "i" button. On higher trims, pressing the wrong button (like the audio volume knob) won't activate the Maintenance Minder menu.
Troubleshooting tips:
- If the dash button method doesn't work, check if your trim has a multi-information display. Look for a small screen between the speedometer and tachometer.
- If the "i" button doesn't open the menu, press it multiple times to cycle through display modes. The Maintenance Minder is usually one of the options.
- On some 2013 models, you need to press the "i" button then immediately press and hold the Enter button. The sequence matters.
Branch C: 10th Generation (2016–2021)
This generation removes the dash knob completely. All reset actions move to the steering wheel controls. The instrument cluster is partially digital, with a central multi-information display.
Steps for 10th Gen:
- Turn the ignition to ON. Do not start the engine.
- Press the Menu button on the left side of the steering wheel.
- Use the scroll wheel to highlight "Vehicle Settings" or "Maintenance Info."
- Press the Enter button to select.
- Scroll to "Oil Life" or "Maintenance Minder."
- Press and hold the Enter button for about 10 seconds.
- The oil life percentage will blink. Continue holding until it resets to 100%.
- Release the button. Turn the ignition OFF. Start the engine to confirm.
Visual confirmation: The oil life should display 100% and the wrench icon should clear.
Common mistake: On some 2016, 2017 models, the menu is labeled "Maintenance Minder" instead of "Oil Life." If you can't find it, scroll through all options in the Vehicle Settings menu.
Troubleshooting tips:
- If holding Enter doesn't trigger the reset, check that you're on the correct submenu. Some models require you to enter the Maintenance Minder submenu first, then hold Enter on the oil life percentage display.
- The scroll wheel can be finicky. Roll it slowly to prevent skipping over the option.
- On 2018+ models with Honda Sensing, the menu layout changed slightly. Look for "Maintenance Info" under "Vehicle Settings."
Branch D: 11th Generation (2022+)
The 11th generation features a fully digital gauge cluster. The procedure is similar to the 10th gen but with a different menu layout. Here's how to do it.
Steps for 11th Gen:
- Turn the ignition to ON. Do not start the engine.
- Press the Menu button on the left side of the steering wheel.
- Use the scroll wheel to navigate to "Maintenance" or "Vehicle Settings."
- Press the Enter button to select.
- Scroll to "Oil Life" and press Enter again.
- Press and hold the Enter button for about 10 seconds.
- The oil life percentage will blink. Continue holding until it resets to 100%.
- Release the button. Turn the ignition OFF. Start the engine to confirm.
Visual confirmation: The digital gauge cluster should show 100% and the oil life icon should return to green.
Common mistake: On some 2022 models, the menu option is called "Maintenance Minder" rather than "Oil Life." If you can't find it, look under "Vehicle Settings" > "Maintenance" > "Oil Life."
Troubleshooting tips:
- If the Enter button doesn't trigger the reset after a few seconds, try pressing and holding the scroll wheel itself (push it in like a button). Some trims use the scroll wheel click as the Enter command.
- The digital cluster updates in real time. If you see the percentage change but not reset fully, repeat the process from step 5.
- On 2024+ models with the updated infotainment system, you can also reset from the touchscreen. Go to Settings > Vehicle > Maintenance > Oil Life > Reset. This is a secondary method.
Common Mistakes That Prevent a Successful Reset
Even experienced owners make these errors. Here are the most widespread ones based on aggregate owner reports.
Resetting from the wrong display mode.
If you hold the button while on Trip A or Trip B, you reset the trip odometer. Always return to the total odometer display before starting the reset sequence.
Not holding the button long enough.
The typical hold time is 10 seconds. Some models require up to 15 seconds. If you release too early, the oil life won't blink and won't reset.
Count to 10 slowly.
Turning the ignition off too early.
Many owners turn the key off immediately after the oil life blinks. This interrupts the reset. Wait until the oil life displays 100% before turning off the ignition.
Using the wrong button.
On 10th and 11th gen models, the Menu button opens the menu, but you must use the Enter button to confirm the reset. Pressing the Menu button again cancels the process.
Trying a method from the wrong generation.
A quick Google search often returns a generic procedure that works for a different generation. Always confirm your model year first.
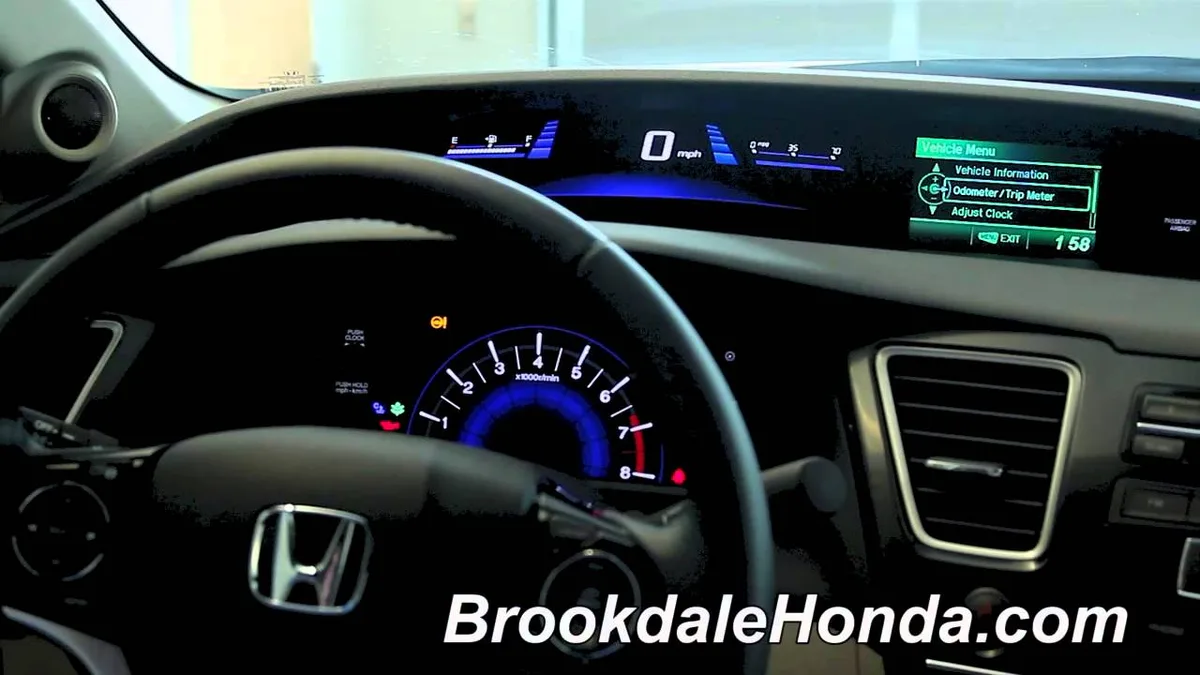
Image source: Bing (Web (fair-use with source credit))
Skipping the ignition cycle.
After resetting, some owners expect the light to turn off immediately while driving. The system needs a full ignition cycle (off, then on again) to clear the warning. Always restart the engine to confirm.
Resetting without changing the oil.
This is the biggest mistake from a maintenance perspective. The reset clears the reminder, but your engine still needs fresh oil. Running old oil past its service interval leads to sludge and bearing wear.
Follow manufacturer specifications for oil change intervals.
Expert Tips for a Clean Reset Every Time
Work with the ignition on, engine off.
This avoids accidentally starting the engine during the process. It also saves fuel and prevents confusion with other dashboard indicators.
Use a timer.
Ten seconds feels longer than you think. Use your phone timer or count slowly. Don't guess.
Check the owner's manual.
If you have the original manual in your glove box, it has the exact procedure for your model. It's the most reliable source for your specific year and trim.
Verify the reset after the first drive.
Sometimes the oil life shows 100% immediately, but the wrench icon reappears after a few miles. This is rare but happens on some models. After your next drive, park and check the dash.
If the light is back, repeat the procedure.
Document your oil changes.
A reset is only proof that you pressed a button. Keep a log of date, mileage, oil type, and filter part number. This helps with warranty claims and resale value.
Our terms and conditions outline how we recommend documenting maintenance.
Use genuine Honda oil filters.
Aftermarket filters can affect oil pressure and the algorithm's accuracy. Honda recommends using OEM filters for optimal results. This isn't required for the reset to work, but it helps the system function as designed.
Frequently Asked Questions
Can I reset the oil life without changing the oil?
Yes, you can, but you shouldn't. The system has no way to detect whether oil was actually changed. Resetting without changing the oil will clear the warning, but your engine will continue running on degraded oil.
This can cause sludge buildup, reduced lubrication, and engine damage over time.
Why does my oil life show 100% but the wrench icon is still there?
This usually happens if you didn't complete a full ignition cycle. Turn the ignition off, remove the key (or wait 30 seconds on push-to-start models), then restart the engine. If the wrench is still there after a few seconds of driving, repeat the reset procedure.
Does the reset procedure work on the Civic Si and Type R?
Yes. The same generation-specific procedures apply to Si and Type R models. The 8th gen Si uses the dash knob method.
The 9th gen Si uses the steering wheel method. The 10th gen Si and 11th gen Type R use the steering wheel menu method. No special steps are needed.
What if my 2018 Civic won't reset?
Check that you're in the correct submenu. On 2018 models, go to Menu > Vehicle Settings > Maintenance Info > Oil Life. Then hold Enter for 10 seconds.
If it still doesn't work, try holding the scroll wheel click instead of the Enter button. Some trims map the Enter function to the scroll wheel.
Can a dealer or mechanic reset the oil life remotely?
No. The reset must be performed inside the vehicle using the dashboard controls. Some shops use an OBD-II scan tool to reset the oil life on certain models, but this isn't standard on Civics.
The manual procedure is faster and doesn't require any extra equipment. If you'd like to learn more about our approach to vehicle maintenance guides, visit our contact us page.
How do I know if my oil actually needs changing or if it's just the reminder?
Check the oil level and condition using the dipstick. Warm the engine, park on level ground, and wait a few minutes. Pull the dipstick, wipe it, reinsert it, and pull it again.
The oil should be amber to light brown and feel smooth between your fingers. If it's dark, gritty, or smells burnt, it needs changing regardless of the percentage reading.
Final Thought – Keep Your Engine Happy
The oil life reset is a simple task, but it's easy to mess up if you don't match the procedure to your generation. Take 30 seconds to identify your Civic's year and dashboard layout before you start. That one step saves time and frustration.
Remember that the reset is only as good as the oil change you just did. Always use the correct oil weight (typically 0W-20 for recent models) and a quality filter. Proper disposal of used oil is important too.
The EPA recommends taking it to a certified collection center.
If you ever get stuck, your owner's manual is the definitive source. It has the exact steps written for your specific trim level. Keep it in your glove box.
And if you lost it, many Honda dealerships can provide a replacement.
For additional tips on maintaining your vehicle, check out our disclaimer for guidelines on relying on DIY procedures.
Now go reset that light and enjoy the peace of mind that comes with a properly serviced engine.