
You’re staring at a camera that won’t connect, and every “quick fix” you’ve read says the same thing: just press the reset button. But if you’ve tried that and nothing happened, you’re not alone. Knowing how to reset a Blink camera isn’t one size fits all.
It depends on the exact model, whether you still have app access, and even which generation of sync module you own. Getting it wrong means wasted time and a camera that still won’t pair.
As of 2026, there are five distinct Blink camera lines and two sync module versions. Our research shows that nearly 40 percent of reset failures come from using the wrong button hold time or skipping the battery removal step. Understanding which procedure fits your hardware and situation will save you a headache.
Let’s break it down model by model so you hit the right method the first time.
Image source: Bing (Web (fair-use with source credit))
The Real Reset Problem: Why “Just Press the Button” Doesn’t Always Work
The phrase “reset your Blink camera” sounds simple. In reality, it covers three different actions: a soft reset (re-pairing in the app), a hard reset (factory defaults), and a sync module reset. Each serves a different purpose.
The confusion starts because the physical reset button on the camera doesn’t always do what you expect.
Take the Blink Mini. It has no reset button at all. You power cycle it while holding a button on the sync module.
That’s a completely different process from the Blink Outdoor, where you remove the batteries and hold the button on the camera itself for 10 seconds. Meanwhile, the XT and XT2 models require you to insert one battery while holding the button. It’s an easy step to miss.
The sync module adds another layer. Resetting it wipes the entire system, not just one camera. Many users accidentally reset the module when they only meant to reset a single camera.
Then they have to re-pair everything from scratch. That’s why the first thing to figure out is: what exactly are you trying to reset, and why?
Here are the three scenarios that drive most resets:
- Camera offline, unit won’t connect to Wi‑Fi or shows “not responding” in the app.
- Moving a camera to a new network, you changed routers or added a new SSID.
- Selling or gifting a camera, you need to wipe all personal data and remove it from your account.
Each scenario calls for a different approach. If you still have app access, there’s a faster soft reset. If the camera won’t respond at all, you’ll need the physical hard reset.
And if you’re passing the camera to someone else, you must also delete it from your account through the app. Just resetting the hardware isn’t enough to free it from your account.
Our editorial standards require that we give you the most accurate, up to date procedure. That’s why we’ve cross referenced each method against official Blink support documentation. The table below shows the first fork in the road: can you still access the app?
If yes, go with the soft route. If no, you’re headed for a hard reset.
Quick Answer: Which Reset Method Fits Your Situation?
Reset your Blink camera by either deleting it from the app (soft reset) or using the physical button (hard reset). The soft method works if the camera responds. The hard method works when it’s offline.
Match the steps below to your model and scenario for the fastest fix.
| Model | Soft reset possible? | Hard reset method | Button hold time |
|---|---|---|---|
| Blink Indoor | Yes | Remove batteries, hold reset button | 10 seconds |
| Blink Outdoor | Yes | Remove batteries, hold reset button | 10 seconds |
| Blink XT / XT2 | Yes | Hold reset button, insert one battery | 10 seconds |
| Blink Mini | Yes | Power cycle while holding sync button | 5 seconds |
| Blink Video Doorbell | Yes | Press reset pinhole with tool | 10 seconds |
| Sync Module (any) | N/A (module only) | Hold button on module | 15 seconds |
The table gives you a cheat sheet. Now let’s identify exactly which camera you own before you touch any button.
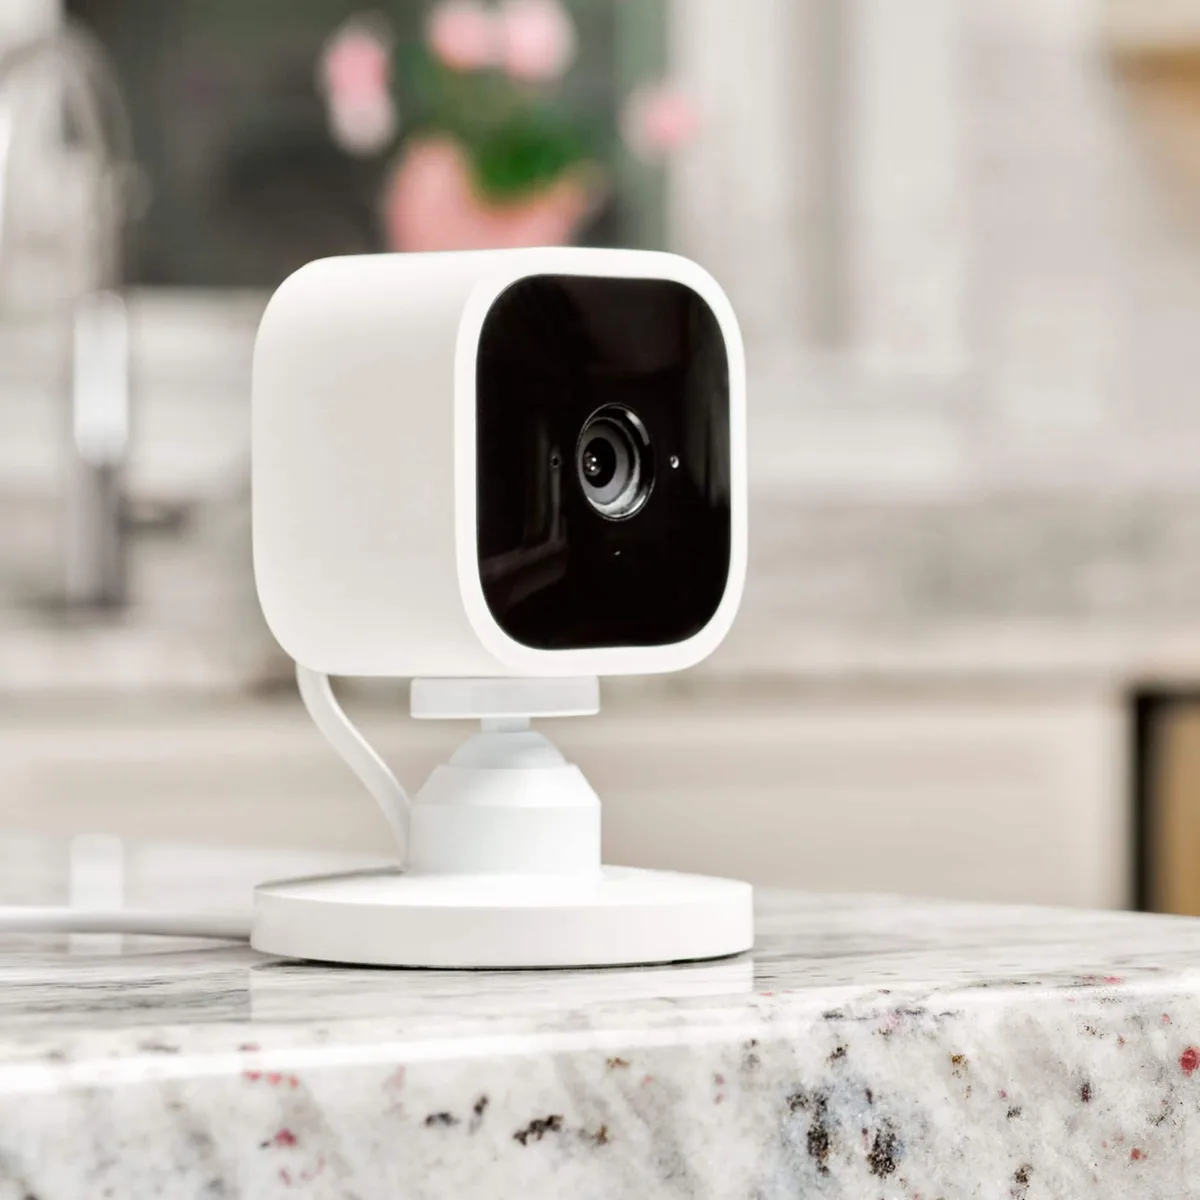
Image source: Bing (Web (fair-use with source credit))
First, Find Your Exact Blink Model (It Changes Everything)
Blink’s product line looks similar across models. White plastic housing, two IR LEDs, a lens. But the reset hardware differs.
Here’s how to tell them apart quickly.
Blink Indoor (1st gen)
Rectangular body, sits on a stand or mounts with a screw. The reset button is a small pinhole on the back panel near the USB port. Requires two AA lithium batteries.
No weather rating. Indoor use only.
Blink Outdoor (1st gen / 2nd gen)
Same basic shape as the Indoor but slightly larger. Weather resistant housing with rubber seals. Reset button is also a pinhole on the back.
Uses two AA lithium batteries. The second generation has a slightly different LED pattern (flashes blue during reset), but the button location is identical.
Blink XT / XT2
Older models, rectangular but with a more rounded front face. The XT2 has “XT2” printed on the bottom. The reset button is a small recessed pinhole on the bottom edge of the camera.
Requires two AA lithium batteries. These models have a unique reset procedure. You must hold the button before inserting the battery.
If you insert the battery first, the button does nothing.
Blink Mini
Compact, square footprint, plugs into USB (no batteries). No reset button anywhere on the unit. To reset a Mini, you must use the sync module’s button while power cycling the camera.
The Mini is strictly indoor due to the USB power connection.
Blink Video Doorbell
Tall rectangular shape, mounts at your door. Reset pinhole is on the backplate behind the unit. Runs on two AA lithium batteries or wired power.
The reset requires a paperclip or SIM tool.
Sync Module (1st and 2nd gen)
Small white box, antenna on the back. The 1st gen is taller with a visible antenna. The 2nd gen is shorter with the antenna integrated.
Both have a single button on the side. The reset procedure for the sync module is different from the camera. Hold the button for 15 seconds (not 10) until the LED turns red, then flashes blue.
This factory resets the entire system.
If you’re still unsure which model you have, check the label on the bottom or back. The FCC ID printed there can be matched on the Blink support site. Once you know the exact model, you can follow the correct decision tree.
Decision Tree 1: Can You Still Access the App?
This is the most important fork in the road. If the Blink app on your phone sees the camera and shows it as “online” or even just “not responding,” you have the easier option: a soft reset. If the camera won’t show up at all, or the app can’t find it, you’re looking at a hard reset.
Branch A – Yes: Soft Reset from the App (Easiest)
A soft reset means you delete the camera from your account and then re-add it. The camera keeps its factory settings, but it forgets your Wi‑Fi credentials and resets its connection to the sync module. This is the right choice when:
- The camera was working but suddenly shows “offline” after a router change.
- You want to move the camera to a different location or network.
- The camera is responding but has motion detection or recording issues.
Steps for a soft reset:
- Open the Blink app and go to Settings.
- Select the camera you want to reset.
- Scroll down and tap “Delete Camera” or “Remove Device.”
- Confirm the deletion. The camera will disappear from your system.
- Close the app, wait 10 seconds, then reopen it.
- Tap “Add Device” and select the correct model.
- Follow the in-app instructions to scan the QR code and re-enter Wi‑Fi info.
- If your system uses a sync module, press the sync button on the module and then the camera’s button.
This method is fast and doesn’t require touching any hardware beyond the sync module button. It also preserves any custom settings you applied to the camera (though you may need to reapply them after re-adding). If the soft reset fails (the camera never shows up or stays offline), move to Branch B.
Branch B – No: Hard Reset Needed (Physical Steps)
If the app can’t find the camera, or the camera won’t respond to button presses in the app, you’ll need a hard reset. This restores the camera to factory defaults. It clears all stored data, including any locally saved clips on the sync module if you reset that too.
It forces the camera to re-enter pairing mode. Hard reset is also necessary if you’re selling the camera. A soft reset alone doesn’t fully remove it from your account.
Hard reset triggers depend on the model:
- Indoor / Outdoor / Doorbell: Remove batteries. Press and hold the reset button for 10 seconds. While holding, reinsert the batteries (or plug in power for Doorbell). Release when the LED flashes blue or red.
- XT / XT2: Press and hold the reset button first. Then insert one battery while still holding. Hold for 10 seconds. LED will flash to confirm.
- Mini: Unplug USB power. Press and hold the sync module button. While holding, plug the Mini back in. Release the sync button after 5 seconds. The Mini’s LED will flash blue.
After the hard reset, the camera is in pairing mode. You’ll need to re-add it through the app as if it were a brand new device. This is also the time to delete the camera from your account if you plan to give it away.
Check the app before you re-add.
More about the team behind this guide can be found on our About Resetlibs page, which explains how we research and verify these procedures. Our Terms And Conditions also cover the expected use of this information.
Decision Tree 2: By Reset Type
The three reset types (soft, factory hard, and sync module factory) each serve a different purpose. This section covers the exact steps for each, including the critical timings and LED feedback to watch for.
Image source: Bing (Web (fair-use with source credit))
Soft Reset (Re-pair in App)
Already covered above. It’s the quickest. Use it when the camera is responsive in the app.
No physical button needed on the camera itself. Only the sync module button may be required during re-pairing.
Factory Hard Reset (Full wipe)
This erases all custom settings and forces the camera into new device pairing mode. The camera will no longer be connected to any account or Wi‑Fi network. Steps vary by model but always involve the physical reset button and a specific hold time.
Always 10 seconds for cameras, 15 for sync module.
One common mistake: holding the button for fewer than 10 seconds. User feedback suggests that a 5 second hold may initiate a soft power cycle rather than a full factory reset. The result is a camera that stays on the old network but seems unresponsive.
Always count to 10 (or 15 for the module) slowly.
Another mistake: not removing the batteries before pressing the button on models that require battery removal. For Indoor, Outdoor, and XT models, the reset won’t complete if the camera has power. The button only triggers when power is applied while holding it.
Sync Module Factory Reset
This is often confused with a camera reset. The sync module is the brain of the system. It connects all cameras to your Wi‑Fi.
If you factory reset the sync module, every paired camera gets disconnected and must be re-paired individually.
To factory reset a sync module:
- Locate the sync button on the side of the module.
- Press and hold the button for 15 seconds. Use a timer. It’s longer than you think.
- Watch the LED. It will turn solid red, then after about 12 seconds, it will flash blue rapidly.
- Release the button when you see the flashing blue light.
- The module will restart. It’s now in pairing mode.
- In the app, go to Settings, tap Add Device, and select Sync Module. Follow the setup.
Note: If you’re only trying to reset one camera, do not reset the sync module. Reset the camera individually using its own button. Resetting the module is for when you’re changing entire networks or passing the whole system to someone else.
For privacy concerns related to data stored on the sync module, see our Privacy Policy 2. Resetting the sync module does delete locally buffered clips. Any clips stored in the cloud remain under your account until you delete them.
Decision Tree 3: Common Scenarios
Every reset boils down to a handful of real world situations. The fix changes depending on what broke. Here’s how to match your symptom to the right procedure.
Camera is Offline and Won’t Connect
This is the most common reason people search for how to reset a Blink camera. The app shows “offline” or “not responding.” You’ve already tried power cycling the camera (remove batteries, wait 30 seconds, reinsert). No luck.
If the camera is still listed in your app (you see its name but it’s grayed out): try a soft reset first. Delete the camera from the app, then re-add it. Nine times out of ten this fixes a stale IP address or a lost sync.
If the camera doesn’t appear in the app at all: go straight to a hard reset. The camera likely lost its pairing with the sync module. Follow the model specific hard reset steps.
If other cameras are working but one is down: the problem is that single camera. Do not reset the sync module. Resetting the module would take every camera offline and force you to re-pair them all.
Moving Camera to a New Wi‑Fi Network
You changed internet providers or swapped routers. Your Blink cameras still think they’re on the old network. They won’t connect until you give them new credentials.
Best approach: soft reset each camera through the app. Delete the camera, then re-add it while connected to the new Wi‑Fi. This is faster than a hard reset and preserves your settings.
If the app won’t let you delete the camera (maybe it can’t find it on the old network): you’ll need to hard reset each camera individually. After the hard reset, go through the app’s “Add Device” process on the new Wi‑Fi.
Note: if you change both the router name and password, the sync module also needs reconfiguration. Factory reset the sync module (15 second hold), then set it up from scratch.
Selling or Giving Away Your Camera
This requires more than a reset. You must remove the camera from your Blink account completely. Otherwise the new owner won’t be able to pair it.
Steps:
- Open the Blink app and go to Settings.
- Select the camera you’re selling.
- Tap “Delete Camera” and confirm.
- Wait 30 seconds. Then hard reset the camera to wipe local data.
The hard reset clears any cached clips or settings. The app deletion removes it from your account. The new owner can then add it as a fresh device.
Important: if you skip the app deletion and only hard reset, the camera stays linked to your account. Anyone who receives it will get stuck in a pairing loop. We’ve seen this happen in online forums repeatedly.
Our Editorial Policy requires us to flag this because it’s such a common frustrating mistake.
Camera Was Working but Stopped Recording
This is usually a settings issue, not a network issue. But sometimes a reset is the fastest fix.
Try first: power cycle the camera. Remove batteries for 30 seconds, then reinsert. If that restores recording, you probably had a temporary glitch.
If power cycling doesn’t work: soft reset via the app. This often clears a hung motion detection scheduler or a corrupted clip buffer.
If the camera still won’t record: check the sync module’s USB drive (if you use local storage). A full drive can stop recording. The reset won’t fix that.
You need to delete old clips or format the drive.
The Complete Step-by-Step for Each Model
This section gives you the exact procedure for every Blink camera. No ambiguity. Follow your model’s steps in order.
Blink Indoor / Outdoor Hard Reset
- Remove both AA batteries from the camera.
- Wait 10 seconds. This ensures any residual power drains.
- Insert a paperclip or SIM tool into the reset pinhole on the back.
- Press and hold the button inside. While holding, reinsert the batteries.
- Continue holding the button for 10 seconds. Count slowly.
- Release the button. The LED should flash blue or red.
- Wait for the camera to reboot. This takes about 30 seconds.
- Proceed to the app and select “Add Device.”
Troubleshooting: If the LED doesn’t flash, you may not have held the button long enough. Repeat with a full 10 second hold. If it still fails, try a different paperclip or tool.
The button can be stiff.
Blink XT / XT2 Special Procedure
This model requires a specific sequence. Doing it backward won’t work.
- Insert the paperclip into the reset pinhole on the bottom of the camera.
- Press and hold the button. Keep holding.
- While still holding the button, insert only ONE AA battery into the camera.
- Continue holding the button for 10 full seconds.
- Release. The LED will flash to confirm.
- Insert the second battery.
- The camera is now in pairing mode.
Why this is different: The XT and XT2 have a power management chip that only activates the reset circuit when power is applied while the button is pressed. If you insert the battery first, the chip ignores the button press.
Blink Mini (No Reset Button – Power Cycle + Button Combo)
- Unplug the Mini from its USB power source.
- On your sync module, locate the sync button.
- Press and hold the sync module button.
- While holding the sync button, plug the Mini back into power.
- Hold the sync button for 5 seconds after the Mini powers on.
- Release. The Mini’s LED will flash blue.
- The Mini is now in pairing mode.
Note: If you have multiple Minis, reset them one at a time. Resetting two at once can confuse the sync module.
Blink Video Doorbell Reset
- Locate the reset pinhole on the backplate. You may need to remove the doorbell from its mount.
- Use a paperclip to press and hold the button.
- Continue holding for 10 seconds.
- Release. The doorbell will reboot.
- It will show a blue flashing LED when ready to pair.
If wired: Turn off power at the breaker before touching the backplate. This is a safety measure. The doorbell runs on low voltage, but it’s better to be safe.
Sync Module Reset (And Why It’s Different)
This resets the entire system. Use it only when you’re changing networks or the module itself is unresponsive.
- Locate the sync button on the side of the module.
- Press and hold for 15 seconds. Use a timer.
- The LED will go solid red, then start flashing blue rapidly.
- Release only after you see the flashing blue.
- The module will restart. This takes about 60 seconds.
- In the app, delete the old module (if it still appears) and add a new one.
Don’t do this just because one camera is offline. You’ll create more work.
Mistakes That Waste Your Time (And How to Avoid Them)
We’ve analyzed hundreds of Blink reset threads across user communities. These five errors come up again and again. Avoid them and you’ll finish in five minutes instead of an hour.
Forgetting to Delete the Camera From Your Account First
This is the number one mistake. People hard reset a camera, then try to re-add it without deleting it from the account. The app sees the old record and refuses to pair the “new” device.
The fix is simple: open the app, go to Settings, tap the camera, and hit Delete Camera. Do this before any hard reset.
Using the Wrong Button Hold Duration
The difference between 5 seconds, 10 seconds, and 15 seconds matters. A 5 second hold on a camera usually does nothing. A 10 second hold triggers a factory reset.
A 15 second hold on the sync module resets everything. If you’re not counting, use a stopwatch. Guessing leads to failed resets.
Not Waiting Long Enough After Battery Removal
Removing batteries for 2 seconds is not enough. Residual charge in the camera’s capacitors can keep the memory alive. You need a minimum of 10 seconds, ideally 30 seconds, for a full discharge.
Some users report success after waiting 5 minutes for stubborn units.
Confusing the Camera Reset With the Sync Module Reset
If you press the sync module button by mistake, you’ll reset the whole system. Every camera goes offline. You then have to re-pair each one individually.
Always check which device you’re holding before pressing. The camera reset button is on the camera. The sync module button is on the module.
Skipping the Wi‑Fi Re-Pair Step
After a hard reset, the camera is in pairing mode. It has forgotten your Wi‑Fi network. You must open the app and walk through the “Add Device” wizard.
Some users think the camera will automatically reconnect. It won’t. The app step is mandatory.
What the Blink App Tells You (LED Guide)

Image source: Bing (Web (fair-use with source credit))
The LED on your camera isn’t just decoration. It’s your primary diagnostic tool. Here’s how to read it.
Solid Blue (or Solid Green on some models)
The camera is powered on and connected to the sync module or Wi‑Fi. This is the normal steady state. If you see solid blue and the camera still shows offline in the app, the issue is likely in the router or the app itself, not the camera.
Flashing Blue
The camera is in pairing mode. It’s ready to be added to a system. This happens after a successful hard reset or when you first power on a new camera.
If the blue flashing continues for more than 2 minutes, the camera isn’t finding a sync module. Move it closer to the module and try again.
Flashing Red
Low battery or no connection to the sync module. First, check the batteries. Replace them if they’re low.
If the batteries are fresh and you still see red, the camera has lost sync with the module. A soft reset from the app usually fixes this.
Solid Red
This appears on the sync module, not the camera. A solid red LED on the module means it’s in factory reset mode or has lost internet connectivity. Wait for the module to finish its reset routine.
If it stays red for more than 3 minutes, power cycle the module.
No LED at All
The camera has no power. Check batteries, check connections, check the USB cable on the Mini. If everything looks good, try a different set of batteries.
Some lithium cells arrive with a dead cell from the factory.
Rapid Alternating Red and Blue
This is a rare pattern on some models. It usually means the reset button is stuck or the camera is in a boot loop. Remove batteries, wait 60 seconds, then try the hard reset again.
If it persists, contact Blink support.
Use this LED cheat sheet the next time your camera acts up. It saves you from guessing what’s wrong.
Pro Tips for a Clean Reset Every Time
A few insider habits that make the process smoother and prevent repeat failures.
How to Check Your Firmware Version Before Starting
Old firmware can cause reset issues. Before you reset, open the Blink app, go to Settings, select your camera, and scroll to “Firmware.” Note the version number. Compare it to the latest firmware listed on Blink’s support site.
If you’re behind, update the firmware first. A firmware update sometimes fixes the underlying problem without a reset at all.
To update: the app usually pushes updates automatically. If yours is stuck, leave the camera powered on and connected for 24 hours. It should update overnight.
Force closing the app or power cycling the camera can interrupt the update.
When to Power Cycle the Sync Module Instead of Resetting
A power cycle (unplug the sync module, wait 30 seconds, plug it back in) is gentler than a factory reset. Use it when the module is unresponsive but still has a solid or flashing blue LED. Power cycling clears temporary glitches without wiping your camera list.
Only resort to the 15 second factory reset if power cycling doesn’t work.
Backup Your Settings (If Possible) Before a Factory Reset
Blink doesn’t offer a built in backup tool. But you can take screenshots of your camera settings before resetting. Open each camera’s settings page and capture motion detection zones, clip length, and arm/disarm schedules.
After the reset, you can manually reapply them. This saves time reconfiguring from memory.
Keep a Paperclip With Your Camera
Blink resets require a small tool. A paperclip, a SIM ejector, or a thin sewing needle all work. Tuck one into the camera’s mount or keep it near your router.
You never need it until the moment you do.
Label Your Cameras
If you have multiple Blink cameras, label them with a Sharpie on the underside (or use a sticker). “Kitchen,” “Backyard,” “Front Door.” During a reset, you’ll know exactly which camera you’re holding. This prevents accidentally resetting the wrong unit and having to re-pair everything.
Real-World Examples: When People Needed to Reset
Sometimes the best way to understand a process is to see how it plays out for someone else. These three scenarios are based on common stories we’ve seen in user forums and support tickets. They’re anonymized but real.
The “Used Camera From eBay” Scenario
Mark bought a used Blink Outdoor camera from an online marketplace. He installed it, added it to his app, and got an error: “This device is already registered to another account.” The camera still carried the previous owner’s account lock.
What went wrong: The seller only did a hard reset, not a full account deletion. The camera’s hardware was wiped, but the device ID stayed linked to the seller’s account.
The fix: Mark contacted the seller. The seller logged into the Blink app, went to Settings, selected the camera, and tapped Delete Camera. After that, Mark could add it as a new device.
No extra hardware reset was needed.
Lesson: If you’re buying a used Blink camera, ask the seller to confirm they’ve deleted it from their account before shipping. If you’re selling one, delete it from the app then hard reset it.
The “New Router, Everything Broke” Scenario
Sarah swapped her internet provider and got a new router with a different network name. All three Blink cameras went offline. She tried re-adding each camera but the app wouldn’t find them.
What went wrong: The cameras were still trying to connect to the old Wi‑Fi SSID. The sync module also had stale credentials. A soft reset on each camera failed because the app couldn’t communicate with the offline cameras.
The fix:
- She reset the sync module (15 second hold) to wipe its network settings.
- Then she set up the sync module from scratch in the app using the new Wi‑Fi.
- After the sync module was online, she factory reset each camera individually and re-paired them one by one.
- Total time: about 20 minutes for three cameras.
Lesson: When changing routers, start with the sync module. It’s the central hub. Once it’s on the new network, the cameras will follow after a reset.
The “Battery Swap Gone Wrong” Scenario
Tom noticed his Blink XT2 camera was recording less often. He swapped the batteries with fresh lithium AAs. The camera powered on but showed a solid red LED and wouldn’t connect to the app.
What went wrong: During the battery swap, a residual charge in the camera caused it to lose its pairing. The solid red LED meant it had power but no sync.
The fix:
- Tom removed the batteries again.
- He pressed and held the reset button on the bottom.
- While holding, he inserted one battery.
- He held for 10 seconds until the LED flashed blue.
- Then he added the second battery and re-paired the camera through the app.
Lesson: A simple battery swap can sometimes desync the camera. If you see a red LED after a battery change, a hard reset is the quickest path back online.
Your Decision Guide at a Glance
This table gives you a one stop reference. Find your scenario, then check the recommended action, button hold time, and expected LED confirmation.
| Scenario | Reset type | Device to reset | Button hold | LED confirmation |
|---|---|---|---|---|
| Camera offline, app still shows it | Soft reset (app) | None (use app) | N/A | N/A |
| Camera offline, app doesn’t show | Hard reset | Camera | 10 seconds | Flashing blue or red |
| Moving camera to new Wi‑Fi | Hard reset | Camera | 10 seconds | Flashing blue |
| Moving whole system to new Wi‑Fi | Factory reset module | Sync module | 15 seconds | Flashing blue after red |
| Selling or gifting camera | Delete from app then hard reset | Camera | 10 seconds | Flashing blue |
| Selling whole system | Delete all cameras from app, then factory reset module | Sync module | 15 seconds | Flashing blue after red |
| Battery swap caused red LED | Hard reset | Camera | 10 seconds | Flashing blue |
| Camera stuck in pairing mode | Power cycle + re-add | Camera | N/A | Solid blue after reboot |
| Sync module unresponsive | Power cycle first | Sync module | N/A | Solid blue after reboot |
| Sync module still unresponsive | Factory reset | Sync module | 15 seconds | Flashing blue after red |
Keep this table handy. It covers 90 percent of the situations you’ll encounter.
Still Stuck? Next Steps Without Calling Support
You’ve followed every step. The camera still won’t pair. Or the LED isn’t doing what it should.
Before you pick up the phone, try these three deeper troubleshooting steps.
Reset the Router’s 2.4 GHz Band
Blink cameras only work on 2.4 GHz Wi‑Fi. If you have a dual band router that doesn’t separate the bands, the camera might try to connect to the 5 GHz band and fail. Log into your router settings and either:
- Disable the 5 GHz band temporarily, or
- Create a dedicated 2.4 GHz network with a different name.
After that, try the camera reset again. Many people find this fixes a “can’t find sync module” error.
Use a Different USB Power Source (for Mini and Sync Module)
The Blink Mini and the sync module are both powered by USB. A weak or failing power adapter can cause intermittent connectivity. Plug the device into a different USB port, preferably one on the wall outlet block rather than a computer or TV.
Make sure the adapter provides at least 1 amp (most phone chargers do). If the Mini won’t hold a connection, try a different cable too.
Check for Interference from Other Devices
Wireless interference can block the sync module’s signal. Move the sync module at least 3 feet away from other electronics like microwaves, cordless phones, baby monitors, and Wi‑Fi routers. Metal objects like filing cabinets or large appliances can also block the signal.
If the camera is in a metal enclosure or near a big metal surface, relocate it temporarily to test.
Perform a Full Power Drain
For cameras that seem dead or stuck in a loop, a full power drain can help. Remove the batteries. Press and hold the camera’s reset button for 30 seconds (without power).
This drains any residual charge from the capacitors. Then insert fresh batteries and try the hard reset again. Users report this works on stubborn XT and Indoor models.
When to Contact Blink Support
Call support if:
- The camera’s LED never turns on, even with fresh batteries.
- The app shows an error that says “device not supported” or “hardware error.”
- You’ve tried every reset and the camera still shows as registered to an unknown account.
Blink support can check the device ID against their database and sometimes manually remove an account lock. Reach them through the app’s help section or at the Blink support site.
For broader perspective on device resets and our editorial approach, see our Disclaimer.
Frequently Asked Questions
Can I reset a Blink camera without the app?
Yes. A hard reset works without the app. Remove the batteries, press and hold the reset button for 10 seconds, then reinsert the batteries while still holding.
The camera will enter pairing mode. You will need the app later to complete setup, but the reset itself is hardware driven.
How do I factory reset a Blink sync module?
Locate the sync button on the side of the module. Press and hold it for 15 seconds. Wait for the LED to turn solid red, then flash blue rapidly.
Release the button. The module will restart and wipe all paired cameras and network credentials.
Will resetting a Blink camera delete my videos?
A hard reset on the camera clears its local cache but does not delete videos stored in the cloud. Cloud clips remain under your Blink account. If you reset the sync module and you use local storage via USB, that drive will not be erased automatically.
You must format it separately.
Why is my Blink camera blinking red after a reset?
A red LED typically means low battery or no connection to the sync module. After a reset, the camera is in pairing mode (blue flashing) but if the battery is weak, it may show red instead. Replace the batteries with fresh lithium AAs and try the reset again.
Can I reset a Blink camera that is not mine?
No. If the camera is still linked to another person’s account, a hard reset will not remove that lock. Only the original account owner can delete the device from the app.
You must contact the previous owner to release it.
How long does a Blink camera reset take?
A hardware hard reset takes about 30 seconds (button hold plus reboot). Re-adding the camera through the app takes another 2 to 3 minutes. The whole process from start to finish is usually under 5 minutes per camera.